05鸿蒙APP开发之加载网络列表_queryparams 鸿蒙-程序员宅基地
技术标签: Promise 网络 鸿蒙开发 http 鸿蒙 加载列表 网络请求
目录
1、概述
为了把上一节(04鸿蒙APP开发之创建一个底部菜单栏及首页列表)中的测试数据,换成网络列表数据,实现动态加载。
官方的DEMO封装得太深,看不出最简化的结构。
基于这些原因,开始写下本篇博文,内容主要包含,网络请求封装、发起请求,及页面渲染。
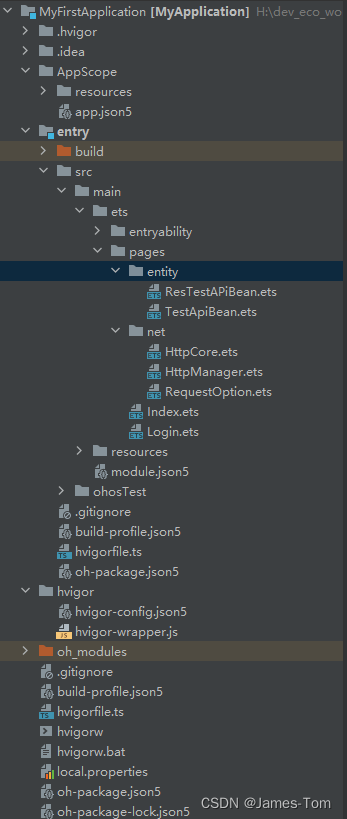
项目最新的目录结构,如下图所示:
2、http请求封装
本段内容主要参考了这篇文章,【鸿蒙应用ArkTS开发系列】- http网络库使用讲解和封装,并完善了appendQueryParams、isValidUrl这两个函数,修改回调函数名称为success、fail。
2.1、为什么要封装Http请求?
官方的Http请求,需要在各个页面每次都要写很长一段代码,为了复用,且降低使用复杂度,所以对Http请求做了二次封装。
2.2、封装后的网络请求
包含三个文件:RequestOption.ets、HttpManager.ets、HttpCore.ets,它们的作用如下:
RequestOption.ets
是一个枚举类,主要是构造一个请求所需的参数集合,包括 地址、请求方式、请求参数、返回数据类型、设置请求头信息。具体实现如下:
export interface RequestOptions {

  url?: string;
  method?: RequestMethod;
  queryParams?: Record<string, string>;
  extraData?: string | Object | ArrayBuffer;
  header?: Object;
}

export enum RequestMethod {

  OPTIONS = "OPTIONS",
  GET = "GET",
  POST = "POST",
  PUT = "PUT",
  HEAD = "HEAD",
  DELETE = "DELETE",
  TRACE = "TRACE",
  CONNECT = "CONNECT"
}
HttpManager.ets
是一个类,使用单例的方式创建实例,作为页面与Http请求类的桥梁,通过调用HttpCore.request()函数,发起请求。具体实现如下:
//注意这一行非常关键,需要别名,不然无法调用request(options)函数
import {
     httpCore as HttpCore } from './HttpCore';
import {
     RequestOptions } from './RequestOption';


export class HttpManager {

  private static mInstance: HttpManager;
  //不允许实例
  private constructor() {

  }

  static getInstance(): HttpManager {

    if (!HttpManager.mInstance) {

      HttpManager.mInstance = new HttpManager();

    }
    return HttpManager.mInstance;
  }

  request<T>(options: RequestOptions): Promise<T> {

    return HttpCore.request(options);
  }
}
HttpCore.ets
是封装原官方的Http请求,进行了回调函数扩展,方便在页面中捕捉回调,获取返回的网络数据,实现页面的状态更新。具体实现如下:
import http from '@ohos.net.http';
import {
     RequestOptions } from '../net/RequestOption';

export class HttpCore {

  request<T>(requestOption: RequestOptions): Promise<T> {

    return new Promise<T>((success, fail) => {

      this.sendRequest(requestOption)
        .then((response) => {

          if (typeof response.result !== 'string') {

            fail(new Error("Invalid data type"));
          } else {

            let bean: T = JSON.parse(response.result);
            if (bean) {

              success(bean);
            } else {

              fail(new Error("JSON to T failed"));
            }
          }
        })
        .catch((error) => {

          fail(error);
        })
    });
  }

  private sendRequest(requestOption: RequestOptions): Promise<http.HttpResponse> {

    let httpRequest = http.createHttp();
    let successFunction, failFunction;
    const resultPromise = new Promise<http.HttpResponse>((success, fail) => {

      successFunction = success;
      failFunction = fail;
    })

    if (!this.isValidUrl(requestOption.url)) {

      return Promise.reject(new Error("URL format error"));
    }

    let promise = httpRequest.request(this.appendQueryParams(requestOption.url, requestOption.queryParams), {

      method: requestOption.method,
      header: requestOption.header,
      extraData: requestOption.extraData,
      expectDataType: http.HttpDataType.STRING
    });

    promise.then((response) => {

      console.info('Result:' + response.result);
      console.info('code:' + response.responseCode);
      console.info('header:' + JSON.stringify(response.header));

      successFunction(response);
    }).catch((err) => {

      failFunction(err);
    }).finally(() => {

      httpRequest.destroy();
    });

    return resultPromise;
  }

  /**
   *  typescript中高级类型Record
   *  组装参数
   * @param url
   * @param queryParams
   * @returns
   */
  private appendQueryParams(url: string, queryParams: Record<string, string>): string {

    var params: string;
    var i: number = 0;
    for (const key in queryParams) {

      if (i == 0) {

        params += key + "=" + queryParams[key];
      } else {

        params += "&" + key + "=" + queryParams[key];
      }
      i++;
      console.log(key + ":" + queryParams[key]);
    }
    if (params != null) {

      return url + "?" + params
    }
    return url
  }

  /**
   * 校验url是否合法,正则
   * @param url
   * @returns
   */
  private isValidUrl(url: string): boolean {

    var regular = /^(?:http(s)?:\/\/)?[\w.-]+(?:\.[\w\.-]+)+[\w\-\._~:/?#[\]@!\$&'\*\+,;=.]+$/;
    if (regular.test(url)) {

      return true;
    }
    return false;
  }
}

//注意这一行非常关键
export const httpCore = new HttpCore();
这三段代码中用到了非常多的陌生关键字,Promise、typeof、.then、.catch、.finally、Record<string, string>、.test,它们是做什么的
,我们来逐一说明。
- Promise:是一种用于处理异步操作的对象,有三种状态:pending(进行中)、fulfilled(已完成)和rejected(已拒绝)。用于一次网络请求、一次文件读写等操作。
- .then:then方法的回调函数接收Promise对象的成功结果作为参数,并将其输出到控制台上。
- .catch:如果Promise对象进入rejected状态,则catch方法的回调函数接收错误对象作为参数,并将其输出到控制台上。
- .finally、不管promise最后的状态,在执行完then或catch指定的回调函数以后,都会执行finally方法中指定的代码。
- typeof:操作符来获取变量的类型。
- Record<string, string>:Record<string, any>
属性名必须是字符串类型,而属性值可以是任意类型。有点类似数据库存放的一行数据结构,如下例:
 const myRecord:Record<string, string>={
     name:'张三' , city: 'Beijing', country: 'China' }
- .test:是RegExp对象的test()函数,用来测试一个字符串是否与正则表达式匹配。
3、发起请求并渲染列表数据
第一步:准备一个目前能用的,测试API地址,如下:
https://opentdb.com/api.php?amount=10&category=23&difficulty=easy&type=multiple
此API返回的JSON数据如下:
{

	"response_code": 0,
	"results": [{

		"type": "multiple",
		"difficulty": "easy",
		"category": "History",
		"question": "Who was among those killed in the 2010 Smolensk, Russia plane crash tragedy?",
		"correct_answer": "The Polish President",
		"incorrect_answers": ["Pope John Paul II", "Bang-Ding Ow", "Albert Putin"]
	}, {

		"type": "multiple",
		"difficulty": "easy",
		"category": "History",
		"question": "What was the first sport to have been played on the moon?",
		"correct_answer": "Golf",
		"incorrect_answers": ["Football", "Tennis", "Soccer"]
	}, {

		"type": "multiple",
		"difficulty": "easy",
		"category": "History",
		"question": "Which of these countries remained neutral during World War II?",
		"correct_answer": "Switzerland",
		"incorrect_answers": ["United Kingdom", "France", "Italy"]
	}, {

		"type": "multiple",
		"difficulty": "easy",
		"category": "History",
		"question": "How many manned moon landings have there been?",
		"correct_answer": "6",
		"incorrect_answers": ["1", "3", "7"]
	}, {

		"type": "multiple",
		"difficulty": "easy",
		"category": "History",
		"question": "In what year was the M1911 pistol designed?",
		"correct_answer": "1911",
		"incorrect_answers": ["1907", "1899", "1917"]
	}, {

		"type": "multiple",
		"difficulty": "easy",
		"category": "History",
		"question": "During WWII, in 1945, the United States dropped atomic bombs on the two Japanese cities of Hiroshima and what other city?",
		"correct_answer": "Nagasaki",
		"incorrect_answers": ["Kawasaki", "Tokyo", "Kagoshima"]
	}, {

		"type": "multiple",
		"difficulty": "easy",
		"category": "History",
		"question": "These two countries held a commonwealth from the 16th to 18th century.",
		"correct_answer": "Poland and Lithuania",
		"incorrect_answers": ["Hutu and Rwanda", "North Korea and South Korea", "Bangladesh and Bhutan"]
	}, {

		"type": "multiple",
		"difficulty": "easy",
		"category": "History",
		"question": "The idea of Socialism was articulated and advanced by whom?",
		"correct_answer": "Karl Marx",
		"incorrect_answers": ["Vladimir Lenin", "Joseph Stalin", "Vladimir Putin"]
	}, {

		"type": "multiple",
		"difficulty": "easy",
		"category": "History",
		"question": "Which German field marshal was known as the `Desert Fox`?",
		"correct_answer": "Erwin Rommel",
		"incorrect_answers": ["Ernst Busch", "Wolfram Freiherr von Richthofen", "Wilhelm List"]
	}, {

		"type": "multiple",
		"difficulty": "easy",
		"category": "History",
		"question": "Which one of these was not a beach landing site in the Invasion of Normandy?",
		"correct_answer": "Silver",
		"incorrect_answers": ["Gold", "Juno", "Sword"]
	}]
}
第二步:创建对应的实体对象
主要是包含两个类TestApiBean和ResTestAPiBean。
ResTestAPiBean.ets类实现如下:
import ArrayList from '@ohos.util.ArrayList';
import {
     TestApiBean } from './TestApiBean';

  export class ResTestAPiBean {

  response_code?: string;
  results?: Array<TestApiBean>;
}
TestApiBean.ets类实现如下:
export class TestApiBean {

  id?:string;
  question?: string;
  correct_answer?: string;
  type?: string;

  constructor(
    id:string,
    question: string,
    correct_answer: string,
    type: string
  ) {

    this.id=id;
    this.question = question;
    this.correct_answer = correct_answer;
    this.type = type;
  }
}
第三步:调用请求,获取数据,渲染页面
Index.ets类的实现如下:
import prompt from '@ohos.promptAction'
import util from '@ohos.util';
//引入自定义类
import {
     HttpManager } from './net/HttpManager'
import {
     RequestMethod } from './net/RequestOption';
import {
     TestApiBean } from './entity/TestApiBean';
import {
     ResTestAPiBean } from './entity/ResTestAPiBean';

@Entry
@Component
struct Index {

  private tabsController = new TabsController();
  @State index: number = 0; // 选项卡下标,默认为第一个

  //组件Index自带的函数,类似于重写@Override,在build()之前就会执行
  aboutToAppear() {

    this.loadApiTestData();
  }

  //@State此时的状态就非常有用了,当你上下拉刷新UI的时候,只需要重新给此变量赋值就会自动刷新界面(UI)
  @State testApiBeanList: Array<TestApiBean> = new Array<TestApiBean>();

  /**
   * 调用封装的网络请求类,访问网络API并获取列表数据
   */
  loadApiTestData() {

    HttpManager.getInstance().request<ResTestAPiBean>({

      url: "https://opentdb.com/api.php?amount=10&category=23&difficulty=easy&type=multiple",
      method: RequestMethod.GET
    }).then((result) => {

      for (let i = 0; i < result.results.length; i++) {

        let item = result.results[i];
        this.testApiBeanList.push({

          id: util.generateRandomUUID(true),
          question: item.question,
          correct_answer: item.correct_answer,
          type: item.type
        });
      }
    }).catch((error) => {

      console.log(error);
    });
  }

  //开始构建UI
  build() {

    Column() {

      Tabs({
     controller: this.tabsController }) {

        TabContent() {

          Column() {

            List({
     space: 10, initialIndex: 0 }) {

              ForEach(this.testApiBeanList, (item: TestApiBean, index: number) => {

                // 循环渲染ListItem
                ListItem() {

                  Row() {

                    Column() {

                      Text(item.correct_answer).fontSize(16).fontColor($r("app.color.color_list_title"))
                      Text(item.question).fontSize(14).fontColor($r("app.color.color_list_abstract"))
                    }.width('100%').alignItems(HorizontalAlign.Start)
                  }.width('100%').justifyContent(FlexAlign.Start).padding({
     left: 16, right: 16, top: 8, bottom: 8 })
                  .onClick(() => {

                    //选项单击事件
                    prompt.showToast({
     message: this.testApiBeanList[index].question, duration: 2000 })
                  })
                }
              }, item => item.id)
            }.width("100%").listDirection(Axis.Vertical).scrollBar(BarState.Auto)

          }.width('100%').height('100%').justifyContent(FlexAlign.Start).backgroundColor("#eeeeee")
        }.tabBar(this.tabHome())

        TabContent() {

          Column() {

            Text("订阅内容").fontSize(32)
          }.width('100%').height('100%').justifyContent(FlexAlign.Center).backgroundColor("#eeeeee")
        }.tabBar(this.tabSub)

        TabContent() {

          Column() {

            Text("我的内容").fontSize(32)
          }.width('100%').height('100%').justifyContent(FlexAlign.Center).backgroundColor("#eeeeee")
        }.tabBar(this.tabMe)

      }.barPosition(BarPosition.End)
    }.width('100%').height('100%')
  }

  @Builder tabHome() {

    Column() {

      Image(this.index == 0 ? $r('app.media.ic_menu_home_focus') : $r('app.media.ic_menu_home_normal'))
        .size({
     width: 25, height: 25 }).margin({
     top: 5, bottom: 5 })
      Text("首页").fontSize(16).fontColor(this.index == 0 ? "#2a58d0" : "#6b6b6b")
    }.width('100%').height('100%').onClick(() => {

      this.index = 0;
      this.tabsController.changeIndex(this.index)
    })
  }

  @Builder tabSub() {

    Column() {

      Image(this.index == 1 ? $r('app.media.ic_menu_sub_focus') : $r('app.media.ic_menu_sub_normal'))
        .size({
     width: 25, height: 25 }).margin({
     top: 5, bottom: 5 })
      Text("订阅").fontSize(16).fontColor(this.index == 1 ? "#2a58d0" : "#6b6b6b")
    }.width('100%').height('100%').onClick(() => {

      this.index = 1;
      this.tabsController.changeIndex(this.index)
    })
  }

  @Builder tabMe() {

    Column() {

      Image(this.index == 2 ? $r('app.media.ic_menu_me_focus') : $r('app.media.ic_menu_me_normal'))
        .size({
     width: 25, height: 25 }).margin({
     top: 5, bottom: 5 })
      Text("我的").fontSize(16).fontColor(this.index == 2 ? "#2a58d0" : "#6b6b6b")
    }.width('100%').height('100%').onClick(() => {

      this.index = 2;
      this.tabsController.changeIndex(this.index)
    })
  }
}
小结
- ForEach必须要求使用Array数据类型来加载数据,Array需要使用push来放入对象数据。
- aboutToAppear(),是页面自带的函数,在Build构建之前执行,类似java重写函数,加载请求可写在此函数中。
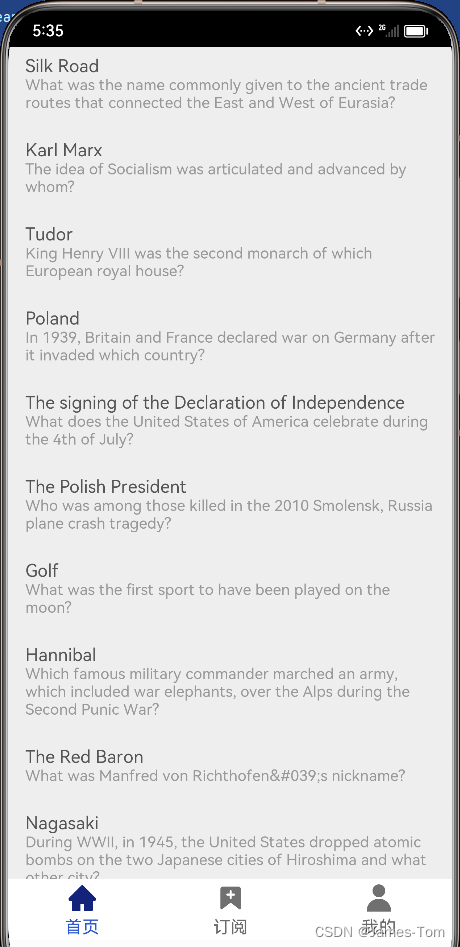
4、运行效果
如下图所示:
5、参考资料:
网络请求封装:https://blog.csdn.net/q919233914/article/details/130643452
原创不易,求个关注。

微信公众号:一粒尘埃的漫旅
里面有很多想对大家说的话,就像和朋友聊聊天。
写代码,做设计,聊生活,聊工作,聊职场。
我见到的世界是什么样子的?
搜索关注我吧。
公众号与博客的内容不同。
智能推荐
什么是内部类?成员内部类、静态内部类、局部内部类和匿名内部类的区别及作用?_成员内部类和局部内部类的区别-程序员宅基地
文章浏览阅读3.4k次,点赞8次,收藏42次。一、什么是内部类?or 内部类的概念内部类是定义在另一个类中的类;下面类TestB是类TestA的内部类。即内部类对象引用了实例化该内部对象的外围类对象。public class TestA{ class TestB {}}二、 为什么需要内部类?or 内部类有什么作用?1、 内部类方法可以访问该类定义所在的作用域中的数据,包括私有数据。2、内部类可以对同一个包中的其他类隐藏起来。3、 当想要定义一个回调函数且不想编写大量代码时,使用匿名内部类比较便捷。三、 内部类的分类成员内部_成员内部类和局部内部类的区别
分布式系统_分布式系统运维工具-程序员宅基地
文章浏览阅读118次。分布式系统要求拆分分布式思想的实质搭配要求分布式系统要求按照某些特定的规则将项目进行拆分。如果将一个项目的所有模板功能都写到一起,当某个模块出现问题时将直接导致整个服务器出现问题。拆分按照业务拆分为不同的服务器,有效的降低系统架构的耦合性在业务拆分的基础上可按照代码层级进行拆分(view、controller、service、pojo)分布式思想的实质分布式思想的实质是为了系统的..._分布式系统运维工具
用Exce分析l数据极简入门_exce l趋势分析数据量-程序员宅基地
文章浏览阅读174次。1.数据源准备2.数据处理step1:数据表处理应用函数:①VLOOKUP函数; ② CONCATENATE函数终表:step2:数据透视表统计分析(1) 透视表汇总不同渠道用户数, 金额(2)透视表汇总不同日期购买用户数,金额(3)透视表汇总不同用户购买订单数,金额step3:讲第二步结果可视化, 比如, 柱形图(1)不同渠道用户数, 金额(2)不同日期..._exce l趋势分析数据量
宁盾堡垒机双因素认证方案_horizon宁盾双因素配置-程序员宅基地
文章浏览阅读3.3k次。堡垒机可以为企业实现服务器、网络设备、数据库、安全设备等的集中管控和安全可靠运行,帮助IT运维人员提高工作效率。通俗来说,就是用来控制哪些人可以登录哪些资产(事先防范和事中控制),以及录像记录登录资产后做了什么事情(事后溯源)。由于堡垒机内部保存着企业所有的设备资产和权限关系,是企业内部信息安全的重要一环。但目前出现的以下问题产生了很大安全隐患:密码设置过于简单,容易被暴力破解;为方便记忆,设置统一的密码,一旦单点被破,极易引发全面危机。在单一的静态密码验证机制下,登录密码是堡垒机安全的唯一_horizon宁盾双因素配置
谷歌浏览器安装(Win、Linux、离线安装)_chrome linux debian离线安装依赖-程序员宅基地
文章浏览阅读7.7k次,点赞4次,收藏16次。Chrome作为一款挺不错的浏览器,其有着诸多的优良特性,并且支持跨平台。其支持(Windows、Linux、Mac OS X、BSD、Android),在绝大多数情况下,其的安装都很简单,但有时会由于网络原因,无法安装,所以在这里总结下Chrome的安装。Windows下的安装:在线安装:离线安装:Linux下的安装:在线安装:离线安装:..._chrome linux debian离线安装依赖
烤仔TVの尚书房 | 逃离北上广?不如押宝越南“北上广”-程序员宅基地
文章浏览阅读153次。中国发达城市榜单每天都在刷新,但无非是北上广轮流坐庄。北京拥有最顶尖的文化资源,上海是“摩登”的国际化大都市,广州是活力四射的千年商都。GDP和发展潜力是衡量城市的数字指...
随便推点
java spark的使用和配置_使用java调用spark注册进去的程序-程序员宅基地
文章浏览阅读3.3k次。前言spark在java使用比较少,多是scala的用法,我这里介绍一下我在项目中使用的代码配置详细算法的使用请点击我主页列表查看版本jar版本说明spark3.0.1scala2.12这个版本注意和spark版本对应,只是为了引jar包springboot版本2.3.2.RELEASEmaven<!-- spark --> <dependency> <gro_使用java调用spark注册进去的程序
汽车零部件开发工具巨头V公司全套bootloader中UDS协议栈源代码,自己完成底层外设驱动开发后,集成即可使用_uds协议栈 源代码-程序员宅基地
文章浏览阅读4.8k次。汽车零部件开发工具巨头V公司全套bootloader中UDS协议栈源代码,自己完成底层外设驱动开发后,集成即可使用,代码精简高效,大厂出品有量产保证。:139800617636213023darcy169_uds协议栈 源代码
AUTOSAR基础篇之OS(下)_autosar 定义了 5 种多核支持类型-程序员宅基地
文章浏览阅读4.6k次,点赞20次,收藏148次。AUTOSAR基础篇之OS(下)前言首先,请问大家几个小小的问题,你清楚:你知道多核OS在什么场景下使用吗?多核系统OS又是如何协同启动或者关闭的呢?AUTOSAR OS存在哪些功能安全等方面的要求呢?多核OS之间的启动关闭与单核相比又存在哪些异同呢?。。。。。。今天,我们来一起探索并回答这些问题。为了便于大家理解,以下是本文的主题大纲:[外链图片转存失败,源站可能有防盗链机制,建议将图片保存下来直接上传(img-JCXrdI0k-1636287756923)(https://gite_autosar 定义了 5 种多核支持类型
VS报错无法打开自己写的头文件_vs2013打不开自己定义的头文件-程序员宅基地
文章浏览阅读2.2k次,点赞6次,收藏14次。原因:自己写的头文件没有被加入到方案的包含目录中去,无法被检索到,也就无法打开。将自己写的头文件都放入header files。然后在VS界面上,右键方案名,点击属性。将自己头文件夹的目录添加进去。_vs2013打不开自己定义的头文件
【Redis】Redis基础命令集详解_redis命令-程序员宅基地
文章浏览阅读3.3w次,点赞80次,收藏342次。此时,可以将系统中所有用户的 Session 数据全部保存到 Redis 中,用户在提交新的请求后,系统先从Redis 中查找相应的Session 数据,如果存在,则再进行相关操作,否则跳转到登录页面。此时,可以将系统中所有用户的 Session 数据全部保存到 Redis 中,用户在提交新的请求后,系统先从Redis 中查找相应的Session 数据,如果存在,则再进行相关操作,否则跳转到登录页面。当数据量很大时,count 的数量的指定可能会不起作用,Redis 会自动调整每次的遍历数目。_redis命令
URP渲染管线简介-程序员宅基地
文章浏览阅读449次,点赞3次,收藏3次。URP的设计目标是在保持高性能的同时,提供更多的渲染功能和自定义选项。与普通项目相比,会多出Presets文件夹,里面包含着一些设置,包括本色,声音,法线,贴图等设置。全局只有主光源和附加光源,主光源只支持平行光,附加光源数量有限制,主光源和附加光源在一次Pass中可以一起着色。URP:全局只有主光源和附加光源,主光源只支持平行光,附加光源数量有限制,一次Pass可以计算多个光源。可编程渲染管线:渲染策略是可以供程序员定制的,可以定制的有:光照计算和光源,深度测试,摄像机光照烘焙,后期处理策略等等。_urp渲染管线