Ubuntu Nginx安装启动_ubuntu 如何安装 gcc unable to locate-程序员宅基地

技术标签: nginx  ubuntu  linux  

原文地址:http://blog.csdn.net/a19881029/article/details/51824790

Linux Distribution:Ubuntu 14


一,Nginx的安装

首先从Nginx的官网下载最新的稳定版本1.10.1,下载地址如下

http://nginx.org/en/download.html


[plain]  view plain   copy
  在CODE上查看代码片 派生到我的代码片
  1. sean@sean:~$ tar -xzf nginx-1.10.1.tar.gz  
  2. sean@sean:~$ cd nginx-1.10.1/  
  3. sean@sean:~/nginx-1.10.1$ sudo ./configure  
  4.     ......  
  5. ./configure: error: the HTTP rewrite module requires the PCRE library.  
  6. You can either disable the module by using --without-http_rewrite_module  
  7. option, or install the PCRE library into the system, or build the PCRE library  
  8. statically from the source with nginx by using --with-pcre=<path> option.  

配置时异常,提示HTTP的rewrite模块需要PCRE库,如果需要使用HTTP的rewrite功能,需要首先安装PCRE库,如果不需要该功能,也可使用--without-http_rewrite_module关闭该功能

PCRE库的下载地址如下

https://sourceforge.net/projects/pcre/files/pcre/8.39/pcre-8.39.tar.gz/download
[plain]  view plain   copy
  在CODE上查看代码片 派生到我的代码片
  1. sean@sean:~$ tar -xzf pcre-8.39.tar.gz   
  2. sean@sean:~$ cd pcre-8.39/  
  3. sean@sean:~/pcre-8.39$ sudo ./configure  
  4. sean@sean:~/pcre-8.39$ sudo make  
  5.     ......  
  6. configure: error: You need a C++ compiler for C++ support.  

提示没有C++编译器

[plain]  view plain   copy
  在CODE上查看代码片 派生到我的代码片
  1. sean@sean:~/pcre-8.39$ sudo apt-get install gcc-c++  
  2. Reading package lists... Done  
  3. Building dependency tree         
  4. Reading state information... Done  
  5. E: Unable to locate package gcc-c+  
  6. E: Couldn't find any package by regex 'gcc-c+'  
  7. sean@sean:~/pcre-8.39$ sudo apt-get install g++  

Ubuntu中C++的编译器并不叫gcc-c++,而是叫g++
继续之前的操作,完成PCRE的安装

[plain]  view plain   copy
  在CODE上查看代码片 派生到我的代码片
  1. sean@sean:~/pcre-8.39$ sudo make  
  2. sean@sean:~/pcre-8.39$ sudo make install  

PCRE安装完成之后可以继续Nginx的安装

[plain]  view plain   copy
  在CODE上查看代码片 派生到我的代码片
  1. sean@sean:~/pcre-8.39$ cd ../nginx-1.10.1/  
  2. sean@sean:~/nginx-1.10.1$ sudo ./configure  
  3.     ......  
  4. ./configure: error: the HTTP gzip module requires the zlib library.  
  5. You can either disable the module by using --without-http_gzip_module  
  6. option, or install the zlib library into the system, or build the zlib library  
  7. statically from the source with nginx by using --with-zlib=<path> option.  

HTTP的gzip模块需要zlib库的支持,zlib库的下载地址为:

http://www.zlib.net/

zlib的最新版本为1.2.8

[plain]  view plain   copy
  1. sean@sean:~$ tar -xzvf zlib-1.2.8.tar.gz   
  2. sean@sean:~$ cd zlib-1.2.8/  
  3. sean@sean:~/zlib-1.2.8$ sudo ./configure  
  4. sean@sean:~/zlib-1.2.8$ sudo make  
  5. sean@sean:~/zlib-1.2.8$ sudo make install  

安装完zlib库之后再次安装Nginx

[plain]  view plain   copy
  1. sean@sean:~/zlib-1.2.8$ cd ../nginx-1.10.1/  
  2. sean@sean:~/nginx-1.10.1$ sudo ./configure --without-http_gzip_module  
  3. sean@sean:~/nginx-1.10.1$ sudo make  
  4. sean@sean:~/nginx-1.10.1$ sudo make install  

Nginx最终将被安装在/usr/local/nginx目录下

[plain]  view plain   copy
  在CODE上查看代码片 派生到我的代码片
  1. sean@sean:/usr/local/nginx$ ll  
  2. total 24  
  3. drwxr-xr-x  6 root root 4096  7月  4 22:14 ./  
  4. drwxr-xr-x 11 root root 4096  7月  4 22:14 ../  
  5. drwxr-xr-x  2 root root 4096  7月  4 22:14 conf/  
  6. drwxr-xr-x  2 root root 4096  7月  4 22:14 html/  
  7. drwxr-xr-x  2 root root 4096  7月  4 22:14 logs/  
  8. drwxr-xr-x  2 root root 4096  7月  4 22:14 sbin/  

Nginx的可执行文件放在sbin目录下

[plain]  view plain   copy
  在CODE上查看代码片 派生到我的代码片
  1. sean@sean:/usr/local/nginx/sbin$ ./nginx   
  2. ./nginx: error while loading shared libraries: libpcre.so.1: cannot open shared object file: No such file or directory  
  3. sean@sean:/usr/local/nginx/sbin$ ldd nginx   
  4.     linux-vdso.so.1 =>  (0x00007ffdb31f6000)  
  5.     libdl.so.2 => /lib/x86_64-linux-gnu/libdl.so.2 (0x00007fa01d5c4000)  
  6.     libpthread.so.0 => /lib/x86_64-linux-gnu/libpthread.so.0 (0x00007fa01d3a6000)  
  7.     libcrypt.so.1 => /lib/x86_64-linux-gnu/libcrypt.so.1 (0x00007fa01d16c000)  
  8.     libpcre.so.1 => not found  
  9.     libz.so.1 => /usr/local/lib/libz.so.1 (0x00007f8278c55000)  
  10.     libc.so.6 => /lib/x86_64-linux-gnu/libc.so.6 (0x00007fa01cda7000)  
  11.     /lib64/ld-linux-x86-64.so.2 (0x00005583ba8e7000)  

虽然Pcre已经安装了,但是Nginx启动时找不到libpcre.so.1,Pcre默认安装在/usr/local/lib目录下,在/lib目录中手动创建一个libpcre.so.1的链接即可

[plain]  view plain   copy
  在CODE上查看代码片 派生到我的代码片
  1. sean@sean:/usr/local/nginx/sbin$ sudo ln -s /usr/local/lib/libpcre.so.1 /lib  
  2. sean@sean:/usr/local/nginx/sbin$ ldd nginx   
  3.     linux-vdso.so.1 =>  (0x00007fff2abef000)  
  4.     libdl.so.2 => /lib/x86_64-linux-gnu/libdl.so.2 (0x00007f15a891f000)  
  5.     libpthread.so.0 => /lib/x86_64-linux-gnu/libpthread.so.0 (0x00007f15a8701000)  
  6.     libcrypt.so.1 => /lib/x86_64-linux-gnu/libcrypt.so.1 (0x00007f15a84c7000)  
  7.     libpcre.so.1 => /lib/libpcre.so.1 (0x00007f15a82a9000)  
  8.     libz.so.1 => /usr/local/lib/libz.so.1 (0x00007f8278c55000)  
  9.     libc.so.6 => /lib/x86_64-linux-gnu/libc.so.6 (0x00007f15a7ee4000)  
  10.     /lib64/ld-linux-x86-64.so.2 (0x000055fce0ecb0  

再次尝试启动Nginx

[plain]  view plain   copy
  在CODE上查看代码片 派生到我的代码片
  1. sean@sean:/usr/local/nginx/sbin$ ./nginx   
  2. nginx: [alert] could not open error log file: open() "/usr/local/nginx/logs/error.log" failed (13: Permission denied)  
  3. 2016/07/05 00:01:01 [emerg] 59770#0: open() "/usr/local/nginx/logs/access.log" failed (13: Permission denied)  
  4. sean@sean:/usr/local/nginx/sbin$ sudo ./nginx   

查看一下进程状态可以发现Nginx已经成功启动了

[plain]  view plain   copy
  在CODE上查看代码片 派生到我的代码片
  1. sean@sean:/usr/local/nginx/sbin$ ps -ef|grep nginx  
  2. root       9700   9062  0 22:31 ?        00:00:00 nginx: master process ./nginx  
  3. nobody     9701   9700  0 22:31 ?        00:00:00 nginx: worker process  
  4. sean       9729   9638  0 22:32 pts/6    00:00:00 grep --color=auto nginx  

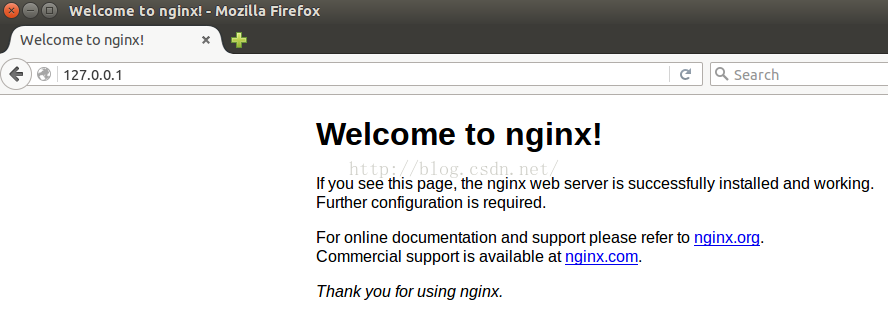
Nginx的默认监听端口是80,此时我们访问http://127.0.0.1:80,就会看到Nginx的欢迎页面


二,Nginx的启停

[plain]  view plain   copy
  在CODE上查看代码片 派生到我的代码片
  1. sean@sean:/usr/local/nginx/sbin$ sudo ./nginx -h  
  2. nginx version: nginx/1.10.1  
  3. Usage: nginx [-?hvVtTq] [-s signal] [-c filename] [-p prefix] [-g directives]  
  4.   
  5. Options:  
  6.   -?,-h         : this help  
  7.   -v            : show version and exit  
  8.   -V            : show version and configure options then exit  
  9.   -t            : test configuration and exit  
  10.   -T            : test configuration, dump it and exit  
  11.   -q            : suppress non-error messages during configuration testing  
  12.   -s signal     : send signal to a master process: stop, quit, reopen, reload  
  13.   -p prefix     : set prefix path (default: /usr/local/nginx/)  
  14.   -c filename   : set configuration file (default: conf/nginx.conf)  
  15.   -g directives : set global directives out of configuration file  

比较常用的几个命令如下:

1,使用-t来校验配置文件格式

[plain]  view plain   copy
  在CODE上查看代码片 派生到我的代码片
  1. sean@sean:/usr/local/nginx/sbin$ sudo ./nginx -t  
  2. nginx: the configuration file /usr/local/nginx/conf/nginx.conf syntax is ok  
  3. nginx: configuration file /usr/local/nginx/conf/nginx.conf test is successful  

2,使用-c指定单独的配置文件

3,平滑关闭

[plain]  view plain   copy
  在CODE上查看代码片 派生到我的代码片
  1. sean@sean:/usr/local/nginx/sbin$ sudo ./nginx -s quit  

当然也可以使用kill -QUIT <pid>

4,快速关闭

[plain]  view plain   copy
  在CODE上查看代码片 派生到我的代码片
  1. sean@sean:/usr/local/nginx/sbin$ sudo ./nginx -s stop  

当然也可以使用kill -TERM <pid>

此外还有平滑的重载配置文件等一系列命令

版权声明:本文为博主原创文章,遵循 CC 4.0 BY-SA 版权协议,转载请附上原文出处链接和本声明。
本文链接:https://blog.csdn.net/xiaochou1994/article/details/52117616

智能推荐

关于秀丸_秀丸操作方法-程序员宅基地

文章浏览阅读6.5k次。/////////////////////////////////破解方法/////////////////////////////////////////以 Hidemaru version 7.11 为例讲解如何注册秀丸:菜单 - その他 (other)- 秀丸エディタについて (For Hidemaru editor)- 送金登录(Registration Transfer)_秀丸操作方法

SAP 执行KSV5报错“客户化错误,非当前业务交易组”_客户化错误:非当前业务交易组 消息编号 ga627-程序员宅基地

文章浏览阅读275次。SAP 执行KSV5报错“客户化错误,非当前业务交易组”_客户化错误:非当前业务交易组 消息编号 ga627

匿名飞控位置估计笔记_px4位置速度估计-程序员宅基地

文章浏览阅读912次,点赞2次,收藏3次。摸着石头过河,一边看一边学。_px4位置速度估计

DoTween函数汇总-程序员宅基地

文章浏览阅读1.1k次。DoTween函数汇总命名规则前缀DOTween.Init创建TweenerA.一般方式B.捷径B-基本元素快捷键C. 其他通用方式命名规则Tweener控制一个值并激活它的中间层。Sequence一个特殊的过渡,不是控制一个值,而是控制其他的tween和动画作为一个group。Tween表示Tweener和序列的通用词。Prefixes包含在一个序列Sequence 中的一个tween 。前缀前缀是最重要的使用智能感知,所以试着记住这些:DO所有之间快捷键的前缀(_dotween函数

Java实现word导出与pdf导出_java 同时导出pdf 个word到浏览器-程序员宅基地

文章浏览阅读1.7k次。实现PDF 导出大部分都是用itext来实现,这次word导出我是用freemarker来实现,麻烦点,需要将其文档改成xml然后在改成ftl文件。如果不懂ftl文件语法请去看freemarker语法。这里就不再说了。程序用的是maven ,导入freemarkerjar包&lt;dependency&gt; &lt;groupId&gt;org.freemarker&lt;..._java 同时导出pdf 个word到浏览器

Vulnhub靶机实战——DC-6_192.168.220.142-程序员宅基地

文章浏览阅读3.8k次,点赞6次,收藏8次。靶机DC-6下载地址:https://download.vulnhub.com/dc/DC-6.zip环境:VMware 15虚拟机软件 DC-6靶机IP地址:192.168.220.139 Kali的IP地址:192.168.220.142DC-6靶机与kali都以NAT模式连接到网络,查看kali的IP地址:192.168.220.142..._192.168.220.142

随便推点

tomcat 打印详细日志信息_tomcat日志打印包名称-程序员宅基地

文章浏览阅读2.6k次。classes 目录下 新建 logging.properties handlers = org.apache.juli.FileHandler, java.util.logging.ConsoleHandlerorg.apache.juli.FileHandler.level = FINEorg.apache.juli.FileHandler.directory = ${catali..._tomcat日志打印包名称

大学生静态HTML网页源码——佛山旅游景点介绍网页代码 家乡旅游网页制作模板 web前端期末大作业_大学旅游html-程序员宅基地

文章浏览阅读514次,点赞2次,收藏11次。精彩专栏推荐 【作者主页——获取更多优质源码】 【web前端期末大作业——毕设项目精品实战案例(1000套)】1 网页简介:此作品为学生个人主页网页设计题材,HTML+CSS 布局制作,web前端期末大作业,大学生网页设计作业源码,这是一个不错的网页制作,画面精明,代码为简单学生水平, 非常适合初学者学习使用。2.网页编辑:网页作品代码简单,可使用任意HTML编辑软件(如:Dreamweaver、HBuilder、Vscode 、Sublime 、Web_大学旅游html

嵌入式单片机编程魔法之三权分立-程序员宅基地

文章浏览阅读216次。关注、星标公众号,直达精彩内容ID:技术让梦想更伟大整理:李肖遥在单片机编程中,有很多人会因为一些貌似简单的处理而把问题弄得乱七八糟,如林中蛛网一样,错综复杂。而事实上,根据编程魔法之思..._如何在嵌入式单片机上编写算法

python实验数据预处理案例_Python数据分析小案例——红楼梦文本分析(一) 文本预处理...-程序员宅基地

文章浏览阅读3k次。本文开始介绍一个简单的数据分析案例,分析红楼梦文本,本文主要内容是将红楼梦文本按照章节获取每一回的标题,字数,段落数并保存到csv中方便后续数据分析红楼梦小说文本可以在这里下载链接:https://pan.baidu.com/s/1WEmunBN_Wo75EZd1cK6_lA提取码:3xco接下来直接上代码import pandas as pdimport numpy as npwith open..._文本预处理案例分析题

Excel表格快速复制公式到最后一行,无需拖拽!_如何快速将公式下拉到最后一行-程序员宅基地

文章浏览阅读2w次,点赞6次,收藏24次。工欲善其事,必先利其器!掌握一些Excel表格的操作技巧,很多时候会极大地减轻工作量。有时我们希望在Excel表格中快速填充/复制公式,但如何在不使用鼠标拖拽的情况下直接复制到最后一行呢?本文将手把手助你提升工作效率_如何快速将公式下拉到最后一行

Spring boot将图片转成base64,使用sun.misc.BASE64Decoder转换图片_sun.misc.base64encoder pom-程序员宅基地

文章浏览阅读2.3k次。一、前情本来项目要求的是后台给前端返回文件的地址,前端可以读取文件,图片或者pdf文件都能读取到,pdf根据浏览器会有显示和下载两种情况,doc等其他类型需要联网使用微软公司的接口。但是这样就暴露了服务器存放文件的地址,所以更改为把图片大小限制后转成base64编码持久化保存。二、导包pom文件直接导入:<!-- 图片转base64 --> <!-- https://mvnrepository.com/artifact/com.slzx.third/sun.misc_sun.misc.base64encoder pom