Spring Security 认证与授权_spring security认证和授权流程-程序员宅基地
技术标签: spring spring security
在上一篇文章中,我们沿用了 Spring Security 默认的安全机制;仅有一个用户,仅有一种角色。在实际开发中,这自然是无法满足需求的。本篇文章将更加深入地对 Spring Security 进行配置,且初步使用授权机制。
一、默认数据库的认证和授权:
1.1 资源准备
首先,新建 controller 包,并创建 3 个控制器,并分别在控制器中建立一些测试路由,三个类的代码如下所示:
@RestController
@RequestMapping("/admin/api")
public class AdminController {

	@GetMapping("/hello")
	public String hello() {
		return "hello admin";
	}
}
@RestController
@RequestMapping("/app/api")
public class AppController {

	@GetMapping("/hello")
	public String hello() {
		return "hello app";
	}
}
@RestController
@RequestMapping("/user/api")
public class UserController {

	@GetMapping("/hello")
	public String hello() {
		return "hello user";
	}
}
假设在 /admin/api 下的内容是系统后台管理相关的 API,在 /app/api 下的内容是面向客户端公开访问的 API,在 /user/api/ 下的内容是用户操作自身数据相关的 API;显然,/admin/api 必须拥有管理员权限才能进行操作,而 /user/api 必须在用户登录后才能进行操作。
1. 2 资源授权的配置
为了能正常访问前面的路由,我们需要修改配置类 WebSecurityConfig ,代码如下所示:
@EnableWebSecurity
public class WebSecurityConfig extends WebSecurityConfigurerAdapter{

	protected void configure(HttpSecurity http) throws Exception{
		http.authorizeRequests().
		antMatchers("/admin/api/**").hasRole("ADMIN").
		antMatchers("/user/api/**").hasRole("USER").
		antMatchers("/app/api/**").permitAll().
		anyRequest().authenticated().
		and().formLogin();
	}
}
antMatchers() 是一个采用 ANT 模式的 URL 匹配器。
使用 ?匹配任意单个字符,
使用 * 匹配 0 或任意数量的字符,
使用 ** 匹配 0 或者更多目录。
antMatchers("/admin/api/**") 相当于匹配了 /admin/api/ 下所有的 API 。此处我们指定当其必须为 ADMIN 角色时才能访,/user/api/ 与之同理。/app/api/ 下的 API 会调用 permitAll() 公开其权限。
授权相关的配置看起来并不复杂,但似乎缺少了什么?这里暂且忽略。
重启服务,尝试访问 localhost:8080/app/api/hello,页面打印 “hello app”,验证了 /app/api/ 下的服务确实是权限公开的。接着访问 localhost:8080/user/api/hello,这次需要登录了。我们尝试输入前面在 application.properties 中定义的用户名和密码,登录之后,页面打印 “hello user” 。然而,我们并没有 user 用户,为什么可以成功访问路由呢?为了验证不是授权环节出现了问题,我们尝试访问 localhost:8080/admin/api/hello,出现的内容如下所示:
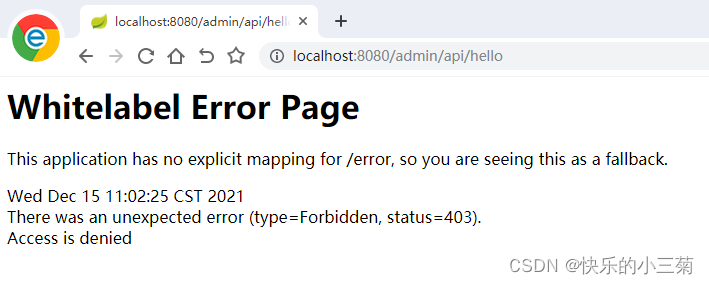
页面显示 403 错误,表示该用户授权失败( 401 代表该用户认证失败)。也就是说,本次访问已经通过了认证环节,只是在授权的时候被驳回了。认证环节是没有问题的,因为 Spring Security 默认的用户角色正是 user。
HTTP 状态码(HTTP Status Code)是由 RFC 2616 定义的一种用来表示一个 HTTP 请求响应状态的规范,由 3 位数字组成。通常用 2XX 表示本次操作成功,用 4XX 表示是客户端导致的失败,用 5XX 表示是服务器引起的错误。
1.3 基于内存的多用户支持
到目前为止,我们仍然只有一个可登录的用户,怎样引入多用户呢?非常简单,我们只需实现一 个自定义的 UserDetailsService 即可,代码如下所示:
@EnableWebSecurity
public class WebSecurityConfig extends WebSecurityConfigurerAdapter{

	protected void configure(HttpSecurity http) throws Exception{
		http.authorizeRequests().
		antMatchers("/admin/api/**").hasRole("ADMIN").
		antMatchers("/user/api/**").hasRole("USER").
		antMatchers("/app/api/**").permitAll().
		anyRequest().authenticated().
		and().formLogin();
	}
	@Bean
	public UserDetailsService userDetailsService() {
		InMemoryUserDetailsManager manager = new InMemoryUserDetailsManager();
		manager.createUser(User.withUsername("user").password("123").roles("USER").build());
		manager.createUser(User.withUsername("admin").password("123").roles("USER","ADMIN").build());
		return manager;
	}
}
为其添加一个 @bean 注解,便可被 Spring Security 发现并使用。Spring Security 支持各种来源的用户数据,包括内存、数据库、LDAP 等。它们被抽象为一个 UserDetailsService 接口,任何实现了 UserDetailsService 接口的对象都可以作为认证数据源。在这种设计模式下,Spring Security 显得尤为灵活。
InMemoryUserDetailsManager 是 UserDetailsService 接口中的一个实现类,它将用户数据源寄存在内存里,在一些不需要引入数据库这种重数据源的系统中很有帮助。 这里仅仅调用createUser() 生成两个用户,并赋予相应的角色。它会工作得很好,多次重启服务也不会出现问题。为什么要强调多次重启服务呢?稍后揭晓答案。
1.4 其他实现方式
除了 InMemoryUserDetailsManager ,Spring Security 还提供另一个 UserDetailsService 实现类: JdbcUserDetailsManager。
JdbcUserDetailsManager 帮助我们以 JDBC 的方式对接数据库和 Spring Security,它设定了一个默认的数据库模型,只要遵从这个模型,在简便性上,JdbcUserDetailsManager 甚至可以媲美 InMemoryUserDetailsManager。
在 pom.xml 中引入 jdbc 和 mysql 的数据库依赖,如下所示:
        <dependency>
			<groupId>org.springframework.boot</groupId>
			<artifactId>spring-boot-starter-jdbc</artifactId>
		</dependency>
		<dependency>
			<groupId>mysql</groupId>
			<artifactId>mysql-connector-java</artifactId>
			<scope>runtime</scope>
		</dependency>
接着在 application.properties 中配置数据库连接参数。
spring.datasource.url = jdbc:mysql://localhost:3306/springDemo?useUnicode=true&characterEncoding=utf-8&useSSL=false
spring.datasource.username = root
spring.datasource.password = Rfid123456
这里连接的数据库名为 springDemo(不配置 driverClassName 也不会出现问题,因为 SpringBoot 会自动根据 URL 去推断),用户名和密码分别为 root 和 Rfid123456,读者可根据实际情况,自行修改。 前面介绍过,JdbcUserDetailsManager 设定了一个默认的数据库模型,SpringSecurity 将该模型定义在 /org/springframework/security/core/userdetails/jdbc/users.ddl 内。
接下来是建表语句,如下所示:
create database springDemo;
use springDemo;
create table users(
	username varchar(50) not null primary key,
	password varchar(500) not null,
	enabled boolean not null
);

create table authorities(
	username varchar(50) not null,
	authority varchar(50) not null,
	constraint fk_authorities_user foreign key(username) references users(username)
);
create unique index ix_auth_username on authorities(username,authority);
JdbcUserDetailsManager 需要两个表,其中 users 表用来存放用户名、密码和是否可用三个信息, authorities 表用来存放用户名及其权限的对应关系。
下面构建一个 JdbcUserDetailsManager 实例,让 Spring Security 使用数据库来管理用户。
import org.apache.tomcat.jdbc.pool.DataSource;

@Autowired
private DataSource dataSource;

@Bean
public UserDetailsService userDetailsService() {
	JdbcUserDetailsManager manager = new JdbcUserDetailsManager();
	manager.setDataSource(dataSource);
	manager.createUser(User.withUsername("user").password("123").roles("USER").build());
    manager.createUser(User.withUsername("admin").password("123").
        roles("USER","ADMIN").build());
	return manager;
}
JdbcUserDetailsManager 与 InMemoryUserDetailsManager 在用法上没有太大区别,只是多了设置 DataSource 的环节。Spring Security 通过 DataSource 执行设定好的命令。例如,此处的 createUser 函数实际上就是执行了下面的 SQL 语句:
insert into users(username,password,enabled) values(?,?,?)查看 JdbcUserDetailsManager 的源代码可以看到更多定义好的 SQL 语句,诸如deleteUserSql、 updateUserSql 等,这些都是 JdbcUserDetailsManager 与数据库实际交互的形式。当然, JdbcUserDetailsManager 也允许我们在特殊情况下自定义这些 SQL 语句,如有必要,调用对应的 setXxxSql方法即可。
现在重启服务,看看在数据库中 Spring Security 生成了哪些数据,如下图所示。
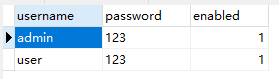
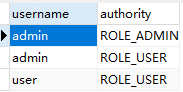
authorities 表的 authority 字段存放的是前面设定的角色,只是会被添上 “ROLE_” 前缀。下面尝试通过 SQL 命令创建一个测试账号。
insert into users values("test","123",1);
insert into authorities values("test","ROLE_USER");
清空缓存并使用 test 账号访问系统,发现可以访问 user 路由,但不能访问 admin 路由,与预期的行为一致。

到目前为止,一切都工作得很好,但是只要我们重启服务,应用就会报错。这是因为 users 表在创建语句时,username 字段为主键,主键是唯一不重复的,但重启服务后会再次创建 admin 和 user,导致数据库报错(在内存数据源上不会出现这种问题,因为重启服务后会清空 username 字段中的内容)。 所以如果需要在服务启动时便生成部分用户,那么建议先判断用户名是否存在。如下所示:
import org.apache.tomcat.jdbc.pool.DataSource;

@Autowired
private DataSource dataSource;

@Bean
public UserDetailsService userDetailsService() {
	JdbcUserDetailsManager manager = new JdbcUserDetailsManager();
	manager.setDataSource(dataSource);
    if(!manager.userExists("user")){
        manager.createUser(User.withUsername("user").password("123").
            roles("USER").build());
    }
    if(!manager.userExists("admin")) {
        manager.createUser(User.withUsername("admin").password("123").
            roles("USER","ADMIN").build());
    }
	return manager;
}
在自定义表单登录页中,WebSecurityConfigurerAdapter 类定义了三个 configure() 方法。
protected void configure(AuthenticationManagerBuilder auth) throws Exception {
	this.disableLocalConfigureAuthenticationBldr = true;
}

public void configure(WebSecurity web) throws Exception {

}

protected void configure(HttpSecurity http) throws Exception {
	http
		.authorizeRequests()
			.anyRequest().authenticated()
				.and()
		.formLogin().and()
		.httpBasic();
}
我们只用到了一个 http 参数,用来接收 HttpSecurity 对象的配置方法。另外两个参数也有各自的用途,其中,AuthenticationManagerBuilder 的 configure 同样允许我们配置认证用户。
@EnableWebSecurity
public class WebSecurityConfig extends WebSecurityConfigurerAdapter{

	protected void configure(HttpSecurity http) throws Exception{
		http.authorizeRequests().
		antMatchers("/admin/api/**").hasRole("ADMIN").
		antMatchers("/user/api/**").hasRole("USER").
		antMatchers("/app/api/**").permitAll().
		anyRequest().authenticated().
		and().formLogin();
	}
	protected void configure(AuthenticationManagerBuilder auth) throws Exception {
		auth.inMemoryAuthentication()
			.withUser("user").password("123").roles("user")
			.and()
			.withUser("admin").password("123").roles("admin");
	}
}
使用方法大同小异,这里不再赘述。
当使用 Spring Security 默认数据库模型应对各种用户系统时,难免灵活性欠佳。尤其是在对现有的系统做 Spring Security 嵌入时,原本的用户数据已经固定,为了适配 Spring Security 而在数据库层面进行修改显然得不偿失。强大而灵活的 Spring Security 对这方面进行了改进。
二、自定义数据库的认证和授权
让 Spring Security 适应系统,而非让系统适应 Spring Security,是 Spring Security 框架开发者和使用者的共识。
下面我们将使用自定义数据库模型接入Spring Security,数据库依然是 MySQL ,持久层框架则选用 MyBatis(倾向于使用 JPA 的读者也可以自行选型,它们在 Spring Security 部分的实践是一样的)。旁枝末节的知识会点到即止,我们重点介绍 Spring Security 相关的内容,所以期望读者自行阅读相关资料,也可以选择暂时略过。
2.1 实现 UserDetails
在上一篇文章种我们使用了 InMemoryUserDetailsManager 和 JdbcUserDetailsManager 两个 UserDetailsService 实现类。生效方式也很简单,只需加入 Spring 的 IoC 容器,就会被 Spring Security 自动发现并使用。自定义数据库结构实际上也仅需实现一个自定义的 UserDetailsService。
UserDetailsService 仅定义了一个 loadUserByUsername 方法,用于获取一个 UserDetails 对象。 UserDetails 对象包含了一系列在验证时会用到的信息,包括用户名、密码、权限以及其他信息,Spring Security 会根据这些信息判定验证是否成功。UserDetails 的源码内容如下所示:
public interface UserDetails extends Serializable {

    Collection<? extends GrantedAuthority> getAuthorities();

    String getPassword();

    String getUsername();

    boolean isAccountNonExpired();

    boolean isAccountNonLocked();

    boolean isCredentialsNonExpired();

    boolean isEnabled();

}
也就是说,不管数据库结构如何变化,只要能构造一个 UserDetails 即可,下面就来实现这个过程。
2.1.1 数据库准备
设计一个自定义的数据库结构。建表语句如下所示:
create table users(
id bigint(20) not null auto_increment primary key,
username varchar(50) not null,
password varchar(60),
enable tinyint(4) not null default '1' comment '用户是否可用',
roles text character set utf8 comment '用户角色,多个用户角色用逗号隔开',
KEY ‘username‘ (username)
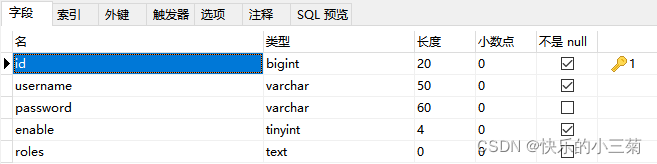
);我们把用户信息和角色放在同一张表中,不再是 Spring Security 默认的分开形式。roles 字段设定为 text 类型,多个角色之间用逗号隔开。建议在 username 字段上建立索引,以提高搜索速度,表结构如下所示:
接下来插入两条记录,方便我们后续的测试工作:
insert into users(username,password,roles) values ("admin","123","ROLE_ADMIN,ROLE_USER");
insert into users(username,password,roles) values ("user","123","ROLE_USER");
2.1.2 编码实现
当数据库结构和数据准备完毕时,即可编写对应的 User 实体。
public class User {

	private Long id;

	private String username;

	private String password;

	private String roles;

	private boolean enable;

    // setter getter
}
让 User 实体继承 UserDetails,代码如下所示:
public class User implements UserDetails{

	private Long id;
	private String username;
	private String password;
	private String roles;
	private boolean enable;

	public Long getId() {
		return id;
	}
	public void setId(Long id) {
		this.id = id;
	}
	public String getUsername() {
		return username;
	}
	public void setUsername(String username) {
		this.username = username;
	}
	public String getPassword() {
		return password;
	}
	public void setPassword(String password) {
		this.password = password;
	}
	public String getRoles() {
		return roles;
	}
	public void setRoles(String roles) {
		this.roles = roles;
	}
	public boolean isEnable() {
		return enable;
	}
	public void setEnable(boolean enable) {
		this.enable = enable;
	}
	private List<GrantedAuthority> authorities;
	public void setAuthorities(List<GrantedAuthority> authorities) {
		this.authorities = authorities;
	}
	@Override
	public Collection<? extends GrantedAuthority> getAuthorities() {
		// TODO Auto-generated method stub
		return this.authorities;
	}
	@Override
	public boolean isAccountNonExpired() {
		// TODO Auto-generated method stub
		return true;
	}
	@Override
	public boolean isAccountNonLocked() {
		// TODO Auto-generated method stub
		return true;
	}
	@Override
	public boolean isCredentialsNonExpired() {
		// TODO Auto-generated method stub
		return true;
	}
	@Override
	public boolean isEnabled() {
		// TODO Auto-generated method stub
		return this.enable;
	}
}
这里需要实现 UserDetails 定义的几个方法,其中 isAccountNonExpired()、isAccountNonLocked() 和 isCredentialsNonExpired() 方法暂且用不到,统一返回 true,否则 Spring Security 会认为账号异常。isEnabled 对应 enable 字段,将其代入即可。getAuthorities() 方法本身对应的是 roles 字段,但由于结构不一致,所以此处新建一个,并在后续进行填充。
2.2 实现 UserDetailsService
2.2.1 数据持久层准备
当准备好 UserDetails 之后,使用数据库持久层框架读取数据并填充对象。首先引入 MyBatis。
<dependency>
    <groupId>org.mybatis.spring.boot</groupId>
    <artifactId>mybatis-spring-boot-starter</artifactId>
    <version>1.3.1</version>
</dependency>
前面在配置文件中曾写过数据库相关的配置,这里沿用即可。
spring.datasource.url = jdbc:mysql://localhost:3306/springDemo?useUnicode=true&characterEncoding=utf-8&useSSL=false
spring.datasource.username = root
spring.datasource.password = Rfid123456
接下来在入口类中用 @MapperScan 指定 MyBatis 要扫描的映射文件目录。
@SpringBootApplication
@RestController
@MapperScan("com.mapper")
public class SpringDemoApplication {

	@GetMapping("/")
	public String hello() {
		return "hello spring security";
	}

	public static void main(String[] args) {
		SpringApplication.run(SpringDemoApplication.class,args);
	}
}
当然,我们还需要在 com.mapper 下创建该目录,并编写对应的映射接口:
@Component
public interface UserMapper {

	@Select("SELECT * FROM  users where username=#{username}")
	User findByUserName(@Param("username") String username);
}
与 MyBatis 相关的内容不再赘述,没有接触过且感兴趣的读者可以自行学习相关知识,这里仅提供一个通过用户名查找用户的方法。
2.2.2 编码实现
当数据持久层准备完成后,我们开始编写 UserDetailsService。
@Service
public class MyUserDetailsService implements UserDetailsService{

	@Autowired
	private UserMapper usermapper;

	@Override
	public UserDetails loadUserByUsername(String username) throws UsernameNotFoundException {
		// 从数据库尝试读取该用户
		User user = usermapper.findByUserName(username);
		// 用户不存在,抛出异常
		if(user == null) {
			throw new UsernameNotFoundException("用户名不存在");
		}
		// 将数据库形式的 roles 解析为 UserDetails 的权限集
		// AuthorityUtils.commaSeparatedStringToAuthorityList() 是Spring Security 提供的
		// 该方法用于将逗号隔开的权限集字符串切割成可用权限对象列表
		// 当然也可以自己实现,如用分号来隔开等,参考下面的generateAuthorities()方法
		user.setAuthorities(AuthorityUtils.commaSeparatedStringToAuthorityList(user.getRoles()));
		return user;
	}

	// 自行实现权限的转移
	private List<GrantedAuthority> generateAuthorities(String roles){
		List<GrantedAuthority> list = new ArrayList<>();
		String [] roleArray = roles.split(";");
		if(roles != null && !"".equals(roles)) {
			for(String role:roleArray) {
				list.add(new SimpleGrantedAuthority(role));
			}
		}
		return list;
	}
}其中,SimpleGrantedAuthority 是 GrantedAuthority 的一个实现类。Spring Security 的权限几乎是用 SimpleGrantedAuthority 生成的,只要注意每种角色对应一个 GrantedAuthority 即可。另外,一定要在自己的 UserDetailsService 实现类上加入 @Service 注解,以便被 Spring Security 自动发现。
至此,我们就实现了 Spring Security 的自定义数据库结构认证。有些读者可能会有疑问,为什么在数据库中的角色总是要添加 “ROLE” 前缀,在配置时却并没有 “ROLE” 前缀呢?
protected void configure(HttpSecurity http) throws Exception{
		http.authorizeRequests().
			antMatchers("/admin/api/**").hasRole("ADMIN").
			antMatchers("/user/api/**").hasRole("USER").
			antMatchers("/app/api/**").permitAll().
			anyRequest().authenticated().
		and().formLogin();
	}
查看源码即可找到答案。
private static String hasRole(String role) {
		Assert.notNull(role, "role cannot be null");
		if (role.startsWith("ROLE_")) {
			throw new IllegalArgumentException(
					"role should not start with 'ROLE_' since it is automatically inserted. Got '"
							+ role + "'");
		}
		return "hasRole('ROLE_" + role + "')";
	}
如果不希望匹配这个前缀,那么改为调用 hasAuthority() 方法即可。
2.2.3 效果测试
此时的 WebSecurityConfig 的代码如下所示:
@EnableWebSecurity
public class WebSecurityConfig extends WebSecurityConfigurerAdapter{

    protected void configure(HttpSecurity http) throws Exception{
		http.authorizeRequests().
			antMatchers("/admin/api/**").hasRole("ADMIN").
			antMatchers("/user/api/**").hasRole("USER").
			antMatchers("/app/api/**").permitAll().
			anyRequest().authenticated().
		and().formLogin();
	}
}
启动程序,使用 user 账户登录 localhost:8080/user/api/hello ,可以正常登录,如下所示:

使用 admin 账户登录 localhost:8080/admin/api/hello ,可以正常登录,如下所示:

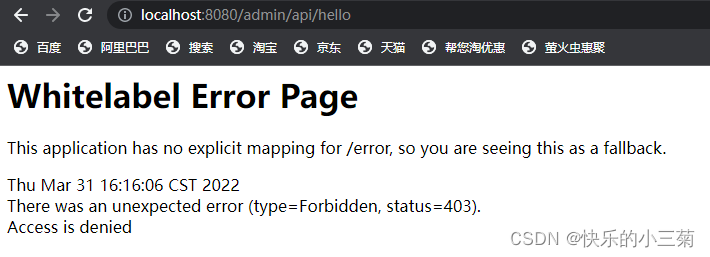
使用 user 账户登录 localhost:8080/admin/api/hello,无法正常登录,如下所示:

智能推荐
[Mysql] CONVERT函数_mysql convert-程序员宅基地
文章浏览阅读3.1w次,点赞23次,收藏109次。本文主要讲解CONVERT函数_mysql convert
【Android】Retrofit入门详解-程序员宅基地
文章浏览阅读1.6k次,点赞23次,收藏2次。简介:大三学生党一枚!主攻Android开发,对于Web和后端均有了解。个人语录:取乎其上,得乎其中,取乎其中,得乎其下,以顶级态度写好一篇的博客。Retrofit入门一.Retrofit介绍二.Retrofit注解2.1 请求方法注解2.1.1 GET请求2.1.2 POST请求2.2 标记类注解2.2.1 FormUrlEncoded2.2.2 Multipart2.2.3 Streaming2.3 参数类注解2.3.1 Header和Headers2.3.2 Body2.3.3 Path2.3.4_retrofit
教你拷贝所有文件到指定文件夹_所有文件夹下文件的 拷贝怎么弄-程序员宅基地
文章浏览阅读1.9k次。在处理文件的时候,如何将文件、文件夹复制到指定文件夹之中呢?打开【文件批量改名高手】,在“文件批量管理任务”中,先点“添加文件”,将文件素材导入。选好一系列的复制选项,单击开始复制,等全部复制好了,提示“已完成XX%”然后可以任意右击一个文件夹路径,在显示出的下拉列表中,选择“打开文件夹”在“复制到的目标文件夹(目录)”中,导入文件夹,多个文件夹,一行一个。最后,即可看到文件、文件夹都复制到各个指定的文件夹之中一一显示着啦。导入后,在表格中我们就可以看到文件或文件夹的名称以及所排列的序号。..._所有文件夹下文件的 拷贝怎么弄
win10和linux双系统安装步骤(详细!)_怎么装双系统win10和linux-程序员宅基地
文章浏览阅读5k次,点赞11次,收藏42次。Windows10安装ubuntu双系统教程ubuntu分区方案_怎么装双系统win10和linux
从图的邻接表表示转换成邻接矩阵表示_typedef struct arcnode{int adjvex;-程序员宅基地
文章浏览阅读1.1k次。从图的邻接表表示转换成邻接矩阵表示typedef struct ArcNode{ int adjvex;//该弧指向的顶点的位置 struct ArcNode *next;//下一条弧的指针 int weight;//弧的权重} ArcNode;typedef struct{ VertexType data;//顶点信息 ArcNode *firstarc;} VNode,AdList[MAXSIZE];typedef struct{ int vexnum;//顶点数 int _typedef struct arcnode{int adjvex;
学好Python开发你一定会用到这30框架种(1)-程序员宅基地
文章浏览阅读635次,点赞18次,收藏26次。14、fabric是基于Python实现的SSH命令行工具,简化了SSH的应用程序部署及系统管理任务,它提供了系统基础的操作组件,可以实现本地或远程shell命令,包括命令执行,文件上传,下载及完整执行日志输出等功能。7、pycurl 是一个用C语言写的libcurl Python实现,功能强大,支持的协议有:FTP,HTTP,HTTPS,TELNET等,可以理解为Linux下curl命令功能的Python封装。Scipy是Python的科学计算库,对Numpy的功能进行了扩充,同时也有部分功能是重合的。
随便推点
手机能打开的表白代码_能远程打开,各种手机电脑进行监控操作,最新黑科技...-程序员宅基地
文章浏览阅读511次。最近家中的潮人,老妈闲着没事干,开始学玩电脑,引起他的各种好奇心。如看看新闻,上上微信或做做其他的事情。但意料之中的是电脑上会莫名出现各种问题?不翼而飞的图标?照片又不见了?文件被删了,卡机或者黑屏,无声音了,等等问题。常常让她束手无策,求助于我,可惜在电话中说不清,往往只能苦等我回家后才能解决,那种开心乐趣一下子消失了。想想,这样也不是办法啊, 于是,我潜心寻找了两款优秀的远程控制软件。两款软件...
成功Ubuntu18.04 ROS melodic安装Cartograhper+Ceres1.13.0,以及错误总结_ros18.04 安装ca-程序员宅基地
文章浏览阅读1.8k次。二.初始化工作空间三.设置下载地址四.下载功能包此处可能会报错,请看:rosdep update遇到ERROR: error loading sources list: The read operation timed out问题_DD᭄ꦿng的博客-程序员宅基地接下来一次安装所有功能包,注意对应ROS版本 五.编译功能包isolated:单独编译各个功能包,每个功能包之间不产生依赖。编译过程时间比较长,可能需要几分钟时间。此处可能会报错:缺少absl依赖包_ros18.04 安装ca
Harbor2.2.1配置(trivy扫描器、镜像签名)_init error: db error: failed to download vulnerabi-程序员宅基地
文章浏览阅读4.1k次,点赞3次,收藏7次。Haobor2.2.1配置(trivy扫描器、镜像签名)docker-compose下载https://github.com/docker/compose/releases安装cp docker-compose /usr/local/binchmod +x /usr/local/bin/docker-composeharbor下载https://github.com/goharbor/harbor/releases解压tar xf xxx.tgx配置harbor根下建立:mkd_init error: db error: failed to download vulnerability db: database download
openFOAM学习笔记(四)—— openFOAM中的List_openfoam list-程序员宅基地
文章浏览阅读3.2k次。又是一个很底层的部分,但是也非常重要_openfoam list
C++对象的JSON序列化与反序列化探索_c++对象 json 序列化和反序列化 库-程序员宅基地
文章浏览阅读1.7w次,点赞3次,收藏15次。一:背景作为一名C++开发人员,我一直很期待能够像C#与JAVA那样,可以轻松的进行对象的序列化与反序列化,但到目前为止,尚未找到相对完美的解决方案。本文旨在抛砖引玉,期待有更好的解决方案;同时向大家寻求帮助,解决本文中未解决的问题。 二:相关技术介绍本方案采用JsonCpp来做具体的JSON的读入与输出,再结合类成员变量的映射,最终实现对象的JSON序列化与反序列化。本文不再_c++对象 json 序列化和反序列化 库
linux x window 详解,王垠:详解Xwindow(插窗户)的工作原理-程序员宅基地
文章浏览阅读523次。该楼层疑似违规已被系统折叠隐藏此楼查看此楼(本文作者貌似是王垠,在某处扒拉出来的转载过来)Xwindow 是非常巧妙的设计,很多时候它在概念上比其它窗口系统先进,以至于经过很多年它仍然是工作站上的工业标准。许多其它窗口系统的概念都是从 Xwindow 学来的。Xwindow 可以说的东西太多了。下面只分辨一些容易混淆的概念,提出一些正确使用它的建议。分辨 X server 和 X client这..._整个插入的窗叫什么