语音质量指标Python(PESQ、STOI、SegSNR、LLR、WSS、CD、LSD、CSIG、CBAK、COVL)_python计算pesq-程序员宅基地
技术标签: 语音信号处理 语音增强 分段信噪比 PESQ 语音评价指标 STOI
常用语音质量指标Python实现
在做语音增强的时候,论文中会提到一些语音质量的评价指标,无从下手,于是自己摸索了两天时间搞出了其计算的python版本。
1.安装对应的依赖库
#!/usr/bin/env python
# -*- coding: utf-8 -*-
'''
@Time : 2020/9/13 16:53
@Author : kingback
@Site :
@File : SEPM.py
@Software: PyCharm
'''
'''
the install order is :
因为一些函数包需要一些依赖,所以建议大家按照如下步骤安装操作
0. All the package I use the commond "python setup.py install" to install to our machine.
Maybe we also need to install other packages like : cython ,numba ,scipy ,matplotlib ,numpy ...
0.说明,以下所有的安装包最好都再对应的github链接下载其源码,然后cmd进入到其对应的文件见,执行python setup.py install命令来进行安装
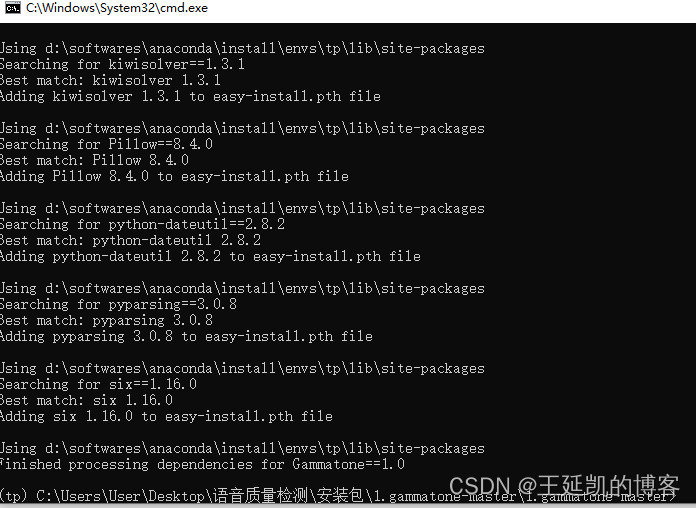
1. install the gammatone from : https://github.com/detly/gammatone
1. 第一步,先安装这个包,下载地址如上,下载好后进入文件夹执行命令python setup.py install
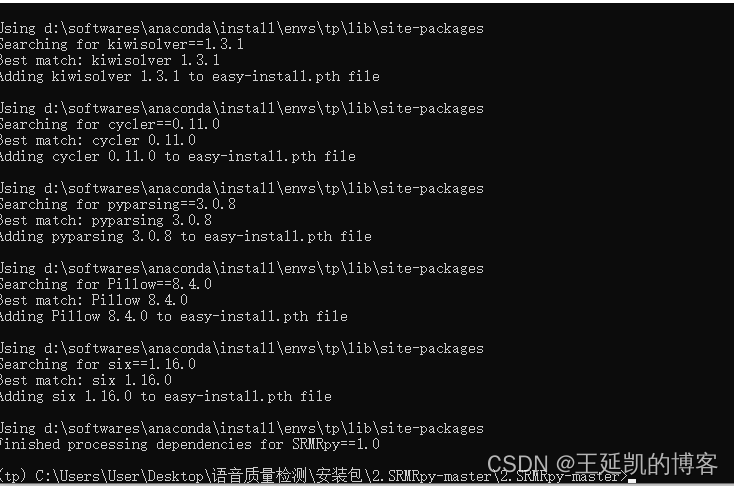
2.install the SRMRpy from : https://github.com/jfsantos/SRMRpy
2.这是需要安装的第二个包,因为这些包都是有依赖关系的,所以建议大家还是按照这个顺序来
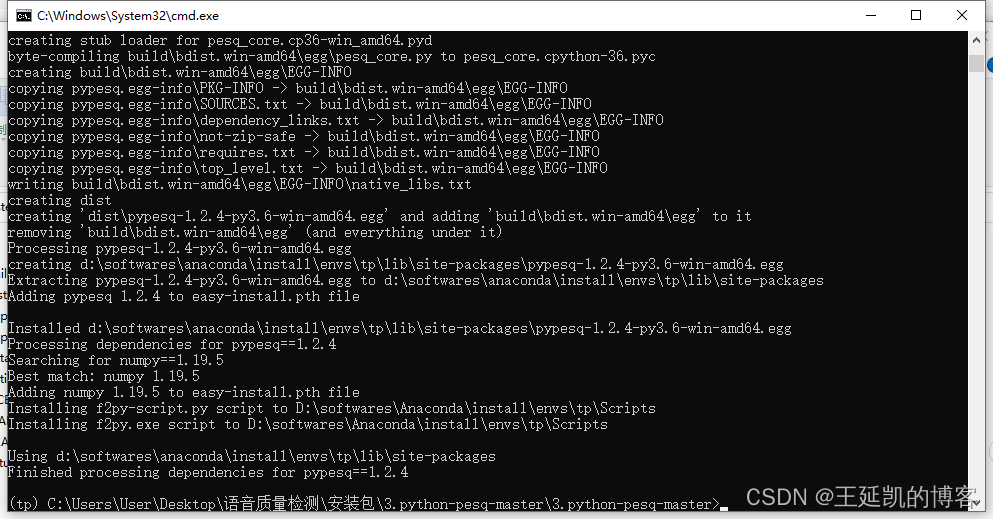
3.install the python-pesq from : https://github.com/vBaiCai/python-pesq
3.这是第三个包
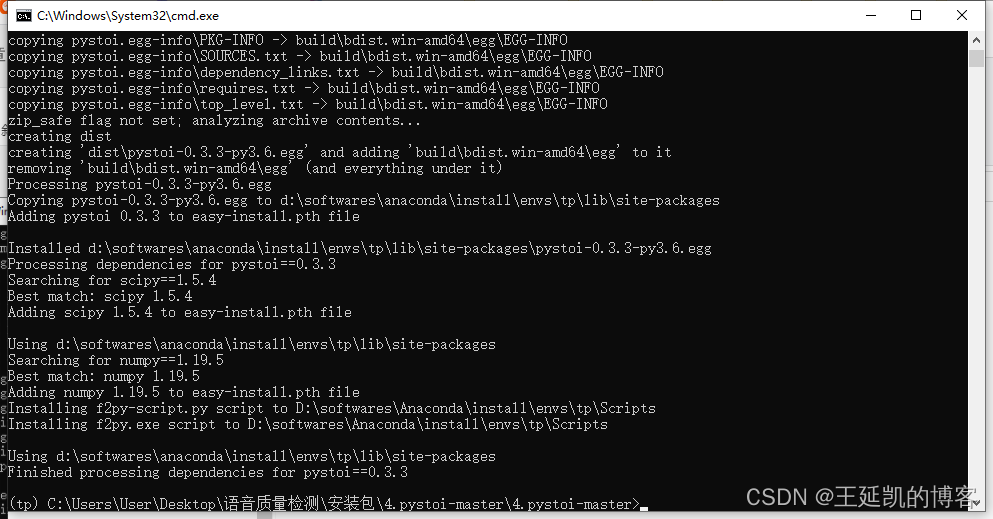
4.install the pystoi from : https://github.com/mpariente/pystoi
4.这是第四个
5.install the pyseqm from : https://github.com/schmiph2/pysepm
5.这是第五个
'''
如果大家链接github速度较慢,可以访问那五个安装包,提取码:r809
2.环境搭建
环境搭建的话,博主是使用conda新创了个python3.6的虚拟环境,然后再搭建的这个语音质量指标环境,以下是搭建过程及步骤:
1.创建新环境 conda create -n tp python=3.6
2.激活环境 activate tp
3.安装必备包(因为下边要安装的包需要这些依赖,如果使用pip源的话就很慢,所以在这里提前下载下来,这三个包必须提前安装哈)
pip install matplotlib -i https://pypi.tuna.tsinghua.edu.cn/simple
pip install scipy -i https://pypi.tuna.tsinghua.edu.cn/simple
pip install numba -i https://pypi.tuna.tsinghua.edu.cn/simple
4. 进入到gammatone_master里边执行python setup.py install命令
5. 安装成功,如下图所示
6. 紧接着同样的步骤安装SRMRpy,记得切换到tp环境哦

然后执行python setup.py install进行安装,出现以下界面就是安装成功了
7.接下来安装pesq,和上边的步骤一样,在对应的文件夹下进入cmd命令行,然后切换到tp虚拟环境,执行命令python setup.py install
8.和上边的操作一样,安装第四个包pystoi
9.步骤同上,安装第五个包pysepm

3.代码部分,计算语音的质量指标
因为新环境并没有soundfile包(用于读取语音文件)和tqdm包(用于显示进度),所以想要以下代码,还需要安装这俩包,执行以下命令
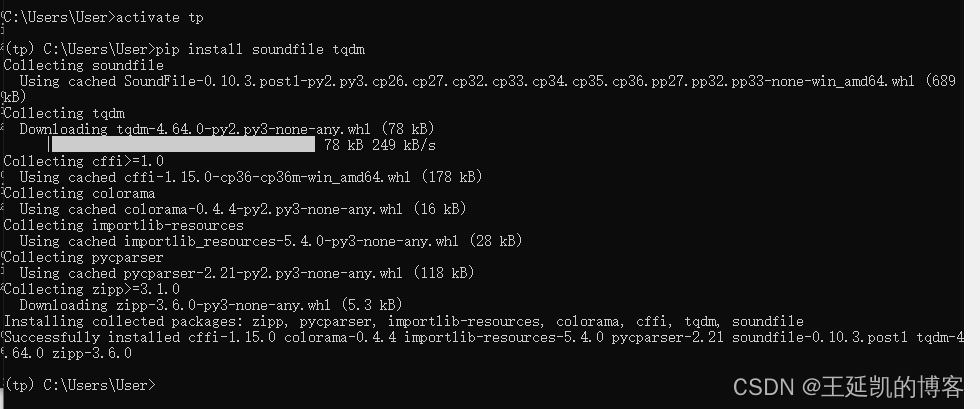
pip install soundfile tqdm
以下就是安装成功的结果啦
都安装完以后,就可以测试语音的质量指标啦,以下就是全部的代码:
import pysepm
import os
import numpy as np
import soundfile as sf
from tqdm import tqdm

clean_wavs = 'clean_testset_wav_16k/'#这个路径,大家根据自己的需求进行修改
denoised_wavs = 'cleaned_testset_wav_16k_48700/'#同理进行修改


def file_name(file_dir):
    L = []
    for root, dirs, files in os.walk(file_dir):
        for file in files:
            if os.path.splitext(file)[1] == '.wav':
                L.append(os.path.join(root, file))
    return L


# get wav_lists
clean_lists = file_name(clean_wavs)
denoised_lists = file_name(denoised_wavs)
# Package files
zipped = zip(clean_lists, denoised_lists)

scores = []
CSIGs = []
CBAKs = []
COVLs = []

for (clean_wav, denoised_wav) in tqdm(zipped, 'the progressing ...'):
    # Gain speech parameters
    ref, sr0 = sf.read(clean_wav)
    deg, sr1 = sf.read(denoised_wav)


    '''
    # Method 1: SNRseg (分段信噪比)
        # from pysepm Call SNRseg to calculate its metrics
        # in this case we can choose our frame length =0.03*1000=30 ms , and the overlap =30 ms *0.75 =22.5 ms
        # 得分越高,质量越好
    '''
    # score = pysepm.SNRseg(ref, deg, sr0)


    '''
    # Method 2: llr (对数似然比测度)
        #
        # 得分越高,质量越好
    '''
    # score = pysepm.llr(ref, deg, sr0)


    '''
    # Method 3: WSS (加权谱倾斜测度)
        #
        # 得分越低,质量越好
    '''
    score = pysepm.wss(ref, deg, sr0)


    '''
    # Method 4: STOI (可短时客观可懂)
        #
        # the score from 0-1 . The higher the score, the better the performance.
        #得分范围0~1,得分越高,质量越好
    '''
    # score = pysepm.stoi(ref, deg, sr0)


    '''
    # Method 5: PESQ
        # when I try this commond , I faced some troubles   , so finally I gave up this commond,
        # use the PESQ.py to instead
        得分范围从 -0.5~ 4.5,得分越高,效果越好
    '''
    NaN,score = pysepm.pesq(ref,deg,sr0)


    '''
    # Method 6: CD (Cepstrum Distance)
        #
        # 数值越高,得分越高.
    '''
    # score = pysepm.cepstrum_distance(ref, deg, sr0)


    '''
       # Method 7: LSD (对数谱距离)
            # This method I use the LSD.py to calculate the distance
            # 数值越小,得分越高
    '''


    '''
    Method 1 - 7 use this score to print
    '''
    # score append to scores
    scores.append(score)


    '''
    # Method 8: Composite
        # In this method , It comes some errors, if you want to solve the error ,  see the step 8 in this file.
        # CSIG , CBAK , COVL all from 1 - 5 , The higher the score, the better the performance.
    '''
    # CSIG,CBAK,COVL = pysepm.composite(ref, deg, sr0)
    # CSIGs.append(CSIG)
    # CBAKs.append(CBAK)
    # COVLs.append(COVL)


# print(scores)
print('The average SegSNR evaluation is :   ', sum(scores) / len(scores))
# calculate the standard deviation & variance of the scores
print('The standard deviation is :   ', np.std(scores))
print('The variance is :   ', np.var(scores))


# print(CSIGs,CBAKs,COVLs)
# print('The average CSIG evaluation is :   ', sum(CSIGs) / len(CSIGs))
# print('The average CBAK evaluation is :   ', sum(CBAKs) / len(CBAKs))
# print('The average COVL evaluation is :   ', sum(COVLs) / len(COVLs))
4.可能出现的问题及解决措施(应该不会出现)
4.1 错误 ModuleNotFoundError: No module named ‘pesq’
 6. if  you have finished the last step  ,don't forget to change the next step's setup.py .
    This is done so that you do not have to repeatedly download the installed files.
    And there's also the possibility of an error.
   如果你在程序运行过程中出现以下问题,可以参考以下解决方案。

7.  如果你的代码在执行过程中遇到以下问题,可以参照此教程,
       "
        File "/home/king/anaconda3/envs/tf_gpu/lib/python3.6/site-packages/pysepm-0.1-py3.6.egg/pysepm/__init__.py", line 4, in <module>
        File "/home/king/anaconda3/envs/tf_gpu/lib/python3.6/site-packages/pysepm-0.1-py3.6.egg/pysepm/qualityMeasures.py", line 4, in <module>
        ModuleNotFoundError: No module named 'pesq'
        "
		找到你的环境中的这个pysepm/qualityMeasures.py文件,当然路径肯定和我这不一样哈
        you can go to your file path "/home/king/anaconda3/envs/tf_gpu/lib/python3.6/site-packages/pysepm-0.1-py3.6.egg/pysepm/qualityMeasures.py"

		在源码中找到如下命令:
            #import pesq as pypesq # https://github.com/ludlows/python-pesq
        替换为 :
            import pypesq
4.2 测量语音的PESQ指标和CBark,CSIG,COVL时可能遇到的问题及解决措施
    9.  if you run the method pesq & Composite , it may be come some errors because we haven't introduced PESQ packages properly yet.
    10.如果你在测量语音的pesq指标,和Composite 指标(即CBark,CSIG,COVL) ,如果出现问题,建议使用如下解决方案
    	打开以下文件
        you can go to your file path "/home/king/anaconda3/envs/tf_gpu/lib/python3.6/site-packages/pysepm-0.1-py3.6.egg/pysepm/qualityMeasures.py"
       (1) 操作1 #在文件开头添加以下命令
            "from pypesq import pesq as pq"

        (2).操作2 ,替换347-359行的pesq函数
            "
                def pesq(clean_speech, processed_speech, fs):
                    if fs == 8000:
                        mos_lqo = pq(clean_speech,processed_speech, fs)
                        pesq_mos = 46607/14945 - (2000*np.log(1/(mos_lqo/4 - 999/4000) - 1))/2989#0.999 + ( 4.999-0.999 ) / ( 1+np.exp(-1.4945*pesq_mos+4.6607) )
                    elif fs == 16000:
                         mos_lqo = pq(clean_speech,processed_speech, fs)
                        pesq_mos = np.NaN
                    else:
                        raise ValueError('fs must be either 8 kHz or 16 kHz')
                    return pesq_mos,mos_lqo
            "
        (3).保存并且退出
5.一劳永逸的方法解决各种错误(简单粗暴)
博主在近期重新搞了搞这个,其实如果重新搭建环境并且按照 第二部分和第三部分环境搭建的话是没有出现问题的,且经过博主本人再三检测,以上所有音频指标均可正常检测,如果大家在使用过程中出现错误,为方便大家,我将该conda虚拟环境传输到百度云网盘,以提供给大家使用,下载完成后,将tp环境放置到conda安装路径下的envs文件夹下,之后选择虚拟环境,就可以直接在这个虚拟环境上进行操作啦。百度云链接,提取码:ggek
6.测试数据集
本博客中用于检测的音频数据,我也一并上传至百度网盘,大家也可拿来进行测试数据集链接,提取码:ybjp
7.参考资料
- https://github.com/schmiph2/pysepm/blob/master/examples/examplesForCalculatingMeasures.ipynb (How to use the packages of SEPM)
- https://zhuanlan.zhihu.com/p/190146707 (音频质量客观评价指标)
8.修改说明
| 时间 | 操作 |
|---|---|
| 2021年4月21日 | 首发 |
| 2022年5月8日 | 重新编辑博客并上传网盘 |
智能推荐
while循环&CPU占用率高问题深入分析与解决方案_main函数使用while(1)循环cpu占用99-程序员宅基地
文章浏览阅读3.8k次,点赞9次,收藏28次。直接上一个工作中碰到的问题,另外一个系统开启多线程调用我这边的接口,然后我这边会开启多线程批量查询第三方接口并且返回给调用方。使用的是两三年前别人遗留下来的方法,放到线上后发现确实是可以正常取到结果,但是一旦调用,CPU占用就直接100%(部署环境是win server服务器)。因此查看了下相关的老代码并使用JProfiler查看发现是在某个while循环的时候有问题。具体项目代码就不贴了,类似于下面这段代码。while(flag) {//your code;}这里的flag._main函数使用while(1)循环cpu占用99
【无标题】jetbrains idea shift f6不生效_idea shift +f6快捷键不生效-程序员宅基地
文章浏览阅读347次。idea shift f6 快捷键无效_idea shift +f6快捷键不生效
node.js学习笔记之Node中的核心模块_node模块中有很多核心模块,以下不属于核心模块,使用时需下载的是-程序员宅基地
文章浏览阅读135次。Ecmacript 中没有DOM 和 BOM核心模块Node为JavaScript提供了很多服务器级别,这些API绝大多数都被包装到了一个具名和核心模块中了,例如文件操作的 fs 核心模块 ,http服务构建的http 模块 path 路径操作模块 os 操作系统信息模块// 用来获取机器信息的var os = require('os')// 用来操作路径的var path = require('path')// 获取当前机器的 CPU 信息console.log(os.cpus._node模块中有很多核心模块,以下不属于核心模块,使用时需下载的是
数学建模【SPSS 下载-安装、方差分析与回归分析的SPSS实现(软件概述、方差分析、回归分析)】_化工数学模型数据回归软件-程序员宅基地
文章浏览阅读10w+次,点赞435次,收藏3.4k次。SPSS 22 下载安装过程7.6 方差分析与回归分析的SPSS实现7.6.1 SPSS软件概述1 SPSS版本与安装2 SPSS界面3 SPSS特点4 SPSS数据7.6.2 SPSS与方差分析1 单因素方差分析2 双因素方差分析7.6.3 SPSS与回归分析SPSS回归分析过程牙膏价格问题的回归分析_化工数学模型数据回归软件
利用hutool实现邮件发送功能_hutool发送邮件-程序员宅基地
文章浏览阅读7.5k次。如何利用hutool工具包实现邮件发送功能呢?1、首先引入hutool依赖<dependency> <groupId>cn.hutool</groupId> <artifactId>hutool-all</artifactId> <version>5.7.19</version></dependency>2、编写邮件发送工具类package com.pc.c..._hutool发送邮件
docker安装elasticsearch,elasticsearch-head,kibana,ik分词器_docker安装kibana连接elasticsearch并且elasticsearch有密码-程序员宅基地
文章浏览阅读867次,点赞2次,收藏2次。docker安装elasticsearch,elasticsearch-head,kibana,ik分词器安装方式基本有两种,一种是pull的方式,一种是Dockerfile的方式,由于pull的方式pull下来后还需配置许多东西且不便于复用,个人比较喜欢使用Dockerfile的方式所有docker支持的镜像基本都在https://hub.docker.com/docker的官网上能找到合..._docker安装kibana连接elasticsearch并且elasticsearch有密码
随便推点
Python 攻克移动开发失败!_beeware-程序员宅基地
文章浏览阅读1.3w次,点赞57次,收藏92次。整理 | 郑丽媛出品 | CSDN(ID:CSDNnews)近年来,随着机器学习的兴起,有一门编程语言逐渐变得火热——Python。得益于其针对机器学习提供了大量开源框架和第三方模块,内置..._beeware
Swift4.0_Timer 的基本使用_swift timer 暂停-程序员宅基地
文章浏览阅读7.9k次。//// ViewController.swift// Day_10_Timer//// Created by dongqiangfei on 2018/10/15.// Copyright 2018年 飞飞. All rights reserved.//import UIKitclass ViewController: UIViewController { ..._swift timer 暂停
元素三大等待-程序员宅基地
文章浏览阅读986次,点赞2次,收藏2次。1.硬性等待让当前线程暂停执行,应用场景:代码执行速度太快了,但是UI元素没有立马加载出来,造成两者不同步,这时候就可以让代码等待一下,再去执行找元素的动作线程休眠,强制等待 Thread.sleep(long mills)package com.example.demo;import org.junit.jupiter.api.Test;import org.openqa.selenium.By;import org.openqa.selenium.firefox.Firefox.._元素三大等待
Java软件工程师职位分析_java岗位分析-程序员宅基地
文章浏览阅读3k次,点赞4次,收藏14次。Java软件工程师职位分析_java岗位分析
Java:Unreachable code的解决方法_java unreachable code-程序员宅基地
文章浏览阅读2k次。Java:Unreachable code的解决方法_java unreachable code
标签data-*自定义属性值和根据data属性值查找对应标签_如何根据data-*属性获取对应的标签对象-程序员宅基地
文章浏览阅读1w次。1、html中设置标签data-*的值 标题 11111 222222、点击获取当前标签的data-url的值$('dd').on('click', function() { var urlVal = $(this).data('ur_如何根据data-*属性获取对应的标签对象