qr码是二维码码
In this post, I will guide you through the creation of a QR-code scanner for iOS, using SwiftUI.
在本文中,我将指导您使用SwiftUI创建iOS的QR码扫描仪。
We are also going to see how to create a preview of the camera feed and use it as a SwiftUI View. The end result will be compatible with the simulator, Xcode’s Live Preview as well as UI tests!
我们还将看到如何创建相机提要的预览并将其用作SwiftUI视图。 最终结果将与模拟器,Xcode的Live Preview以及UI测试兼容!
什么是QR码? (What is QR-code?)
QR-code stands for Quick Response Code. They contain small amounts of information presented in such a way that computers and mobile devices can interpret it. QR-codes are a kind of 2D barcodes called Matrix codes. Some variations exist, like Aztec Codes or Data Matrix codes. QR-codes usually look like this:
QR码代表快速响应代码。 它们包含少量信息,这些信息以计算机和移动设备可以解释的方式呈现。 QR码是一种二维码,称为矩阵码。 存在一些变体,例如Aztec代码或Data Matrix代码。 QR码通常如下所示:
入门 (Getting started)
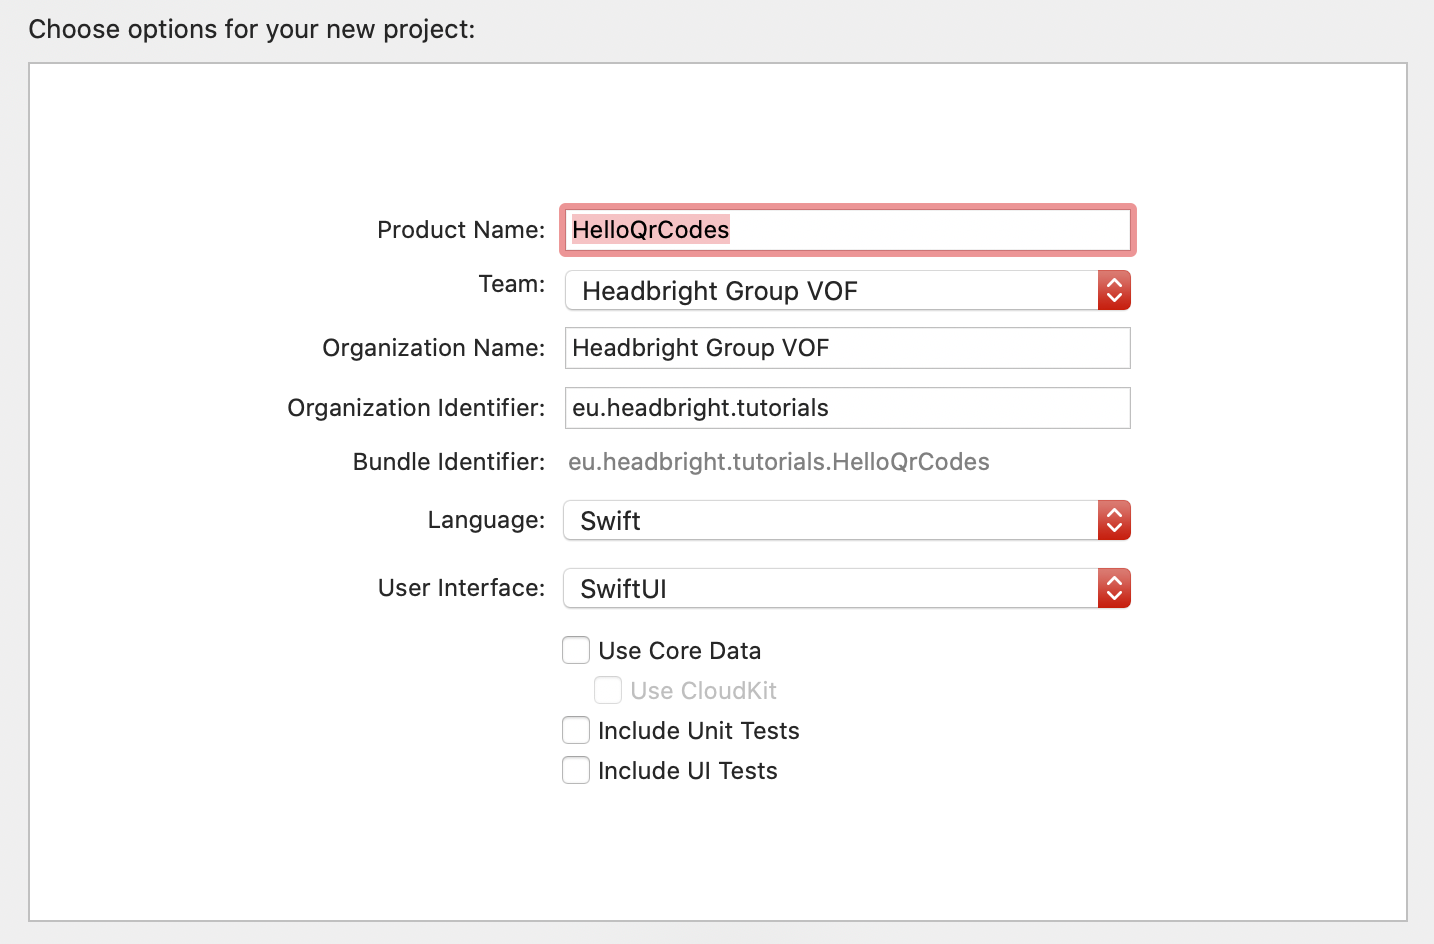
Let’s begin by creating a new iOS app project in Xcode. You will want to choose the Single View App template and make sure the User Interface technology is set to SwiftUI.
让我们从Xcode创建一个新的iOS应用项目开始。 您将要选择Single View App模板,并确保将User Interface技术设置为SwiftUI 。

准备布局 (Prepare the Layout)
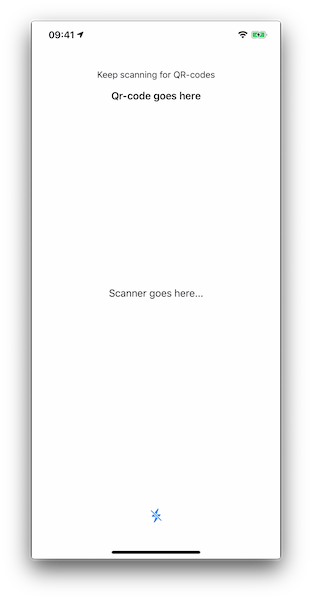
The layout of the scanner screen probably depends on your specific app use case, so we are going to create a very simple view which allows us to see the camera preview, the value of any detected QR-codes as well as a button to toggle the torch light on and off.
扫描仪屏幕的布局可能取决于您特定的应用程序用例,因此我们将创建一个非常简单的视图,使我们可以查看相机预览,任何检测到的QR码的值以及用于切换开启和关闭手电筒。
Create the ScannerViewModel, which will hold the state the View
创建ScannerViewModel,它将保留View的状态
The scan interval is a variable which allows us to control how often we are going to retry scanning for a QR-code. This is useful if we want to provide a continuous scan function.
扫描间隔是一个变量,它使我们可以控制重新尝试扫描QR码的频率。 如果我们要提供连续扫描功能,这将很有用。
The torchIsOn field holds the current state of the device torch light. This tutorial assumes that a torch is always available.
torchIsOn字段保存设备手电筒灯的当前状态。 本教程假定割炬始终可用。
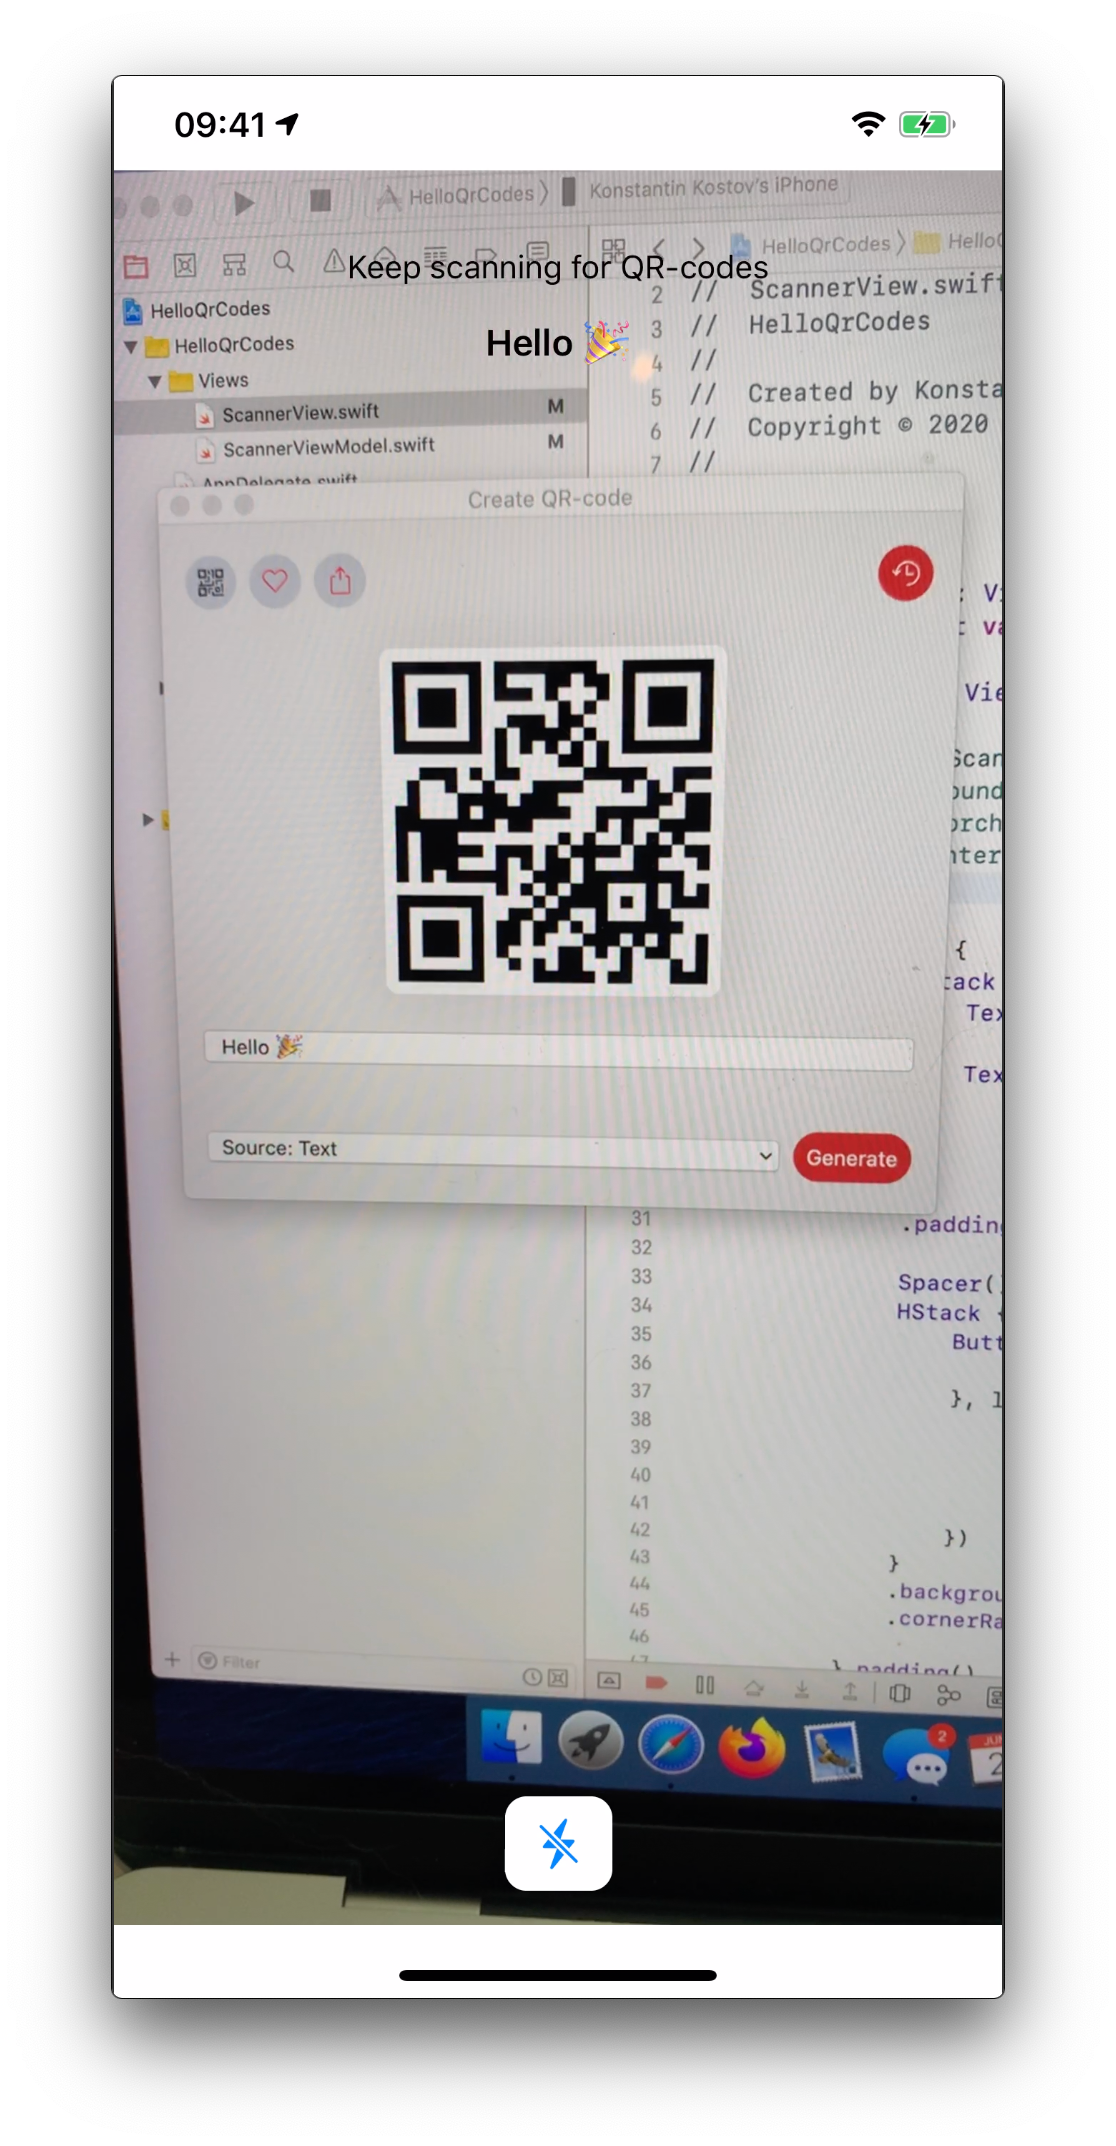
The lastQrCode field will hold the string value of the last detected QR-code value. When the user is scanning, this field will update to the last QR-code scanned.
lastQrCode字段将保存最后检测到的QR码值的字符串值。 用户扫描时,此字段将更新为最后扫描的QR码。
Finally a function onFoundQrCode which our QrCodeScanner is going to call whenever a new QR-code has been detected.
最后一个功能onFoundQrCode ,我们的QrCodeScanner是怎么回事时已检测到新的QR码来调用。
Now let’s create the ScannerView layout
现在让我们创建ScannerView布局
We are going to use a ZStack to create a layout where the Scanner showing the camera view will be seen at the back, taking the entire screen and on top of it, we are going to layout some interface elements like the balloon with the recently scanned QR-code or the torch button.
我们将使用ZStack来创建一个布局,在该布局中,可以在背面看到显示摄像机视图的Scanner,并占据整个屏幕,并在其顶部,我们将使用最近扫描的内容来布局一些界面元素,例如气球QR码或手电筒按钮。
关于相机视图 (About the Camera View)
We are going to create a View which shows the feed from the device camera. Ideally, we also want to be able to position the Camera View using SwiftUI.
我们将创建一个视图,该视图显示来自设备相机的提要。 理想情况下,我们还希望能够使用SwiftUI定位Camera View。
Most of the functionality we are going to use comes from the AVFoundation framework. For presently it doesn’t offer any ready made SwiftUI views, we are going to create a traditional UIView and embed it as a UIViewRepresentable in our SwiftUI app.
我们将要使用的大多数功能来自AVFoundation框架。 目前,它不提供任何现成的SwiftUI视图,我们将创建一个传统的UIView并将其作为UIViewRepresentable嵌入到我们的SwiftUI应用中。
We are going to setup a AVCaptureSession which will use the device back camera as an input and a AVCaptureMetadataOutput as an output, allowing us to receive a stream of metadata objects recognised from the camera input. Those metadata objects are the actual QR-code values we are aiming to gather.
我们将设置一个AVCaptureSession ,它将使用设备后置摄像头作为输入,将AVCaptureMetadataOutput用作输出,从而使我们能够接收从摄像头输入中识别出的元数据对象流。 这些元数据对象是我们旨在收集的实际QR码值。
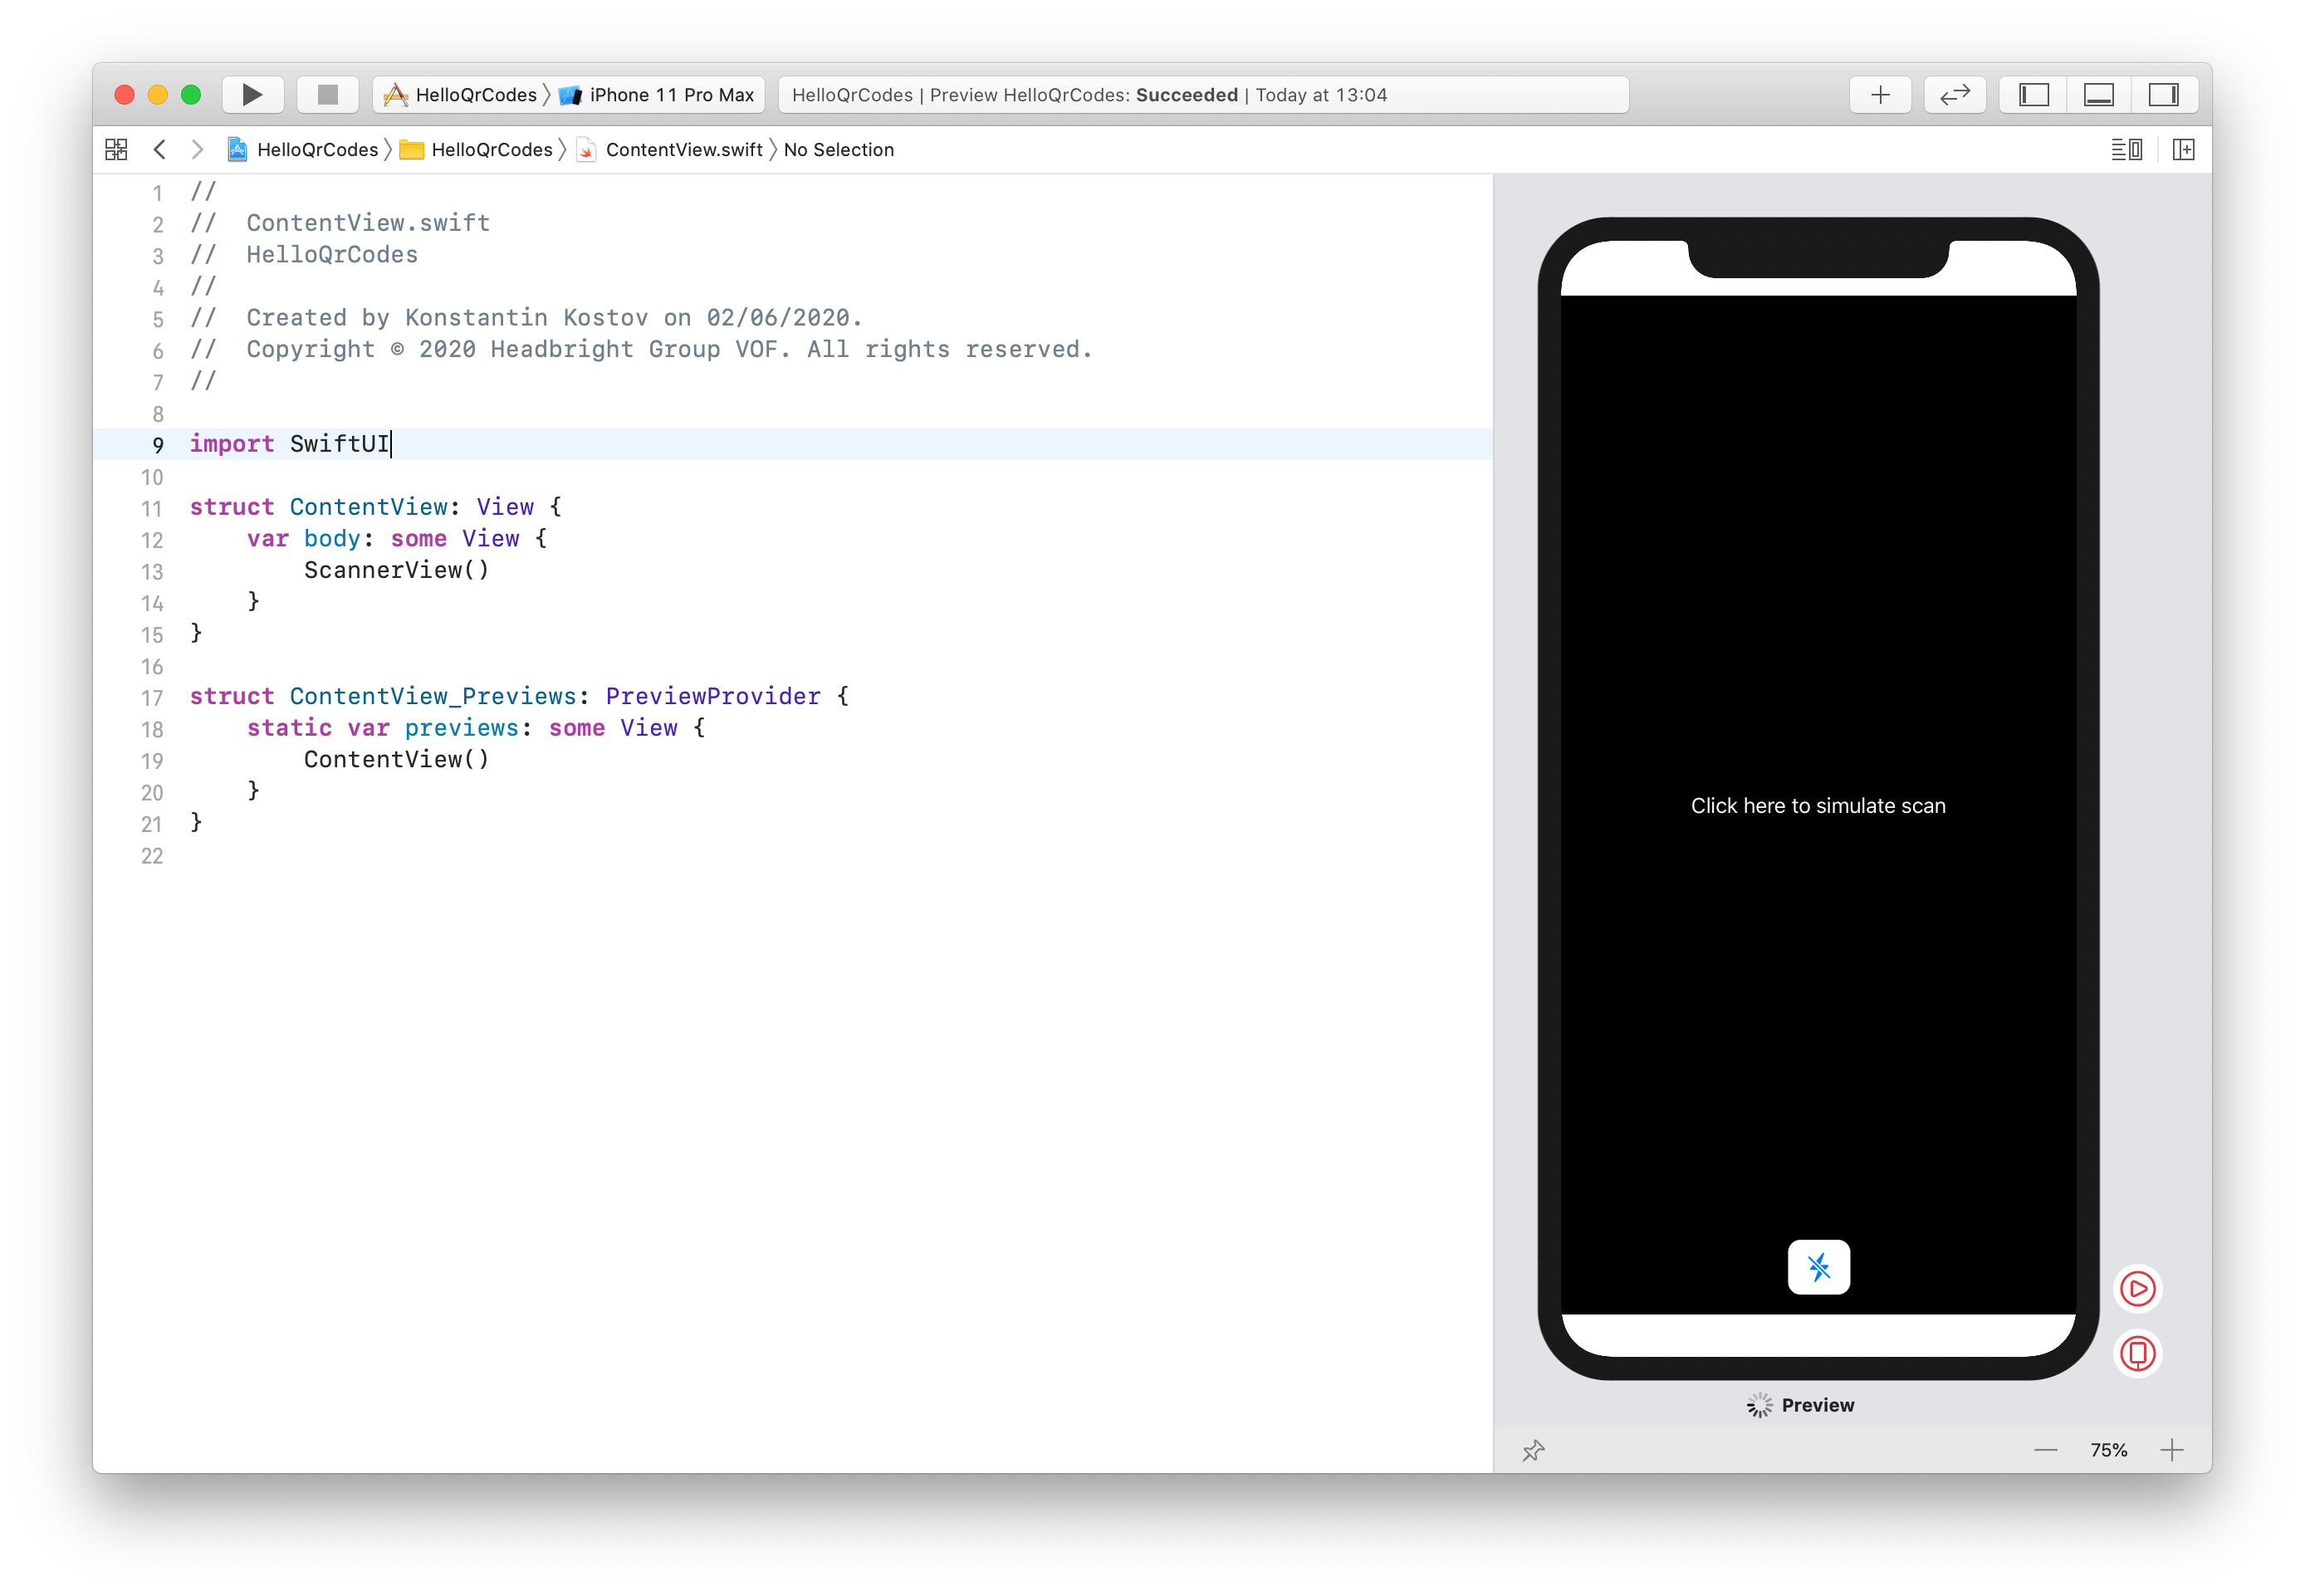
Since we are going to use the camera view in SwiftUI layouts, it will be ideal if the implementation plays nice with the simulator (so the SwiftUI preview function will work). Since the simulator lacks a physical camera device, we are going to embed a fallback in the camera view.
由于我们将在SwiftUI布局中使用摄影机视图,因此如果实现与模拟器完美配合将是理想的选择(因此SwiftUI预览功能将起作用)。 由于模拟器缺少物理相机设备,因此我们将在相机视图中嵌入一个备用。
代表 (The Delegate)
The delegate will be responsible for handling the metadata output, checking if a QR-code was found and informing the parent View of that QR-code value.
委托人将负责处理元数据输出,检查是否找到QR码,并将该QR码值通知父视图。
Most notably, our delegate object will adopt the AVCaptureMetadataOutputObjectsDelegate protocol in order to listen for new metadata objects which were detected in the camera feed.
最值得注意的是,我们的委托对象将采用AVCaptureMetadataOutputObjectsDelegate协议,以侦听在相机供稿中检测到的AVCaptureMetadataOutputObjectsDelegate数据对象。
The delegate will also take advantage of the scanning interval we prepared for in our View Model. As long as the capture session is active and a QR-code image is in view of the camera feed, new metadata objects will be constantly detected. For this, we are going to skip frames and only notify the parent view once per scanning interval.
委托还将利用我们在视图模型中准备的扫描间隔。 只要捕获会话处于活动状态并且QR码图像在摄像机馈送的视角下,就会不断检测到新的元数据对象。 为此,我们将跳过帧,并且每个扫描间隔仅通知一次父视图。
相机预览 (The CameraPreview)
The camera preview is the UIView we are going to use to show a live feed from the camera (or a simulated value for the simulator). This is a UIKit view which will eventually be presented using a UIViewRepresentable in our SwiftUI layout.
相机预览是UIView我们将使用它来显示相机的实时供稿(或模拟器的模拟值)。 这是一个UIKit视图,最终将在我们的SwiftUI布局中使用UIViewRepresentable进行呈现。
The view is created for a given AVCaptureSession and includes a AVCaptureVideoPreviewLayer which is based on CoreAnimation and enables us to preview the visual output from the camera session. This is what the user will eventually see as a “camera preview”. When the camera is not available, we are going to substitute the vide preview with a simple UILabel showing the mock data content we’ve provided.
该视图是为给定的AVCaptureSession创建的,并包括一个基于CoreAnimation的AVCaptureVideoPreviewLayer ,使我们能够预览摄像头会话的视觉输出。 这就是用户最终将看到的“相机预览”。 当摄像机不可用时,我们将用一个简单的UILabel代替视频预览,该UILabel显示我们提供的模拟数据内容。
This means a QR-code scan can be “simulated” during preview or live view in Xcode, the simulator or a UI test.
这意味着可以在Xcode,模拟器或UI测试的预览或实时取景期间“模拟” QR码扫描。
几乎在那里,创建UIViewRepresentable (Almost there, creating the UIViewRepresentable)
The last piece we need is a way to show the CameraPreview view in SwiftUI. This can be achieved by implementing the framework-provided UIViewRepresentable protocol.
我们需要的最后一块是在SwiftUI中显示CameraPreview视图的方法。 这可以通过实现框架提供的UIViewRepresentable协议来实现。
The purpose of this protocol is for us to sort of translate the SwiftUI state and lifecycle events to UIKit. For example, in SwiftUI views are often destroyed and recreated when their state changes while in UIKit a UIView is usually kept around and updated.
该协议的目的是让我们将SwiftUI状态和生命周期事件转换为UIKit。 例如,在SwiftUI中,视图的状态更改时通常会销毁并重新创建视图,而在UIKit中,通常会保留并更新UIView。
The bare minimum we are going to need is:
我们需要的最低要求是:
Create a CameraView and associate it with a
AVCaptureSession.创建一个CameraView并将其与
AVCaptureSession关联。- Check if we are running on a real device and if it is the case, request permission to access the camera. 检查我们是否在真实设备上运行,如果是,请请求访问摄像机的权限。
Remember to add the NSCameraUsageDescription key to the Info.plist file otherwise using the camera will result in a crash.
请记住将 NSCameraUsageDescription 键 添加 到 Info.plist 文件,否则使用相机会导致崩溃。
- When the SwiftUI view is updated, we need to make sure the CameraView will also update its layout. 更新SwiftUI视图时,我们需要确保CameraView也将更新其布局。
- We need to correctly dispose of the capture session when SwiftUI is preparing to remove and destroy the QrCodeScannerView. 当SwiftUI准备删除和销毁QrCodeScannerView时,我们需要正确处理捕获会话。
Let’s tweak the QrCodeScannerView with the following additions:
让我们对QrCodeScannerView进行以下调整:
- The ability to request permission to use the camera 要求许可使用相机的能力
- The ability to setup the scanning interval from the SwiftUI view as a modifier. 从SwiftUI视图设置扫描间隔作为修改器的功能。
- The ability to set the mock data for use during simulation or UI Testing. 设置模拟数据以在仿真或UI测试期间使用的能力。
- The ability to control the torch light of the device. 控制设备的手电筒的能力。
Here is the complete implementation of the scanner view:
这是扫描器视图的完整实现:
结束 (The End)
Now we can use the QrCodeScannerView in the SwiftUI layout. Replace the Text view with the following:
现在我们可以在SwiftUI布局中使用QrCodeScannerView了。 将文本视图替换为以下内容:
QrCodeScannerView()
.found(r: self.viewModel.onFoundQrCode)
.torchLight(isOn: self.viewModel.torchIsOn)
.interval(delay: self.viewModel.scanInterval)
Tadaa
多田a
翻译自: https://medium.com/dev-genius/camera-preview-and-a-qr-code-scanner-in-swiftui-48b111155c66
qr码是二维码码