SpringMVC+Spring+Mybatis框架整合MQTT通信协议+ActiveMQ作为中间件进行消息的发布与订阅_mqtt +activemq-程序员宅基地
技术标签: ActiveMQ学习 SpringMVC+Spring+Mybatis ActiveMQ Mqttt通信协议
最近做了一个小项目,简单描述下项目结构,主要是java与单片机进行通信,为了实现通信可以采用中间件和http的方式,但是本人因为最近在学习ActiveMQ,所以更加偏向前者,最终确定了采用消息中间件的方式进行通信。
首先完成的步骤分为这两步:
1、单片机采用MQTT的通信协议将一个消息发送到一个消息中间件(本人采用ActiveMQ,也可以采用其他的消息中间件),这里需要注意下MQTT只能采用发布/订阅的模式进行消息传输。所以单边机将会发送一个带有消息体的主题到ActiveMQ中,
2、JAVA部分则对该主题进行订阅,监听消息。
而完成这两步,我现在有两种方案可供选择:
1、单片机部分采用MQTT协议将主题消息发布到队列中,java部分直接整合ActiveMQ,用ActiveMQ对主题消息进行订阅。
2、单片机部分采用MQTT协议将主题消息发布到队列中,java部分也采用MQTT协议进行处理,整合MQTT协议。
之后经过验证,还是采用了第二种方案,理由如下:采用方案1,单片机部分是采用MQTT协议进行发送,java部分接收消息,需要对消息进行处理,采用方案2可以直接接收消息内容。
若是采用方案1,则处理消息代码如下:
public void onMessage(Message message) {
	String responseXml = null;
	if (message instanceof BytesMessage) {
		ActiveMQBytesMessage bytesMessage = (ActiveMQBytesMessage) message;
		byte[] bys = null;
		try {
			bys = new byte[(int) bytesMessage.getBodyLength()];
			bytesMessage.readBytes(bys);
			responseXml = new String(bys);
			/*******此处为模拟数据******************/
			System.out.println("收到32单片机消息:" + responseXml);
		} catch (JMSException e) {
			e.printStackTrace();
		}
	} else {
		TextMessage bm = (TextMessage) message;
        try {
            responseXml = bm.getText();
            System.out.println("------------内容是:" + responseXml);
        } catch (JMSException e) {
            logger.error(e.getMessage(), e);
        }
	}

}
采用方案二:java部分采用SpringMVC+Spring+Mybatis框架(PS:网上SpringBoot+MQTT的资料很多)+MQTT
项目结构如下图所示
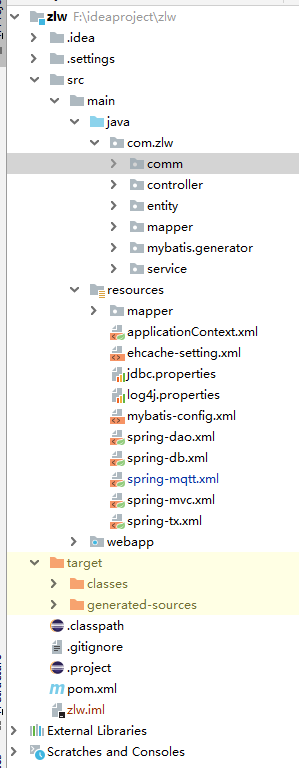
考虑项目代码可能多,所以只贴关键性代码,首先将一个ssm框架搭建好后就可以开始配置MQTT了,
1、引入jar包
        <!-- mqtt开始 -->
		<dependency>
			<groupId>org.springframework.integration</groupId>
			<artifactId>spring-integration-core</artifactId>
			<version>4.1.0.RELEASE</version>
		</dependency>
		<dependency>
			<groupId>org.springframework.integration</groupId>
			<artifactId>spring-integration-mqtt</artifactId>
			<version>4.1.0.RELEASE</version>
		</dependency>
		<dependency>
			<groupId>org.eclipse.paho</groupId>
			<artifactId>org.eclipse.paho.client.mqttv3</artifactId>
			<version>1.2.0</version>
		</dependency>
		<!-- mqtt结束 -->
2、配置spring-mqtt.xml文件
<?xml version="1.0" encoding="UTF-8"?>
<beans xmlns="http://www.springframework.org/schema/beans"
	xmlns:xsi="http://www.w3.org/2001/XMLSchema-instance"
	xmlns:int="http://www.springframework.org/schema/integration"
	xmlns:context="http://www.springframework.org/schema/context"
	xmlns:int-mqtt="http://www.springframework.org/schema/integration/mqtt"
	xsi:schemaLocation="
        http://www.springframework.org/schema/integration
        http://www.springframework.org/schema/integration/spring-integration-4.1.xsd
        http://www.springframework.org/schema/beans
        http://www.springframework.org/schema/beans/spring-beans-3.1.xsd
        http://www.springframework.org/schema/integration/mqtt
        http://www.springframework.org/schema/integration/mqtt/spring-integration-mqtt-4.1.xsd
        http://www.springframework.org/schema/context
        http://www.springframework.org/schema/context/spring-context-3.1.xsd  ">

	<!-- 引入配置文件- -->
	<bean id="propertyConfigurer"
		class="org.springframework.beans.factory.config.PropertyPlaceholderConfigurer">
		<property name="location" value="classpath:jdbc.properties" />
	</bean>

	<bean id="clientFactory"
		class="org.springframework.integration.mqtt.core.DefaultMqttPahoClientFactory">
		<property name="userName" value="${mqtt.username}" />
		<property name="password" value="${mqtt.password}" />
		<property name="serverURIs">
			<array>
				<value>${mqtt.serverURI1}</value>
			</array>
		</property>
	</bean>
	<bean id="mqttHandler" class="org.springframework.integration.mqtt.outbound.MqttPahoMessageHandler">
		<constructor-arg name="clientId" value="${mqtt.clientId}"></constructor-arg>
		<constructor-arg name="clientFactory" ref="clientFactory"></constructor-arg>
		<property name="async" value="${mqtt.async}" />
		<property name="defaultQos" value="${mqtt.defaultQos}" />
		<property name="completionTimeout" value="${mqtt.completionTimeout}" />
	</bean>

	<!-- 消息适配器  -->
	<int-mqtt:message-driven-channel-adapter
		id="mqttInbound" client-id="CID_20190617" url="${mqtt.serverURI1}"
		topics="${mqtt.topic}" qos="${mqtt.defaultQos}" client-factory="clientFactory"  auto-startup="true"
		send-timeout="${mqtt.completionTimeout}" channel="startCase" />
		<int:channel id="startCase" />

	<!-- 消息处理类 -->
	<int:service-activator id="startCaseService"
    input-channel="startCase" ref="mqttCaseService" method="startCase" />
    <!--这里是指向消息监听到后对消息处理的类-->
    <bean id="mqttCaseService" class="com.zlw.comm.mqtt.MqttService" />
</beans>
3、jdbc.properties配置MQTT相关参数
#-----------------------------------mqtt配置----------------------------
#MQTT-登陆名
mqtt.username=admin
#MQTT-密码
mqtt.password=admin
#级别
mqtt.defaultQos=1
#MQTT-地址----配你的MQ的地址与端口
mqtt.serverURI1=tcp://192.168.1.168:1883
#超时时间
mqtt.completionTimeout=20000
#MQTT-监听的主题
mqtt.topic=RECEIVE_DATA
#MQTT-客户端名称
mqtt.clientId=webClientId
#\u662F\u5426\u6E05\u9664\u4F1A\u8BDD
mqtt.cleanSession=false
#\u662F\u5426\u5F02\u6B65\u53D1\u9001
mqtt.async=true
#\u5FC3\u8DF3
mqtt.keepAliveInterval=30
4、消息处理类MqttService.java
public class MqttService {


	public void startCase(String message){
		JSONObject jb = FastJsonUtils.toJsonObject(message);
		System.out.println("收到32单片机消息:" + message);
    }

}
之后启动项目就可以了,当单片机部分发送主题为RECEIVE_DATA的消息主题时候,java这边就能监听到并将消息输出,
启动项目后,这里为了方便进行调试,在java端写了一个接口,进行接口测试,接口控制层代码
@Controller
@RequestMapping("mqtt")
public class MqttController extends BaseController{
	@Resource
	private MqttPahoMessageHandler mqttHandler;

    /**
     * @Title: sendHello
     * @Description: TOD
     * @author  : cxding
     * @param mqttToSave
     * @return
     */
    @RequestMapping(value = "/hello",method = RequestMethod.POST)
    @ResponseBody
    public Result<String> sendHello(String text){
       /* JSONObject jb = FastJsonUtils.toJsonObject(text);*/
        // 构建消息
        Message<String> messages = MessageBuilder.withPayload(text)
                .setHeader(MqttHeaders.TOPIC, "RECEIVE_DATA")
                .build();
        // 发送消息
        mqttHandler.handleMessage(messages);
    	/*String jsonstr = FastJsonUtils.getBeanToJson(mqttToSave.getRgFlowerPot());
    	mqttGateway.sendToMqtt(jsonstr,mqttToSave.getKdTopic());*/
        return new Result<String>("OK",true);
    }

}
采用postman进行接口测试:

查看消息队列

有一条消息并且已经被消费了
查看控制台

控制台成功打印出消息
项目已经打包上传,打包地址:https://download.csdn.net/download/qq_34178998/11251538
智能推荐
springboot接收枚举值的默认方式_springboot get请求怎么接收前端传递的枚举数字-程序员宅基地
文章浏览阅读1.6k次。测试代码:@PostMapping() public void test(@RequestBody Student student){ System.out.println(student.getLover().name()); }class Student{ private Lover lover; public Lover getLover() { return lover; } public void setLover_springboot get请求怎么接收前端传递的枚举数字
【数学建模笔记】【第七讲】多元线性回归分析(二):虚拟变量的设置以及交互项的解释,以及基于Stata的普通回归与标准化回归分析实例_stata两个虚拟变量的交互项-程序员宅基地
文章浏览阅读1.5w次,点赞24次,收藏120次。简单来说就是去量纲后的回归(因为你要比较不同变量之间的显著性的大小,那么带着量纲怎么比,所以先把量纲去掉,然后再比较)官话:为了更为精准的研究影响评价量的重要因素(去除量纲的影响),我们可考虑使用标准化回归系数。_stata两个虚拟变量的交互项
mysql-程序员宅基地
文章浏览阅读203次。有时候安装mysql后使用mysql命令时报错 Can't connect to MySQL server on localhost (10061),或者用net start mysql 时报服务名无效,一般是因为mysql服务没有启动。这时候可以用管理身份运行cmd.exe(注意必须是管理..._c:\program files\mysql\mysql server 5.6\bin>mysqld --install install/remove
亚信科技java笔试题答案_亚信笔试题卷以及答案.docx-程序员宅基地
文章浏览阅读6.2k次,点赞3次,收藏44次。亚信联创科技校园招聘B 卷考试时间60_分钟 _考试方式(闭)卷(本试卷满分 100 分,答案请写在答题卡上)请不要在问卷上答题或涂改,笔试结束后请务必交回试卷部分内容分值备注一、计算机基础40分C/C++语言基础40分技能部分二、二选一JAVA 语言基础40分三、数据库20分总分100 分第一部分——计算机基础一、选择题(每题 2 分,总分 40分)1.CPU 状态分为目态和管态两种..._亚信科技java实习笔试题
三线城市程序员的薪资待遇怎么样?我分享提高java技术水平的几个方法_三线城市学java-程序员宅基地
文章浏览阅读1.3k次。3年对一个程序员来说是非常重要的。像我自己本身就是做程序员的,目前的薪资待遇是13K左右,虽然在我所在的公司不是最高的,但在所在的这个城市的消费水平来说,除了日常的开支,包括房租、水电、伙食、人际交往等费用之外,还能留下一部分闲钱自己存起来。不同城市的薪资待遇是不一样的,这主要是由于当地的消费水平和经济发展水平不同,所以如果你想要更高的薪资待遇,就要考虑在一线城市或者经济发达的城市工作。一个有着丰富工作经验的程序员,他的技能水平、经验和能力都比没有经验的程序员更加出色,所以他们的薪资待遇也会更高一些。_三线城市学java
Unity渲染顺序相关学习_unity overlaycamera depth-程序员宅基地
文章浏览阅读975次。1、camera(depth越小,越先渲染)2、sorting layer(值越小,越先渲染)(下面还有个sortingOrder 值越小,越先渲染)3、渲染队列renderQueue(值越小,越先渲染)4、深度值(距离相机越近该值越小,越远该值越大。)..._unity overlaycamera depth
随便推点
软件测试风险追踪表_软件测试风险管理表格-程序员宅基地
文章浏览阅读430次。软件测试风险追踪表风险追踪表 项目名称: 填制人: 编号 风险描述 影响 风险等级 发生的可能性 应对策略 状态 责任人 备注 ..._软件测试风险管理表格
AAC ADTS封装实现-程序员宅基地
文章浏览阅读1.2k次。一、AAC音频格式种类有哪些AAC音频格式是一种由MPEG-4标准定义的有损音频压缩格式。AAC包含两种格式 ADIF(Audio Data Interchange Format音频数据交换格式)和ADTS(Audio Data transport Stream音频数据传输流)。ADIF特点:可以确定的找到音视频数据的开始,不需要进行在音视频数据流中间开始的解码,它的解码必须在明确的定义开始。应用场景:常用在磁盘文件中。ADTS特点:具有同步字的比特流,解码可以在这个流中任何位置开始。类似于mp_aac adts
Unity基础概念_unity基本概念-程序员宅基地
文章浏览阅读213次。像要使用Resouce类,必须创建一个 Resouce 文件夹,然后把需要的资源放进去,才可以在代码中设置路径进行访问_unity基本概念
在gitlab中指定自定义 CI/CD 配置文件_gitlab配置cicd-程序员宅基地
文章浏览阅读2.4k次。指定自定义 CI/CD 配置文件,顾名思义就是在项目中指定文件来代替默认的.gitlab-ci.yml文件的方式来运行流水线。以往我们在使用流水线的时候,都是默认将.gitlab-ci.yml文件存在在项目的跟路径下,但是我们也可以指定备用文件名路径,或者不想在每个项目中来维护这个yml文件,那么通过自定义 CI/CD 配置文件便可以实现。_gitlab配置cicd
mysql出现#1063 - Incorrect column specifier for column 'id'的解决方法_sql 错误 [1063] [42000]: incorrect column specifier -程序员宅基地
文章浏览阅读1w次。出现这个表示如果设置了自动增长,字段类型应该设置为int整型。_sql 错误 [1063] [42000]: incorrect column specifier for column 'id' incorrec
java getlength_JAVA RSA-DerInputStream.getLength(): lengthTag=127, too big.-程序员宅基地
文章浏览阅读1k次。RSA 加载公钥时: Caused by: java.security.InvalidKeyException: IOException: DerInputStream.getLength(): lengthTag=127, too big.加载公钥代码段:public static String getPubKeyByCer(String cerPath){String pubKey = "";..._java.security.invalidkeyexception: ioexception : derinputstream.getlength():