iPhone X适配_iphone home indicator适配-程序员宅基地
一、屏幕尺寸
1、规格:
iPhone X 的屏幕宽度同 iPhone 6、iPhone 6s、iPhone 7 和 iPhone 8 的 4.7 英寸屏幕宽度相同,即 375pt。屏幕垂直高度增加了 145pt,这意味着增加了 20% 的可视空间。

竖屏规格:1125px × 2436px (375pt × 812pt @3x)
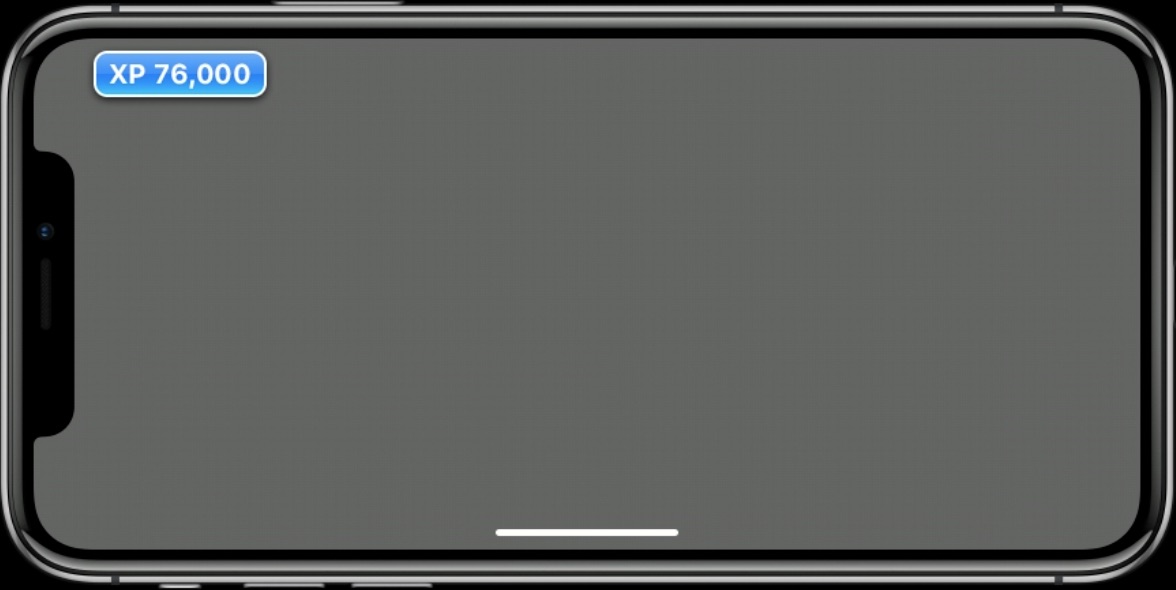
横屏规格:2436px × 1125px (812pt × 375pt @3x)
2、状态栏
高度增加了24像素

来电或者热点不会导致状态栏高度变化:


3、底部栏
TabBar高度增加了34像素


UITabBar: 0x7f94ca71a7b0; frame = (0 729; 375 83);
ToolBar高度不变,只是向上偏移了34像素

UIToolbar: 0x7f89c7c0b9e0; frame = (0 730; 375 48);
二、设计原则
1、所有设计的内容(不包括滚动列表)不要被屏幕圆角、上方传感器区域和下方home键指示器区域遮挡。

2、提供全屏用户体验,这里主要是指列表要延展到屏幕底部。

3、避免将可交互控件放在屏幕底部或者屏幕圆角区域,防止视觉遮挡和系统边缘手势冲突。

4、不要刻意遮挡和和引导屏幕的关键位置,比如用纯黑色的navigationbar和toolbar遮住上下区域,或者用闪亮的背景强调底部指示器区域。

上图为官方标准的黑色背景,注意不是纯黑色的,还能分辨传感器区域

三、SafeArea安全区域
安全区域是指在屏幕顶部和底部区域之间能正常显示内容的区域。顶部区域包括导航栏、状态栏或者传感器区域,底部区域包含Tabbar、工具栏或者home键指示器区域。
1、iPhoneX安全区域(全屏状态):


2、普通iPhone安全区域(包含所有状态):

3、安全区域布局SafeAreaLayoutGuide
/* The top of the safeAreaLayoutGuide indicates the unobscured top edge of the view (e.g, not behind
 the status bar or navigation bar, if present). Similarly for the other edges.
 */
@property(nonatomic,readonly,strong) UILayoutGuide *safeAreaLayouGuide API_AVAILABLE(ios(11.0),tvos(11.0));

ContentView的布局为:
UIView *contentView = [[UIView alloc] initWithFrame:CGRectZero];
contentView.backgroundColor = [UIColor blueColor];
[self.view addSubview:contentView];

contentView.translatesAutoresizingMaskIntoConstraints = NO;//使用autolayout
NSLayoutConstraint *top = [view.topAnchor constraintEqualToAnchor:self.view.safeAreaLayoutGuide.topAnchor];
NSLayoutConstraint *bottom = [view.bottomAnchor constraintEqualToAnchor:self.view.safeAreaLayoutGuide.bottomAnchor];
NSLayoutConstraint *left = [view.leadingAnchor constraintEqualToAnchor:self.view.safeAreaLayoutGuide.leftAnchor];
NSLayoutConstraint *right = [view.trailingAnchor constraintEqualToAnchor:self.view.safeAreaLayoutGuide.rightAnchor];
[NSLayoutConstraint activateConstraints:@[left, right, top, bottom]];
注意safeAreaLayoutGuide只适用于iOS11,如果是之前的版本则必须用topLayoutGuide和bottomLayoutGuide。

ContentView的布局为:
NSLayoutConstraint *top = [NSLayoutConstraint constraintWithItem:contentView attribute:NSLayoutAttributeTop relatedBy:NSLayoutRelationEqual toItem:self.topLayoutGuide attribute:NSLayoutAttributeBottom multiplier:1 constant:0];
NSLayoutConstraint *bottom = [NSLayoutConstraint constraintWithItem:contentView attribute:NSLayoutAttributeBottom relatedBy:NSLayoutRelationEqual toItem:self.bottomLayoutGuide attribute:NSLayoutAttributeTop multiplier:1 constant:0];
NSLayoutConstraint *left = [NSLayoutConstraint constraintWithItem:contentView attribute:NSLayoutAttributeLeft relatedBy:NSLayoutRelationEqual toItem:self.view attribute:NSLayoutAttributeLeft multiplier:1 constant:0];
NSLayoutConstraint *right = [NSLayoutConstraint constraintWithItem:contentView attribute:NSLayoutAttributeRight relatedBy:NSLayoutRelationEqual toItem:self.view attribute:NSLayoutAttributeRight multiplier:1 constant:0];
[NSLayoutConstraint activateConstraints:@[top, bottom, left, right]];
如果你的App支持target最低版本号是iOS9,可以使用锚点布局NSLayoutAnchor:
NSLayoutConstraint *top = [contentView.topAnchor constraintEqualToAnchor:self.topLayoutGuide.bottomAnchor];
NSLayoutConstraint *bottom = [contentView.bottomAnchor constraintEqualToAnchor:self.bottomLayoutGuide.topAnchor];
NSLayoutConstraint *left = [contentView.leftAnchor constraintEqualToAnchor:self.view.leftAnchor];
NSLayoutConstraint *right = [contentView.rightAnchor constraintEqualToAnchor:self.view.rightAnchor];
[NSLayoutConstraint activateConstraints:@[top, bottom, left, right]];
另外safeAreaLayoutGuide是UView的属性,而topLayoutGuide和bottomLayoutGuide是UIViewController的属性。
如果想读取SafeArea的frame,可以读取属性view.safeAreaLayoutGuide.layoutFrame或者view.safeAreaInsets.
例如:
safeAreaInsets:{44, 0, 83, 0}
layoutFrame:{ {0, 44}, {375, 685}}
注意需要在UIView的layoutsubviews或者UIViewController的viewDidLayoutSubviews之后读取。
4、SafeArea Storyboard
如果是低版本创建的storyboard可以在inspector栏找到“Use Safe Area Layout Guides”勾选即可。
修改前:

修改后:

备注:storyboad配置向下兼容,低版本也可以使用。
四、布局适配
1、自定义导航栏
如果你的项目存在导航栏界面push到全屏界面,或者手势滑动做很炫的过场动画,那么你可能会用到自定义导航栏NavigationBar,每个ViewController维护自身的Navigationbar实例。
UINavigationBar *navigationBar = [[UINavigationBar alloc] initWithFrame:CGRectZero];
navigationBar.backgroundColor = [UIColor blueColor];
navigationBar.barTintColor = [UIColor blueColor];
navigationBar.titleTextAttributes = @{
    NSForegroundColorAttributeName:[UIColor whiteColor]};
navigationBar.items = @[[UINavigationItem new]];
navigationBar.topItem.title = self.title;
[self.view addSubview:navigationBar];

navigationBar.translatesAutoresizingMaskIntoConstraints = NO;

if (@available(iOS 11.0, *)) {
    NSLayoutConstraint *left = [navigationBar.leftAnchor constraintEqualToAnchor:self.view.safeAreaLayoutGuide.leftAnchor];
    NSLayoutConstraint *right = [navigationBar.rightAnchor constraintEqualToAnchor:self.view.safeAreaLayoutGuide.rightAnchor];
    NSLayoutConstraint *top = [navigationBar.topAnchor constraintEqualToAnchor:self.view.safeAreaLayoutGuide.topAnchor];
    NSLayoutConstraint *height = [navigationBar.heightAnchor constraintEqualToConstant:44];
    [NSLayoutConstraint activateConstraints:@[left, right, top, height]];
}else{
    NSLayoutConstraint *left = [navigationBar.leftAnchor constraintEqualToAnchor:self.view.leftAnchor];
    NSLayoutConstraint *right = [navigationBar.rightAnchor constraintEqualToAnchor:self.view.rightAnchor];
    NSLayoutConstraint *top = [navigationBar.topAnchor constraintEqualToAnchor:self.topLayoutGuide.bottomAnchor];
    NSLayoutConstraint *height = [navigationBar.heightAnchor constraintEqualToConstant:44];
    [NSLayoutConstraint activateConstraints:@[left, right, top, height]];
}

导航栏背景未扩展到状态栏,正常应该显示蓝色。
解决方案:
设置Navigationbar的UIBarPositioningDelegate返回UIBarPositionTopAttached即可。
typedef NS_ENUM(NSInteger, UIBarPosition) {
    UIBarPositionAny = 0,
    UIBarPositionBottom = 1, // The bar is at the bottom of its local context, and directional decoration draws accordingly (e.g., shadow above the bar).
    UIBarPositionTop = 2, // The bar is at the top of its local context, and directional decoration draws accordingly (e.g., shadow below the bar)
    UIBarPositionTopAttached = 3, // The bar is at the top of the screen (as well as its local context), and its background extends upward—currently only enough for the status bar.
} NS_ENUM_AVAILABLE_IOS(7_0);
navigationBar.delegate = self;

- (UIBarPosition)positionForBar:(id <UIBarPositioning>)bar
{
    return UIBarPositionTopAttached;
}
修改后正常显示了:

备注:navigationbar扩展到statusbar的颜色为barTintColor的值。如果失效,检查下是否将translucent设置为NO,并且Navigationbar必须为添加到ViewController的一级subView。
自定义导航栏后发现SafeArea没有变化,这样设置contentview的时候会将navigationbar遮挡。
safeAreaInsets:{44, 0, 34, 0})
解决方案:设置additionalSafeAreaInsets
/* Custom container UIViewController subclasses can use this property to add to the overlay
 that UIViewController calculates for the safeAreaInsets for contained view controllers.
 */
@property(nonatomic) UIEdgeInsets additionalSafeAreaInsets API_AVAILABLE(ios(11.0), tvos(11.0));
设置该值后也要相应调整下导航栏的布局,之前是在SafeArea之内,现在要改为之外。
self.additionalSafeAreaInsets = UIEdgeInsetsMake(44, 0, 0, 0);
NSLayoutConstraint *left = [navigationBar.leftAnchor constraintEqualToAnchor:self.view.safeAreaLayoutGuide.leftAnchor];
NSLayoutConstraint *right = [navigationBar.rightAnchor constraintEqualToAnchor:self.view.safeAreaLayoutGuide.rightAnchor];
NSLayoutConstraint *bottom = [navigationBar.bottomAnchor constraintEqualToAnchor:self.view.safeAreaLayoutGuide.topAnchor];
NSLayoutConstraint *height = [navigationBar.heightAnchor constraintEqualToConstant:44];
[NSLayoutConstraint activateConstraints:@[left, right, bottom, height]];
可以看到安全区域也更新了:
safeAreaInsets:{88, 0, 34, 0}
2、自定义工具栏
可交互的固定组件是不能遮住home键指示器,需要放置在安全区域底部内。
CustomToolBar *toolbar = [[CustomToolBar alloc] initWithFrame:CGRectZero];
toolbar.backgroundColor = [UIColor blueColor];
[self.view addSubview:toolbar];

toolbar.translatesAutoresizingMaskIntoConstraints = NO;

if (@available(iOS 11.0, *)) {
    NSLayoutConstraint *bottom = [toolbar.bottomAnchor constraintEqualToAnchor:self.view.safeAreaLayoutGuide.bottomAnchor];
    NSLayoutConstraint *height = [toolbar.heightAnchor constraintEqualToConstant:48];
    NSLayoutConstraint *left = [toolbar.leftAnchor constraintEqualToAnchor:self.view.leftAnchor];
    NSLayoutConstraint *right = [toolbar.rightAnchor constraintEqualToAnchor:self.view.rightAnchor];
    [NSLayoutConstraint activateConstraints:@[bottom, height, left, right]];
}else{
    NSLayoutConstraint *bottom = [toolbar.bottomAnchor constraintEqualToAnchor:self.bottomLayoutGuide.topAnchor];
    NSLayoutConstraint *height = [toolbar.heightAnchor constraintEqualToConstant:48];
    NSLayoutConstraint *left = [toolbar.leftAnchor constraintEqualToAnchor:self.view.leftAnchor];
    NSLayoutConstraint *right = [toolbar.rightAnchor constraintEqualToAnchor:self.view.rightAnchor];
    [NSLayoutConstraint activateConstraints:@[bottom, height, left, right]];
}

放置在安全区域内导致Home键指示器区域背景留底了,怎么办?
解决方案:系统的UIToolBar会自动扩展背景颜色到底部,可以让Custombar继承UIToolBar,或者直接放置一个ToolBar的在底部当做背景也是可以的。注意高度不能超过48,否则失效。
UIToolbar *toolbar = [[UIToolbar alloc] initWithFrame:CGRectZero];
toolbar.backgroundColor = [UIColor blueColor];
toolbar.barTintColor = [UIColor blueColor];
[self.view addSubview:toolbar];
同样,你也可以设置additionalSafeAreaInsets,让安全区域限制在工具栏上方。
3、TableView布局
如果底部区域不存在可交互的固定组件,那么tableView需要延伸到屏幕底部。
if (@available(iOS 11.0, *)) {
    NSLayoutConstraint *top = [tableView.topAnchor constraintEqualToAnchor:self.view.safeAreaLayoutGuide.topAnchor];
    NSLayoutConstraint *bottom = [tableView.bottomAnchor constraintEqualToAnchor:self.view.bottomAnchor];
    NSLayoutConstraint *left = [tableView.leftAnchor constraintEqualToAnchor:self.view.leftAnchor];
    NSLayoutConstraint *right = [tableView.rightAnchor constraintEqualToAnchor:self.view.rightAnchor];
    [NSLayoutConstraint activateConstraints:@[top, bottom, left, right]];
} else {
    NSLayoutConstraint *top = [tableView.topAnchor constraintEqualToAnchor:self.topLayoutGuide.bottomAnchor];
    NSLayoutConstraint *bottom = [tableView.bottomAnchor constraintEqualToAnchor:self.view.bottomAnchor];
    NSLayoutConstraint *left = [tableView.leftAnchor constraintEqualToAnchor:self.view.leftAnchor];
    NSLayoutConstraint *right = [tableView.rightAnchor constraintEqualToAnchor:self.view.rightAnchor];
    [NSLayoutConstraint activateConstraints:@[top, bottom, left, right]];
}

尽管最后一个cell会被Home键指示器遮挡,将tableView向上滑动极限时,最后一个cell是显示在Home键指示器之上的。

4、横屏交互适配
主要涉及到视频播放的边缘交互按钮。
内容
内容只需放置在SafeArea之内。同样底部如果没有固定可交互组件也要延伸到屏幕底部。
交互按钮
屏幕角落边缘可交互按钮需要在SafeArea内部,并且还需再限制在layoutMargins之内(UIViewController属性)

/* -layoutMargins returns a set of insets from the edge of the view's bounds that denote a default spacing for laying out content.
If preservesSuperviewLayoutMargins is YES, margins cascade down the view tree, adjusting for geometry offsets, so that setting
the left value of layoutMargins on a superview will affect the left value of layoutMargins for subviews positioned close to the
left edge of their superview's bounds
 If your view subclass uses layoutMargins in its layout or drawing, override -layoutMarginsDidChange in order to refresh your
view if the margins change.
 On iOS 11.0 and later, please support both user interface layout directions by setting the directionalLayoutMargins property
instead of the layoutMargins property. After setting the directionalLayoutMargins property, the values in the left and right
fields of the layoutMargins property will depend on the user interface layout direction.
*/
@property (nonatomic) UIEdgeInsets layoutMargins NS_AVAILABLE_IOS(8_0);
效果如下:

safeAreaInsets:{0, 44, 21, 44}
layoutMargins:{0, 64, 21, 64}
五、Home键指示器隐藏
一般情况只有视频全屏播放和游戏界面需要设置自动隐藏,API如下:

@interface UIViewController (UIHomeIndicatorAutoHidden)

// Override to return a child view controller or nil. If non-nil, that view controller's home indicator auto-hiding will be used. If nil, self is used. Whenever the return value changes, -setNeedsHomeIndicatorAutoHiddenUpdate should be called.
- (nullable UIViewController *)childViewControllerForHomeIndicatorAutoHidden API_AVAILABLE(ios(11.0)) API_UNAVAILABLE(watchos, tvos);

// Controls the application's preferred home indicator auto-hiding when this view controller is shown.
- (BOOL)prefersHomeIndicatorAutoHidden API_AVAILABLE(ios(11.0)) API_UNAVAILABLE(watchos, tvos);

// This should be called whenever the return values for the view controller's home indicator auto-hiding have changed.
- (void)setNeedsUpdateOfHomeIndicatorAutoHidden API_AVAILABLE(ios(11.0)) API_UNAVAILABLE(watchos, tvos);

@end
打开自动隐藏功能
- (BOOL)prefersHomeIndicatorAutoHidden
{
    return YES;
}
如果想手动控制隐藏功能,动态返回一个值,并且在更新的时候调用setNeedsUpdateOfHomeIndicatorAutoHidden。
- (BOOL)prefersHomeIndicatorAutoHidden
{
    return  _homeIndicatorAutoHidden;
}

_homeIndicatorAutoHidden = NO;
[self setNeedsUpdateOfHomeIndicatorAutoHidden];
六、屏幕边缘手势冲突
有时候你的App需要控制从状态栏下拉或者底部栏上滑,这个会跟系统的下拉通知中心手势和上滑控制中心手势冲突。
如果你要优先自己处理手势可以将系统手势延迟。
@interface UIViewController (UIScreenEdgesDeferringSystemGestures)

// Override to return a child view controller or nil. If non-nil, that view controller's screen edges deferring system gestures will be used. If nil, self is used. Whenever the return value changes, -setNeedsScreenEdgesDeferringSystemGesturesUpdate should be called.
- (nullable UIViewController *)childViewControllerForScreenEdgesDeferringSystemGestures API_AVAILABLE(ios(11.0)) API_UNAVAILABLE(watchos, tvos);

// Controls the application's preferred screen edges deferring system gestures when this view controller is shown. Default is UIRectEdgeNone.
- (UIRectEdge)preferredScreenEdgesDeferringSystemGestures API_AVAILABLE(ios(11.0)) API_UNAVAILABLE(watchos, tvos);

// This should be called whenever the return values for the view controller's screen edges deferring system gestures have changed.
- (void)setNeedsUpdateOfScreenEdgesDeferringSystemGestures API_AVAILABLE(ios(11.0)) API_UNAVAILABLE(watchos, tvos);

@end
例如:
- (UIRectEdge)preferredScreenEdgesDeferringSystemGestures
{
    return UIRectEdgeTop;
}
设置后下拉状态栏只会展示指示器,继续下拉才能将通知中心拉出来。如果返回UIRectEdgeNone则会直接下拉出来。
七、开源库Masonry更新SafeArea支持
想必有不少开发受够了苹果Autolayout繁琐的API调用,Mansonry的出现完美解决了这一大痛点。
比如原生代码调用:
NSLayoutConstraint *top = [NSLayoutConstraint constraintWithItem:contentView attribute:NSLayoutAttributeTop relatedBy:NSLayoutRelationEqual toItem:self.view attribute:NSLayoutAttributeTop multiplier:1 constant:0];
NSLayoutConstraint *bottom = [NSLayoutConstraint constraintWithItem:contentView attribute:NSLayoutAttributeBottom relatedBy:NSLayoutRelationEqual toItem:self.view attribute:NSLayoutAttributeBottom multiplier:1 constant:0];
NSLayoutConstraint *left = [NSLayoutConstraint constraintWithItem:contentView attribute:NSLayoutAttributeLeft relatedBy:NSLayoutRelationEqual toItem:self.view attribute:NSLayoutAttributeLeft multiplier:1 constant:0];
NSLayoutConstraint *right = [NSLayoutConstraint constraintWithItem:contentView attribute:NSLayoutAttributeRight relatedBy:NSLayoutRelationEqual toItem:self.view attribute:NSLayoutAttributeRight multiplier:1 constant:0];
[NSLayoutConstraint activateConstraints:@[top, bottom, left, right]];
使用masonry后:
[contentView mas_makeConstraints:^(MASConstraintMaker *make) {
    make.top.bottom.left.right.equalTo(self.view);
}]
代码简洁高下立判。
支持SafeArea需要更新到V1.1.0版本

适配代码示例:
- 原生代码:
if (@available(iOS 11.0, *)) { NSLayoutConstraint *top = [contentView.topAnchor constraintEqualToAnchor:self.view.safeAreaLayoutGuide.topAnchor]; NSLayoutConstraint *bottom = [contentView.bottomAnchor constraintEqualToAnchor:self.view.safeAreaLayoutGuide.bottomAnchor]; NSLayoutConstraint *left = [contentView.leftAnchor constraintEqualToAnchor:self.view.safeAreaLayoutGuide.leftAnchor]; NSLayoutConstraint *right = [contentView.rightAnchor constraintEqualToAnchor:self.view.safeAreaLayoutGuide.rightAnchor]; [NSLayoutConstraint activateConstraints:@[top, bottom, left, right]]; } else { NSLayoutConstraint *top = [contentView.topAnchor constraintEqualToAnchor:self.topLayoutGuide.bottomAnchor]; NSLayoutConstraint *bottom = [contentView.bottomAnchor constraintEqualToAnchor:self.bottomLayoutGuide.topAnchor]; NSLayoutConstraint *left = [contentView.leftAnchor constraintEqualToAnchor:self.view.leftAnchor]; NSLayoutConstraint *right = [contentView.rightAnchor constraintEqualToAnchor:self.view.rightAnchor]; [NSLayoutConstraint activateConstraints:@[top, bottom, left, right]]; }[contentView mas_makeConstraints:^(MASConstraintMaker *make) { if (@available(iOS 11.0, *)) { make.top.equalTo(self.view.mas_safeAreaLayoutGuideTop); make.bottom.equalTo(self.view.mas_safeAreaLayoutGuideBottom); make.left.equalTo(self.view.mas_safeAreaLayoutGuideLeft); make.right.equalTo(self.view.mas_safeAreaLayoutGuideRight); }else{ make.top.equalTo(self.mas_topLayoutGuideBottom); make.bottom.equalTo(self.mas_bottomLayoutGuideTop); make.left.equalTo(self.view); make.right.equalTo(self.view); } }];
参考教程:
4、原文链接
应用实例
底部TabBar处理
本例让Custombar继承UIToolBar,但是在 iOS11 上就有点击无响应的问题,解决方案 在实际应用中发现在Custombar初始化方法中
- (instancetype)initWithFrame:(CGRect)frame
{
    //ios11 新增的UIToolbarContentView移到自定义控件之下
    self = [super initWithFrame:frame];
    if (self) {
        [self layoutIfNeeded];
        self.backgroundColor = [UIColor greenColor];
        self.barTintColor = [UIColor yellowColor];

        [self addSubview:self.button];
    }
    return self;
}
这样写才有效果。
智能推荐
什么是内部类?成员内部类、静态内部类、局部内部类和匿名内部类的区别及作用?_成员内部类和局部内部类的区别-程序员宅基地
文章浏览阅读3.4k次,点赞8次,收藏42次。一、什么是内部类?or 内部类的概念内部类是定义在另一个类中的类;下面类TestB是类TestA的内部类。即内部类对象引用了实例化该内部对象的外围类对象。public class TestA{ class TestB {}}二、 为什么需要内部类?or 内部类有什么作用?1、 内部类方法可以访问该类定义所在的作用域中的数据,包括私有数据。2、内部类可以对同一个包中的其他类隐藏起来。3、 当想要定义一个回调函数且不想编写大量代码时,使用匿名内部类比较便捷。三、 内部类的分类成员内部_成员内部类和局部内部类的区别
分布式系统_分布式系统运维工具-程序员宅基地
文章浏览阅读118次。分布式系统要求拆分分布式思想的实质搭配要求分布式系统要求按照某些特定的规则将项目进行拆分。如果将一个项目的所有模板功能都写到一起,当某个模块出现问题时将直接导致整个服务器出现问题。拆分按照业务拆分为不同的服务器,有效的降低系统架构的耦合性在业务拆分的基础上可按照代码层级进行拆分(view、controller、service、pojo)分布式思想的实质分布式思想的实质是为了系统的..._分布式系统运维工具
用Exce分析l数据极简入门_exce l趋势分析数据量-程序员宅基地
文章浏览阅读174次。1.数据源准备2.数据处理step1:数据表处理应用函数:①VLOOKUP函数; ② CONCATENATE函数终表:step2:数据透视表统计分析(1) 透视表汇总不同渠道用户数, 金额(2)透视表汇总不同日期购买用户数,金额(3)透视表汇总不同用户购买订单数,金额step3:讲第二步结果可视化, 比如, 柱形图(1)不同渠道用户数, 金额(2)不同日期..._exce l趋势分析数据量
宁盾堡垒机双因素认证方案_horizon宁盾双因素配置-程序员宅基地
文章浏览阅读3.3k次。堡垒机可以为企业实现服务器、网络设备、数据库、安全设备等的集中管控和安全可靠运行,帮助IT运维人员提高工作效率。通俗来说,就是用来控制哪些人可以登录哪些资产(事先防范和事中控制),以及录像记录登录资产后做了什么事情(事后溯源)。由于堡垒机内部保存着企业所有的设备资产和权限关系,是企业内部信息安全的重要一环。但目前出现的以下问题产生了很大安全隐患:密码设置过于简单,容易被暴力破解;为方便记忆,设置统一的密码,一旦单点被破,极易引发全面危机。在单一的静态密码验证机制下,登录密码是堡垒机安全的唯一_horizon宁盾双因素配置
谷歌浏览器安装(Win、Linux、离线安装)_chrome linux debian离线安装依赖-程序员宅基地
文章浏览阅读7.7k次,点赞4次,收藏16次。Chrome作为一款挺不错的浏览器,其有着诸多的优良特性,并且支持跨平台。其支持(Windows、Linux、Mac OS X、BSD、Android),在绝大多数情况下,其的安装都很简单,但有时会由于网络原因,无法安装,所以在这里总结下Chrome的安装。Windows下的安装:在线安装:离线安装:Linux下的安装:在线安装:离线安装:..._chrome linux debian离线安装依赖
烤仔TVの尚书房 | 逃离北上广?不如押宝越南“北上广”-程序员宅基地
文章浏览阅读153次。中国发达城市榜单每天都在刷新,但无非是北上广轮流坐庄。北京拥有最顶尖的文化资源,上海是“摩登”的国际化大都市,广州是活力四射的千年商都。GDP和发展潜力是衡量城市的数字指...
随便推点
java spark的使用和配置_使用java调用spark注册进去的程序-程序员宅基地
文章浏览阅读3.3k次。前言spark在java使用比较少,多是scala的用法,我这里介绍一下我在项目中使用的代码配置详细算法的使用请点击我主页列表查看版本jar版本说明spark3.0.1scala2.12这个版本注意和spark版本对应,只是为了引jar包springboot版本2.3.2.RELEASEmaven<!-- spark --> <dependency> <gro_使用java调用spark注册进去的程序
汽车零部件开发工具巨头V公司全套bootloader中UDS协议栈源代码,自己完成底层外设驱动开发后,集成即可使用_uds协议栈 源代码-程序员宅基地
文章浏览阅读4.8k次。汽车零部件开发工具巨头V公司全套bootloader中UDS协议栈源代码,自己完成底层外设驱动开发后,集成即可使用,代码精简高效,大厂出品有量产保证。:139800617636213023darcy169_uds协议栈 源代码
AUTOSAR基础篇之OS(下)_autosar 定义了 5 种多核支持类型-程序员宅基地
文章浏览阅读4.6k次,点赞20次,收藏148次。AUTOSAR基础篇之OS(下)前言首先,请问大家几个小小的问题,你清楚:你知道多核OS在什么场景下使用吗?多核系统OS又是如何协同启动或者关闭的呢?AUTOSAR OS存在哪些功能安全等方面的要求呢?多核OS之间的启动关闭与单核相比又存在哪些异同呢?。。。。。。今天,我们来一起探索并回答这些问题。为了便于大家理解,以下是本文的主题大纲:[外链图片转存失败,源站可能有防盗链机制,建议将图片保存下来直接上传(img-JCXrdI0k-1636287756923)(https://gite_autosar 定义了 5 种多核支持类型
VS报错无法打开自己写的头文件_vs2013打不开自己定义的头文件-程序员宅基地
文章浏览阅读2.2k次,点赞6次,收藏14次。原因:自己写的头文件没有被加入到方案的包含目录中去,无法被检索到,也就无法打开。将自己写的头文件都放入header files。然后在VS界面上,右键方案名,点击属性。将自己头文件夹的目录添加进去。_vs2013打不开自己定义的头文件
【Redis】Redis基础命令集详解_redis命令-程序员宅基地
文章浏览阅读3.3w次,点赞80次,收藏342次。此时,可以将系统中所有用户的 Session 数据全部保存到 Redis 中,用户在提交新的请求后,系统先从Redis 中查找相应的Session 数据,如果存在,则再进行相关操作,否则跳转到登录页面。此时,可以将系统中所有用户的 Session 数据全部保存到 Redis 中,用户在提交新的请求后,系统先从Redis 中查找相应的Session 数据,如果存在,则再进行相关操作,否则跳转到登录页面。当数据量很大时,count 的数量的指定可能会不起作用,Redis 会自动调整每次的遍历数目。_redis命令
URP渲染管线简介-程序员宅基地
文章浏览阅读449次,点赞3次,收藏3次。URP的设计目标是在保持高性能的同时,提供更多的渲染功能和自定义选项。与普通项目相比,会多出Presets文件夹,里面包含着一些设置,包括本色,声音,法线,贴图等设置。全局只有主光源和附加光源,主光源只支持平行光,附加光源数量有限制,主光源和附加光源在一次Pass中可以一起着色。URP:全局只有主光源和附加光源,主光源只支持平行光,附加光源数量有限制,一次Pass可以计算多个光源。可编程渲染管线:渲染策略是可以供程序员定制的,可以定制的有:光照计算和光源,深度测试,摄像机光照烘焙,后期处理策略等等。_urp渲染管线