FFmpeg 之音视频解码与音视频同步(二)-程序员宅基地
public static void registerCallback(AVCallback callback) {
sAVCallback = callback;
}
static {
System.loadLibrary(“avfilter-5”);
System.loadLibrary(“avdevice-56”);
System.loadLibrary(“yuv”);
System.loadLibrary(“avutil-54”);
System.loadLibrary(“swresample-1”);
System.loadLibrary(“avcodec-56”);
System.loadLibrary(“avformat-56”);
System.loadLibrary(“swscale-3”);
System.loadLibrary(“postproc-53”);
System.loadLibrary(“native-lib”);
}
/**
-
解码视频中的视频压缩数据
-
@param input_file_path 输入的视频文件路径
-
@param output_file_path 视频压缩数据解码后输出的 YUV 文件路径
*/
public static native void videoDecode(String input_file_path, String output_file_path);
/**
-
显示视频视频解码后像素数据
-
@param input 输入的视频文件路径
-
@param surface 用于显示视频视频解码后的 RGBA 像素数据
*/
public static native void videoRender(String input, Surface surface);
/**
-
解码视频中的音频压缩数据
-
@param input 输入的视频文件路径
-
@param output 音频压缩数据解码后输出的 PCM 文件路径
*/
public static native void audioDecode(String input, String output);
/**
-
播放视频中的音频数据
-
@param input 输入的视频文件路径
*/
public static native void audioPlay(String input);
/**
- 创建一个 AudioTrack 对象,用于播放音频,在 Native 层中调用。
*/
public static AudioTrack createAudioTrack(int sampleRate, int num_channel) {
int audioFormat = AudioFormat.ENCODING_PCM_16BIT;
Log.i(TAG, “声道数:” + num_channel);
int channelConfig;
if (num_channel == 1) {
channelConfig = android.media.AudioFormat.CHANNEL_OUT_MONO;
} else if (num_channel == 2) {
channelConfig = android.media.AudioFormat.CHANNEL_OUT_STEREO;
} else {
channelConfig = android.media.AudioFormat.CHANNEL_OUT_STEREO;
}
int bufferSize = AudioTrack.getMinBufferSize(sampleRate, channelConfig, audioFormat);
AudioTrack audioTrack = new AudioTrack(
AudioManager.STREAM_MUSIC,
sampleRate, channelConfig,
audioFormat,
bufferSize, AudioTrack.MODE_STREAM);
return audioTrack;
}
public interface AVCallback {
void onFinish();
}
}
MySurfaceView.java
/**
-
author: haohao
-
time: 2017/12/20
-
mail: [email protected]
-
desc: MySurfaceView
*/
public class MySurfaceView extends SurfaceView {
public MySurfaceView(Context context) {
super(context);
}
public MySurfaceView(Context context, AttributeSet attrs) {
super(context, attrs);
}
public MySurfaceView(Context context, AttributeSet attrs, int defStyleAttr) {
super(context, attrs, defStyleAttr);
}
private void init(){
// 设置像素绘制格式为 RGBA_8888
SurfaceHolder holder = getHolder();
holder.setFormat(PixelFormat.RGBA_8888);
}
}
activity_main.xml
<?xml version="1.0" encoding="utf-8"?><FrameLayout xmlns:android=“http://schemas.android.com/apk/res/android”
xmlns:app=“http://schemas.android.com/apk/res-auto”
xmlns:tools=“http://schemas.android.com/tools”
android:layout_width=“match_parent”
android:layout_height=“match_parent”>
<com.haohao.ffmpeg.MySurfaceView
android:id=“@+id/my_surface_view”
android:layout_width=“match_parent”
android:layout_height=“match_parent” />
<LinearLayout
android:layout_width=“match_parent”
android:layout_height=“wrap_content”
android:orientation=“vertical”>
<LinearLayout
android:layout_width=“match_parent”
android:layout_height=“wrap_content”
android:alpha=“0.7”
android:orientation=“horizontal”>
<Button
android:id=“@+id/video_decode_btn”
android:layout_width=“0dp”
android:layout_weight=“1”
android:layout_height=“wrap_content”
android:text=“视频解码” />
<Button
android:id=“@+id/video_render_btn”
android:layout_width=“0dp”
android:layout_weight=“1”
android:layout_height=“wrap_content”
android:text=“视频渲染” />
<LinearLayout
android:layout_width=“match_parent”
android:layout_height=“wrap_content”
android:alpha=“0.7”
android:orientation=“horizontal”>
<Button
android:id=“@+id/audio_decode_btn”
android:layout_width=“0dp”
android:layout_weight=“1”
android:layout_height=“wrap_content”
android:text=“音频解码” />
<Button
android:id=“@+id/audio_play_btn”
android:layout_width=“0dp”
android:layout_weight=“1”
android:layout_height=“wrap_content”
android:text=“音频播放” />
MainActivity.java
public class MainActivity extends AppCompatActivity implements View.OnClickListener, AVUtils.AVCallback {
private static final String TAG = “MainActivity”;
private static final String BASE_PATH = Environment.getExternalStorageDirectory().getAbsolutePath() + File.separatorChar;
private String input_video_file_path = BASE_PATH
- “input.mp4”;
private String output_video_file_path = BASE_PATH
- “output.yuv”;
private String input_audio_file_path = BASE_PATH
- “hello.mp3”;
private String output_audio_file_path = BASE_PATH
- “hello.pcm”;
private String video_src = BASE_PATH
- “ffmpeg.mp4”;
private Button mDecodeVideoBtn;
private Button mVideoRenderBtn;
private Button mAudioPlayBtn, mAudioDecodeBtn;
private ProgressDialog mProgressDialog;
private ExecutorService mExecutorService;
private MySurfaceView mySurfaceView;
@Override
protected void onCreate(Bundle savedInstanceState) {
super.onCreate(savedInstanceState);
setContentView(R.layout.activity_main);
if (Build.VERSION.SDK_INT >= Build.VERSION_CODES.M) {
requestPermissions(new String[]{Manifest.permission.READ_EXTERNAL_STORAGE, Manifest.permission.WRITE_EXTERNAL_STORAGE, Manifest.permission.MOUNT_UNMOUNT_FILESYSTEMS}, 0);
}
mDecodeVideoBtn = (Button)findViewById(R.id.video_decode_btn);
mVideoRenderBtn = (Button)findViewById(R.id.video_render_btn);
mAudioDecodeBtn = (Button) findViewById(R.id.audio_decode_btn);
mAudioPlayBtn = (Button)findViewById(R.id.audio_play_btn);
mySurfaceView = (MySurfaceView) findViewById(R.id.my_surface_view);
mDecodeVideoBtn.setOnClickListener(this);
mVideoRenderBtn.setOnClickListener(this);
mAudioDecodeBtn.setOnClickListener(this);
mAudioPlayBtn.setOnClickListener(this);
AVUtils.registerCallback(this);
mProgressDialog = new ProgressDialog(this);
mProgressDialog.setCanceledOnTouchOutside(false);
mExecutorService = Executors.newFixedThreadPool(2);
}
@Override
public void onClick(View view) {
int id = view.getId();
switch (id) {
case R.id.video_decode_btn:
mProgressDialog.setMessage(“正在解码…”);
mProgressDialog.show();
mExecutorService.submit(new Runnable() {
@Override
public void run() {
AVUtils.videoDecode(input_video_file_path, output_video_file_path);
}
});
break;
case R.id.video_render_btn:
mExecutorService.submit(new Runnable() {
@Override
public void run() {
AVUtils.videoRender(input_video_file_path, mySurfaceView.getHolder().getSurface());
}
});
break;
case R.id.audio_decode_btn:
mProgressDialog.setMessage(“正在解码…”);
mProgressDialog.show();
mExecutorService.submit(new Runnable() {
@Override
public void run() {
AVUtils.audioDecode(input_audio_file_path, output_audio_file_path);
}
});
break;
case R.id.audio_play_btn:
mExecutorService.submit(new Runnable() {
@Override
public void run() {
AVUtils.audioPlay(input_video_file_path);
}
});
break;
}
}
@Override
public void onFinish() {
runOnUiThread(new Runnable() {
@Override
public void run() {
if (mProgressDialog.isShowing()) {
mProgressDialog.dismiss();
}
Toast.makeText(MainActivity.this, “解码完成”, Toast.LENGTH_SHORT).show();
}
});
}
@Override
protected void onDestroy() {
super.onDestroy();
mExecutorService.shutdown();
}
}
nativelib.c
#include <jni.h>
#include <string.h>
#include <android/log.h>
#include <stdio.h>
#include <libavutil/time.h>
//编码
#include “include/libavcodec/avcodec.h”
//封装格式处理
#include “include/libavformat/avformat.h”
//像素处理
#include “include/libswscale/swscale.h”
#define LOGI(FORMAT, …) __android_log_print(ANDROID_LOG_INFO,“haohao”,FORMAT,##VA_ARGS);
#define LOGE(FORMAT, …) __android_log_print(ANDROID_LOG_ERROR,“haohao”,FORMAT,##VA_ARGS);
//中文字符串转换
jstring charsToUTF8String(JNIEnv *env, char *s) {
jclass string_cls = (*env)->FindClass(env, “java/lang/String”);
jmethodID mid = (*env)->GetMethodID(env, string_cls, “”, “([BLjava/lang/String;)V”);
jbyteArray jb_arr = (*env)->NewByteArray(env, strlen(s));
(*env)->SetByteArrayRegion(env, jb_arr, 0, strlen(s), s);
jstring charset = (*env)->NewStringUTF(env, “UTF-8”);
return (*env)->NewObject(env, string_cls, mid, jb_arr, charset);
}
JNIEXPORT void JNICALL
Java_com_haohao_ffmpeg_AVUtils_videoDecode(JNIEnv *env, jclass type, jstring input_,
jstring output_) {
//访问静态方法
jmethodID mid = (*env)->GetStaticMethodID(env, type, “onNativeCallback”, “()V”);
//需要转码的视频文件(输入的视频文件)
const char *input = (*env)->GetStringUTFChars(env, input_, 0);
const char *output = (*env)->GetStringUTFChars(env, output_, 0);
//注册所有组件
av_register_all();
//封装格式上下文,统领全局的结构体,保存了视频文件封装格式的相关信息
AVFormatContext *pFormatCtx = avformat_alloc_context();
//打开输入视频文件
if (avformat_open_input(&pFormatCtx, input, NULL, NULL) != 0) {
LOGE(“%s”, “无法打开输入视频文件”);
return;
}
//获取视频文件信息,例如得到视频的宽高
if (avformat_find_stream_info(pFormatCtx, NULL) < 0) {
LOGE(“%s”, “无法获取视频文件信息”);
return;
}
//获取视频流的索引位置
//遍历所有类型的流(音频流、视频流、字幕流),找到视频流
int v_stream_idx = -1;
int i = 0;
for (; i < pFormatCtx->nb_streams; i++) {
//判断视频流
if (pFormatCtx->streams[i]->codec->codec_type == AVMEDIA_TYPE_VIDEO) {
v_stream_idx = i;
break;
}
}
if (v_stream_idx == -1) {
LOGE(“%s”, “找不到视频流\n”);
return;
}
//根据视频的编码方式,获取对应的解码器
AVCodecContext *pCodecCtx = pFormatCtx->streams[v_stream_idx]->codec;
//根据编解码上下文中的编码 id 查找对应的解码器
AVCodec *pCodec = avcodec_find_decoder(pCodecCtx->codec_id);
if (pCodec == NULL) {
LOGE(“%s”, “找不到解码器,或者视频已加密\n”);
return;
}
//打开解码器,解码器有问题(比如说我们编译FFmpeg的时候没有编译对应类型的解码器)
if (avcodec_open2(pCodecCtx, pCodec, NULL) < 0) {
LOGE(“%s”, “解码器无法打开\n”);
return;
}
//输出视频信息
LOGI(“视频的文件格式:%s”, pFormatCtx->iformat->name);
LOGI(“视频时长:%lld”, (pFormatCtx->duration) / (1000 * 1000));
LOGI(“视频的宽高:%d,%d”, pCodecCtx->width, pCodecCtx->height);
LOGI(“解码器的名称:%s”, pCodec->name);
//准备读取
//AVPacket用于存储一帧一帧的压缩数据(H264)
//缓冲区,开辟空间
AVPacket *packet = (AVPacket *) av_malloc(sizeof(AVPacket));
//AVFrame用于存储解码后的像素数据(YUV)
//内存分配
AVFrame *pFrame = av_frame_alloc();
//YUV420
AVFrame *pFrameYUV = av_frame_alloc();
//只有指定了AVFrame的像素格式、画面大小才能真正分配内存
//缓冲区分配内存
uint8_t *out_buffer = (uint8_t *) av_malloc(
avpicture_get_size(AV_PIX_FMT_YUV420P, pCodecCtx->width, pCodecCtx->height));
//初始化缓冲区
avpicture_fill((AVPicture *) pFrameYUV, out_buffer, AV_PIX_FMT_YUV420P, pCodecCtx->width,
pCodecCtx->height);
//用于转码(缩放)的参数,转之前的宽高,转之后的宽高,格式等
struct SwsContext *sws_ctx = sws_getContext(pCodecCtx->width, pCodecCtx->height,
pCodecCtx->pix_fmt,
pCodecCtx->width, pCodecCtx->height,
AV_PIX_FMT_YUV420P,
SWS_BICUBIC, NULL, NULL, NULL);
int got_picture, ret;
//输出文件
FILE *fp_yuv = fopen(output, “wb+”);
int frame_count = 0;
//一帧一帧的读取压缩数据
while (av_read_frame(pFormatCtx, packet) >= 0) {
//只要视频压缩数据(根据流的索引位置判断)
if (packet->stream_index == v_stream_idx) {
//解码一帧视频压缩数据,得到视频像素数据
ret = avcodec_decode_video2(pCodecCtx, pFrame, &got_picture, packet);
if (ret < 0) {
LOGE(“%s”, “解码错误”);
return;
}
//为 0 说明解码完成,非0正在解码
if (got_picture) {
//AVFrame转为像素格式YUV420,宽高
//2 6输入、输出数据
//3 7输入、输出画面一行的数据的大小 AVFrame 转换是一行一行转换的
//4 输入数据第一列要转码的位置 从0开始
//5 输入画面的高度
sws_scale(sws_ctx, pFrame->data, pFrame->linesize, 0, pCodecCtx->height,
pFrameYUV->data, pFrameYUV->linesize);
//输出到YUV文件
//AVFrame像素帧写入文件
//data解码后的图像像素数据(音频采样数据)
//Y 亮度 UV 色度(压缩了) 人对亮度更加敏感
//U V 个数是Y的1/4
int y_size = pCodecCtx->width * pCodecCtx->height;
fwrite(pFrameYUV->data[0], 1, y_size, fp_yuv);
fwrite(pFrameYUV->data[1], 1, y_size / 4, fp_yuv);
fwrite(pFrameYUV->data[2], 1, y_size / 4, fp_yuv);
frame_count++;
LOGI(“解码第%d帧”, frame_count);
}
}
//释放资源
av_free_packet(packet);
}
fclose(fp_yuv);
av_frame_free(&pFrame);
avcodec_close(pCodecCtx);
avformat_free_context(pFormatCtx);
(*env)->ReleaseStringUTFChars(env, input_, input);
(*env)->ReleaseStringUTFChars(env, output_, output);
//通知 Java 层解码完毕
(*env)->CallStaticVoidMethod(env, type, mid);
}
//使用这两个 Window 相关的头文件需要在 CMake 脚本中引入 android 库
#include <android/native_window_jni.h>
#include <android/native_window.h>
#include “include/yuv/libyuv.h”
JNIEXPORT void JNICALL
Java_com_haohao_ffmpeg_AVUtils_videoRender(JNIEnv *env, jclass type, jstring input_,
jobject surface) {
//需要转码的视频文件(输入的视频文件)
const char *input = (*env)->GetStringUTFChars(env, input_, 0);
//注册所有组件
av_register_all();
//avcodec_register_all();
//封装格式上下文,统领全局的结构体,保存了视频文件封装格式的相关信息
AVFormatContext *pFormatCtx = avformat_alloc_context();
//打开输入视频文件
if (avformat_open_input(&pFormatCtx, input, NULL, NULL) != 0) {
LOGE(“%s”, “无法打开输入视频文件”);
return;
}
//获取视频文件信息,例如得到视频的宽高
//第二个参数是一个字典,表示你需要获取什么信息,比如视频的元数据
if (avformat_find_stream_info(pFormatCtx, NULL) < 0) {
LOGE(“%s”, “无法获取视频文件信息”);
return;
}
//获取视频流的索引位置
//遍历所有类型的流(音频流、视频流、字幕流),找到视频流
int v_stream_idx = -1;
int i = 0;
//number of streams
for (; i < pFormatCtx->nb_streams; i++) {
//流的类型
if (pFormatCtx->streams[i]->codec->codec_type == AVMEDIA_TYPE_VIDEO) {
v_stream_idx = i;
break;
}
}
if (v_stream_idx == -1) {
LOGE(“%s”, “找不到视频流\n”);
return;
}
//获取视频流中的编解码上下文
AVCodecContext *pCodecCtx = pFormatCtx->streams[v_stream_idx]->codec;
//根据编解码上下文中的编码 id 查找对应的解码器
AVCodec *pCodec = avcodec_find_decoder(pCodecCtx->codec_id);
if (pCodec == NULL) {
LOGE(“%s”, “找不到解码器,或者视频已加密\n”);
return;
}
//打开解码器,解码器有问题(比如说我们编译FFmpeg的时候没有编译对应类型的解码器)
if (avcodec_open2(pCodecCtx, pCodec, NULL) < 0) {
LOGE(“%s”, “解码器无法打开\n”);
return;
}
//准备读取
//AVPacket用于存储一帧一帧的压缩数据(H264)
//缓冲区,开辟空间
AVPacket *packet = (AVPacket *) av_malloc(sizeof(AVPacket));
//AVFrame用于存储解码后的像素数据(YUV)
//内存分配
AVFrame *yuv_frame = av_frame_alloc();
AVFrame *rgb_frame = av_frame_alloc();
int got_picture, ret;
int frame_count = 0;
//窗体
ANativeWindow *pWindow = ANativeWindow_fromSurface(env, surface);
//绘制时的缓冲区
ANativeWindow_Buffer out_buffer;
//一帧一帧的读取压缩数据
while (av_read_frame(pFormatCtx, packet) >= 0) {
//只要视频压缩数据(根据流的索引位置判断)
if (packet->stream_index == v_stream_idx) {
//7.解码一帧视频压缩数据,得到视频像素数据
ret = avcodec_decode_video2(pCodecCtx, yuv_frame, &got_picture, packet);
if (ret < 0) {
LOGE(“%s”, “解码错误”);
return;
}
//为0说明解码完成,非0正在解码
if (got_picture) {
//lock window
//设置缓冲区的属性:宽高、像素格式(需要与Java层的格式一致)
ANativeWindow_setBuffersGeometry(pWindow, pCodecCtx->width, pCodecCtx->height,
WINDOW_FORMAT_RGBA_8888);
ANativeWindow_lock(pWindow, &out_buffer, NULL);
//初始化缓冲区
//设置属性,像素格式、宽高
//rgb_frame的缓冲区就是Window的缓冲区,同一个,解锁的时候就会进行绘制
avpicture_fill((AVPicture *) rgb_frame, out_buffer.bits, AV_PIX_FMT_RGBA,
pCodecCtx->width,
pCodecCtx->height);
//YUV格式的数据转换成RGBA 8888格式的数据, FFmpeg 也可以转换,但是存在问题,使用libyuv这个库实现
I420ToARGB(yuv_frame->data[0], yuv_frame->linesize[0],
yuv_frame->data[2], yuv_frame->linesize[2],
yuv_frame->data[1], yuv_frame->linesize[1],
rgb_frame->data[0], rgb_frame->linesize[0],
pCodecCtx->width, pCodecCtx->height);
//3、unlock window
ANativeWindow_unlockAndPost(pWindow);
frame_count++;
LOGI(“解码绘制第%d帧”, frame_count);
}
}
//释放资源
av_free_packet(packet);
}
av_frame_free(&yuv_frame);
avcodec_close(pCodecCtx);
avformat_free_context(pFormatCtx);
(*env)->ReleaseStringUTFChars(env, input_, input);
}
#include “libswresample/swresample.h”
#define MAX_AUDIO_FRME_SIZE 48000 * 4
//音频解码(重采样)
JNIEXPORT void JNICALL
Java_com_haohao_ffmpeg_AVUtils_audioDecode(JNIEnv *env, jclass type, jstring input_,
jstring output_) {
//访问静态方法
jmethodID mid = (*env)->GetStaticMethodID(env, type, “onNativeCallback”, “()V”);
const char *input = (*env)->GetStringUTFChars(env, input_, 0);
const char *output = (*env)->GetStringUTFChars(env, output_, 0);
//注册组件
av_register_all();
AVFormatContext *pFormatCtx = avformat_alloc_context();
//打开音频文件
if (avformat_open_input(&pFormatCtx, input, NULL, NULL) != 0) {
LOGI(“%s”, “无法打开音频文件”);
return;
}
//获取输入文件信息
if (avformat_find_stream_info(pFormatCtx, NULL) < 0) {
LOGI(“%s”, “无法获取输入文件信息”);
return;
}
//获取音频流索引位置
int i = 0, audio_stream_idx = -1;
for (; i < pFormatCtx->nb_streams; i++) {
if (pFormatCtx->streams[i]->codec->codec_type == AVMEDIA_TYPE_AUDIO) {
audio_stream_idx = i;
break;
}
}
//获取解码器
AVCodecContext *codecCtx = pFormatCtx->streams[audio_stream_idx]->codec;
AVCodec *codec = avcodec_find_decoder(codecCtx->codec_id);
if (codec == NULL) {
LOGI(“%s”, “无法获取解码器”);
return;
}
//打开解码器
if (avcodec_open2(codecCtx, codec, NULL) < 0) {
LOGI(“%s”, “无法打开解码器”);
return;
}
//压缩数据
AVPacket *packet = (AVPacket *) av_malloc(sizeof(AVPacket));
//解压缩数据
AVFrame *frame = av_frame_alloc();
//frame->16bit 44100 PCM 统一音频采样格式与采样率
SwrContext *swrCtx = swr_alloc();
//重采样设置参数
//输入的采样格式
enum AVSampleFormat in_sample_fmt = codecCtx->sample_fmt;
//输出采样格式16bit PCM
enum AVSampleFormat out_sample_fmt = AV_SAMPLE_FMT_S16;
//输入采样率
int in_sample_rate = codecCtx->sample_rate;
//输出采样率
int out_sample_rate = 44100;
//获取输入的声道布局
//根据声道个数获取默认的声道布局(2个声道,默认立体声stereo)
//av_get_default_channel_layout(codecCtx->channels);
uint64_t in_ch_layout = codecCtx->channel_layout;
//输出的声道布局(立体声)
uint64_t out_ch_layout = AV_CH_LAYOUT_STEREO;
swr_alloc_set_opts(swrCtx,
out_ch_layout, out_sample_fmt, out_sample_rate,
in_ch_layout, in_sample_fmt, in_sample_rate,
0, NULL);
swr_init(swrCtx);
//输出的声道个数
int out_channel_nb = av_get_channel_layout_nb_channels(out_ch_layout);
//重采样设置参数
//位宽16bit 采样率 44100HZ 的 PCM 数据
uint8_t *out_buffer = (uint8_t *) av_malloc(MAX_AUDIO_FRME_SIZE);
FILE *fp_pcm = fopen(output, “wb”);
int got_frame = 0, index = 0, ret;
//不断读取压缩数据
while (av_read_frame(pFormatCtx, packet) >= 0) {
//解码
ret = avcodec_decode_audio4(codecCtx, frame, &got_frame, packet);
if (ret < 0) {
LOGI(“%s”, “解码完成”);
}
//解码一帧成功
if (got_frame > 0) {
LOGI(“解码:%d”, index++);
swr_convert(swrCtx, &out_buffer, MAX_AUDIO_FRME_SIZE, frame->data, frame->nb_samples);
//获取sample的size
int out_buffer_size = av_samples_get_buffer_size(NULL, out_channel_nb,
frame->nb_samples, out_sample_fmt, 1);
fwrite(out_buffer, 1, out_buffer_size, fp_pcm);
}
av_free_packet(packet);
}
fclose(fp_pcm);
av_frame_free(&frame);
av_free(out_buffer);
swr_free(&swrCtx);
avcodec_close(codecCtx);
avformat_close_input(&pFormatCtx);
(*env)->ReleaseStringUTFChars(env, input_, input);
(*env)->ReleaseStringUTFChars(env, output_, output);
//通知 Java 层解码完成
(*env)->CallStaticVoidMethod(env, type, mid);
}
JNIEXPORT void JNICALL
Java_com_haohao_ffmpeg_AVUtils_audioPlay(JNIEnv *env, jclass type, jstring input_) {
const char *input = (*env)->GetStringUTFChars(env, input_, 0);
LOGI(“%s”, “sound”);
//注册组件
av_register_all();
AVFormatContext *pFormatCtx = avformat_alloc_context();
//打开音频文件
if (avformat_open_input(&pFormatCtx, input, NULL, NULL) != 0) {
LOGI(“%s”, “无法打开音频文件”);
return;
}
//获取输入文件信息
if (avformat_find_stream_info(pFormatCtx, NULL) < 0) {
LOGI(“%s”, “无法获取输入文件信息”);
return;
}
//获取音频流索引位置
int i = 0, audio_stream_idx = -1;
for (; i < pFormatCtx->nb_streams; i++) {
if (pFormatCtx->streams[i]->codec->codec_type == AVMEDIA_TYPE_AUDIO) {
audio_stream_idx = i;
break;
}
}
//获取解码器
AVCodecContext *codecCtx = pFormatCtx->streams[audio_stream_idx]->codec;
AVCodec *codec = avcodec_find_decoder(codecCtx->codec_id);
if (codec == NULL) {
LOGI(“%s”, “无法获取解码器”);
return;
}
//打开解码器
if (avcodec_open2(codecCtx, codec, NULL) < 0) {
LOGI(“%s”, “无法打开解码器”);
return;
}
//压缩数据
AVPacket *packet = (AVPacket *) av_malloc(sizeof(AVPacket));
//解压缩数据
AVFrame *frame = av_frame_alloc();
//frame->16bit 44100 PCM 统一音频采样格式与采样率
SwrContext *swrCtx = swr_alloc();
//输入的采样格式
enum AVSampleFormat in_sample_fmt = codecCtx->sample_fmt;
//输出采样格式16bit PCM
enum AVSampleFormat out_sample_fmt = AV_SAMPLE_FMT_S16;
//输入采样率
int in_sample_rate = codecCtx->sample_rate;
//输出采样率
int out_sample_rate = in_sample_rate;
//获取输入的声道布局
//根据声道个数获取默认的声道布局(2个声道,默认立体声stereo)
//av_get_default_channel_layout(codecCtx->channels);
uint64_t in_ch_layout = codecCtx->channel_layout;
//输出的声道布局(立体声)
uint64_t out_ch_layout = AV_CH_LAYOUT_STEREO;
swr_alloc_set_opts(swrCtx,
out_ch_layout, out_sample_fmt, out_sample_rate,
in_ch_layout, in_sample_fmt, in_sample_rate,
0, NULL);
swr_init(swrCtx);
//输出的声道个数
int out_channel_nb = av_get_channel_layout_nb_channels(out_ch_layout);
//AudioTrack对象
jmethodID create_audio_track_mid = (*env)->GetStaticMethodID(env, type, “createAudioTrack”,
“(II)Landroid/media/AudioTrack;”);
jobject audio_track = (*env)->CallStaticObjectMethod(env, type, create_audio_track_mid,
out_sample_rate, out_channel_nb);
//调用AudioTrack.play方法
jclass audio_track_class = (*env)->GetObjectClass(env, audio_track);
jmethodID audio_track_play_mid = (*env)->GetMethodID(env, audio_track_class, “play”, “()V”);
jmethodID audio_track_stop_mid = (*env)->GetMethodID(env, audio_track_class, “stop”, “()V”);
(*env)->CallVoidMethod(env, audio_track, audio_track_play_mid);
//AudioTrack.write
jmethodID audio_track_write_mid = (*env)->GetMethodID(env, audio_track_class, “write”,
“([BII)I”);
//16bit 44100 PCM 数据
uint8_t *out_buffer = (uint8_t *) av_malloc(MAX_AUDIO_FRME_SIZE);
int got_frame = 0, index = 0, ret;
//不断读取压缩数据
while (av_read_frame(pFormatCtx, packet) >= 0) {
//解码音频类型的Packet
if (packet->stream_index == audio_stream_idx) {
//解码
ret = avcodec_decode_audio4(codecCtx, frame, &got_frame, packet);
if (ret < 0) {
LOGI(“%s”, “解码完成”);
}
//解码一帧成功
if (got_frame > 0) {
LOGI(“解码:%d”, index++);
swr_convert(swrCtx, &out_buffer, MAX_AUDIO_FRME_SIZE,
(const uint8_t **) frame->data, frame->nb_samples);
//获取sample的size
int out_buffer_size = av_samples_get_buffer_size(NULL, out_channel_nb,
frame->nb_samples, out_sample_fmt,
1);
//out_buffer缓冲区数据,转成byte数组
自我介绍一下,小编13年上海交大毕业,曾经在小公司待过,也去过华为、OPPO等大厂,18年进入阿里一直到现在。
深知大多数初中级Android工程师,想要提升技能,往往是自己摸索成长或者是报班学习,但对于培训机构动则近万的学费,着实压力不小。自己不成体系的自学效果低效又漫长,而且极易碰到天花板技术停滞不前!
因此收集整理了一份《2024年Android移动开发全套学习资料》,初衷也很简单,就是希望能够帮助到想自学提升又不知道该从何学起的朋友,同时减轻大家的负担。
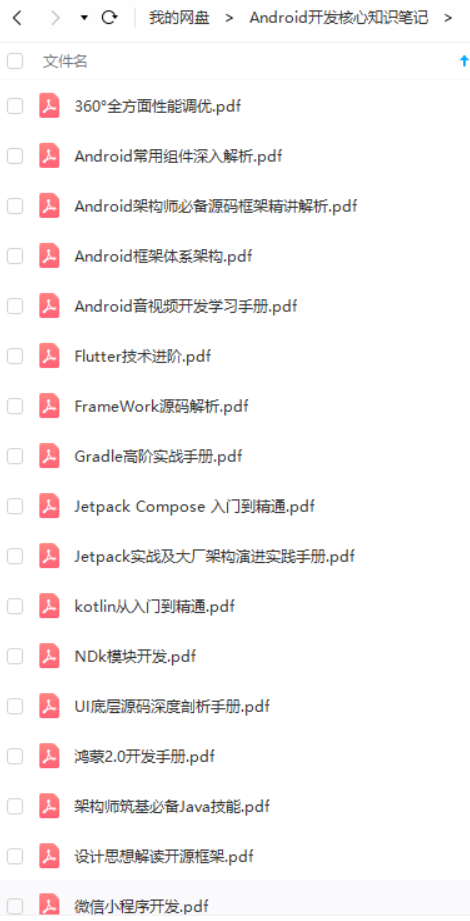

既有适合小白学习的零基础资料,也有适合3年以上经验的小伙伴深入学习提升的进阶课程,基本涵盖了95%以上Android开发知识点,真正体系化!
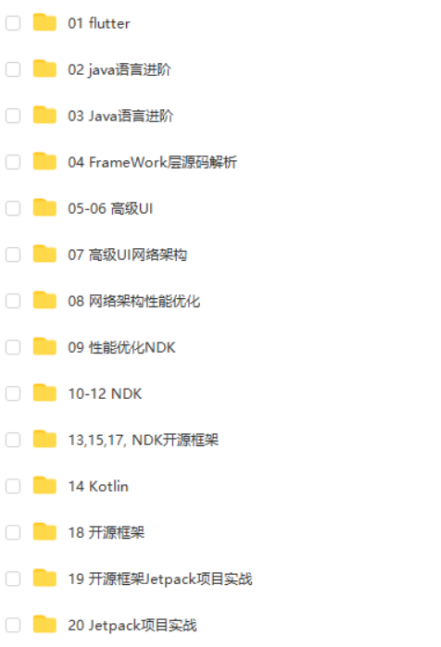
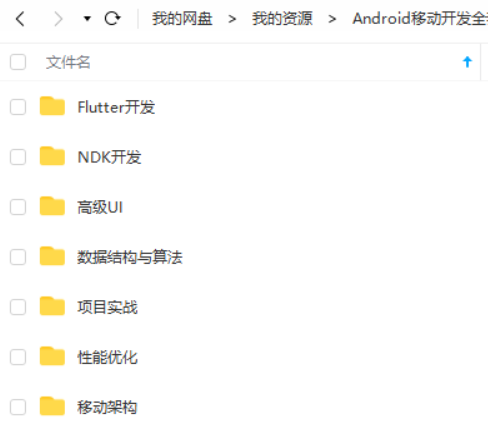
由于文件比较大,这里只是将部分目录截图出来,每个节点里面都包含大厂面经、学习笔记、源码讲义、实战项目、讲解视频,并且会持续更新!
如果你觉得这些内容对你有帮助,可以扫码获取!!(备注:Android)

要如何成为Android架构师?
搭建自己的知识框架,全面提升自己的技术体系,并且往底层源码方向深入钻研。
大多数技术人喜欢用思维脑图来构建自己的知识体系,一目了然。这里给大家分享一份大厂主流的Android架构师技术体系,可以用来搭建自己的知识框架,或者查漏补缺;

对应这份技术大纲,我也整理了一套Android高级架构师完整系列的视频教程,主要针对3-5年Android开发经验以上,需要往高级架构师层次学习提升的同学,希望能帮你突破瓶颈,跳槽进大厂;
最后我必须强调几点:
1.搭建知识框架可不是说你整理好要学习的知识顺序,然后看一遍理解了能复制粘贴就够了,大多都是需要你自己读懂源码和原理,能自己手写出来的。
2.学习的时候你一定要多看多练几遍,把知识才吃透,还要记笔记,这些很重要! 最后你达到什么水平取决你消化了多少知识
3.最终你的知识框架应该是一个完善的,兼顾广度和深度的技术体系。然后经过多次项目实战积累经验,你才能达到高级架构师的层次。
你只需要按照在这个大的框架去填充自己,年薪40W一定不是终点,技术无止境
《互联网大厂面试真题解析、进阶开发核心学习笔记、全套讲解视频、实战项目源码讲义》点击传送门即可获取!
) {
LOGI(“解码:%d”, index++);
swr_convert(swrCtx, &out_buffer, MAX_AUDIO_FRME_SIZE,
(const uint8_t **) frame->data, frame->nb_samples);
//获取sample的size
int out_buffer_size = av_samples_get_buffer_size(NULL, out_channel_nb,
frame->nb_samples, out_sample_fmt,
1);
//out_buffer缓冲区数据,转成byte数组
自我介绍一下,小编13年上海交大毕业,曾经在小公司待过,也去过华为、OPPO等大厂,18年进入阿里一直到现在。
深知大多数初中级Android工程师,想要提升技能,往往是自己摸索成长或者是报班学习,但对于培训机构动则近万的学费,着实压力不小。自己不成体系的自学效果低效又漫长,而且极易碰到天花板技术停滞不前!
因此收集整理了一份《2024年Android移动开发全套学习资料》,初衷也很简单,就是希望能够帮助到想自学提升又不知道该从何学起的朋友,同时减轻大家的负担。
[外链图片转存中…(img-6skjJsAS-1713306042948)]
[外链图片转存中…(img-DeAvFTw1-1713306042950)]
[外链图片转存中…(img-VBdNa0nj-1713306042951)]
[外链图片转存中…(img-nPzKWa6o-1713306042952)]
[外链图片转存中…(img-7uLQRxPT-1713306042953)]
既有适合小白学习的零基础资料,也有适合3年以上经验的小伙伴深入学习提升的进阶课程,基本涵盖了95%以上Android开发知识点,真正体系化!
由于文件比较大,这里只是将部分目录截图出来,每个节点里面都包含大厂面经、学习笔记、源码讲义、实战项目、讲解视频,并且会持续更新!
如果你觉得这些内容对你有帮助,可以扫码获取!!(备注:Android)
要如何成为Android架构师?
搭建自己的知识框架,全面提升自己的技术体系,并且往底层源码方向深入钻研。
大多数技术人喜欢用思维脑图来构建自己的知识体系,一目了然。这里给大家分享一份大厂主流的Android架构师技术体系,可以用来搭建自己的知识框架,或者查漏补缺;
[外链图片转存中…(img-Z6F6tUNi-1713306042955)]
对应这份技术大纲,我也整理了一套Android高级架构师完整系列的视频教程,主要针对3-5年Android开发经验以上,需要往高级架构师层次学习提升的同学,希望能帮你突破瓶颈,跳槽进大厂;
最后我必须强调几点:
1.搭建知识框架可不是说你整理好要学习的知识顺序,然后看一遍理解了能复制粘贴就够了,大多都是需要你自己读懂源码和原理,能自己手写出来的。
2.学习的时候你一定要多看多练几遍,把知识才吃透,还要记笔记,这些很重要! 最后你达到什么水平取决你消化了多少知识
3.最终你的知识框架应该是一个完善的,兼顾广度和深度的技术体系。然后经过多次项目实战积累经验,你才能达到高级架构师的层次。
你只需要按照在这个大的框架去填充自己,年薪40W一定不是终点,技术无止境
《互联网大厂面试真题解析、进阶开发核心学习笔记、全套讲解视频、实战项目源码讲义》点击传送门即可获取!
智能推荐
线性空间(也叫向量空间)、线性运算_线性空间定义-程序员宅基地
文章浏览阅读793次,点赞7次,收藏9次。线性空间(也叫向量空间)、线性运算_线性空间定义
pychram中更换pip源_pycharm更换pip源-程序员宅基地
文章浏览阅读1.1k次。2、pip config set global.index-url http://mirrors.aliyun.com/pypi/simple/ #修改配置文件。原本的pip源一般为国外源,在下载第三方库的速度很慢,更改pip源可以快速提高下载速度。清华大学:https://pypi.tuna.tsinghua.edu.cn/simple。阿里云:http://mirrors.aliyun.com/pypi/simple。豆瓣:http://pypi.douban.com/simple。_pycharm更换pip源
vue项目中(vue-cli3)代理配置不成功 及 axios的 baseUrl 设置无效问题_axios加上baseurl反向代理就不生效-程序员宅基地
文章浏览阅读1.3w次,点赞9次,收藏35次。最近开发项目时配置代理过程中遇到一个非常低级的错误,导致配置完代理后,项目运行请求接口一直是404;并同时因为这个低级错误,自己对前端vue项目的代理配置又混乱,直至发现问题后才对代理配置清晰明了起来。本文简单记录问题解决方式及自己对vue项目中的代理配置一点小理解,避免日后再次踩坑。vue项目中涉及的文件简单描述:1、该项目的后台的服务地址为:http://10.10.10.10/aa2、现在请求一个后台的验证码接口为: /code/img3、vue项目中环境配置(.env.developme._axios加上baseurl反向代理就不生效
mybatis报错:org.mybatis.spring.MyBatisSystemException: nested exception is org.apache.ibatis.exception-程序员宅基地
文章浏览阅读1.1w次。今日Mybatis执行一个 select 命令时出现错误,mybatis报错:targetException:org.mybatis.spring.MyBatisSystemException: nested exception is org.apache.ibatis.exceptions.PersistenceException:### Error querying databas..._mybatissystemexception: nested exception is org.apache.ibatis.exceptions.per
python程序员入职第一天_看不懂代码,不会用框架,新手程序员入职后如何快速上手项目?...-程序员宅基地
文章浏览阅读949次,点赞2次,收藏3次。大家好,我是良许。对于职场新人,特别是应届毕业生,他们拿到offer之后,进入公司后会有一段时间的焦虑感。比如说,不懂公司项目开发流程,代码看不懂,业务流程也不知道,框架不会用,等等还有各种各样的问题。所以很多人一开始都会在担心自己能不能胜任这个职位,会不会连试用期都过不了。其实这个心态是很常见的,每个程序员应该都会经历这么一个过程。就拿我自己来说吧,由于我是自学转行的,我的技术本身就比那些科班出..._进入公司不会写python怎么办
关于ffmpeg中rtmp无法设置超时时间的bug修复_ffmpeg rtmp 超时设置-程序员宅基地
文章浏览阅读1.1k次。AVDictionary* options = nullptr; av_dict_set(&options, "timeout", "3000000", 0); //设置超时断开连接时间 if (avformat_open_input(&pFormatCtx, url, NULL, &options) != 0) { printf("Couldn't open input stream.(无法打开输入流)\n"); ret..._ffmpeg rtmp 超时设置
随便推点
使用Sonatype Nexus Repository Manager上传jar包_sonatype sonatype nexus repository manager 上传jar-程序员宅基地
文章浏览阅读2.1w次,点赞4次,收藏7次。使用Sonatype Nexus Repository ManagerOSS 3.14.0-04 上传jar包1、登录后台2、单击Browse server contents图标,打开预览页面,如下图所示:3、单击Browse菜单,选择组件库,打开上传组件页面,如下图所示:4、单击Upload按钮,打开上传页面,上传jar包,并填写相关信息,如下图所示:5、单击Up..._sonatype sonatype nexus repository manager 上传jar
6位数密码C++破解程序,并附上时间_6位数字密码攻破-程序员宅基地
文章浏览阅读1.2w次,点赞5次,收藏14次。今天在看hash函数对于数字或字符进行加密的知识,有感而发就写了一个C++破解6位数数字密码的程序,程序很简单,也很容易理解,并给也给出了对于不同密码所需要破解的时间。好了,废话不多少,直接贴程序:#include #includeusing namespace std;int main(){ int a,b,c,d,e,f,i=0; int password[6]; cout<_6位数字密码攻破
图解TensorFlow op:tf.nn.space_to_depth_space-to-depth-程序员宅基地
文章浏览阅读4.9k次,点赞15次,收藏22次。田海立@CSDN 2020-10-20TensorFlow算子space_to_depth是depth_to_space的逆操作。本文用图文的方式来解释该算子运算的方式。一、space_to_depth原型space_to_depth是把space数据(width和height维)移到depth(Channel)维上,与depth_to_space刚好是反向的操作。对应到ML该操作是把width和height维上各取block_size都分给depth上。所以,对应有一个参数block_s._space-to-depth
找不到 cl.exe 解决办法-程序员宅基地
文章浏览阅读1.7w次,点赞32次,收藏64次。._cl.exe
(Linux)kill命令常用技巧_kill -g-程序员宅基地
文章浏览阅读4.6w次,点赞14次,收藏98次。前言在Linux的系统中,kill是我们最常见的命令之一。 kill,英语中为杀死的意思,顾名思义,就是用来杀死一些东西的命令,常用来杀死系统中的进程。就像是Windows系统中的关闭软件的按钮,不过kill最直接,从后台直接停止。下面就介绍一下,kill是如何杀死进程的。kill命令的参数在Linux系统中命令都是有参数的,这给了我们很多的选择,但是kill的重..._kill -g
用inkscape临摹logo_inkscape 画平行四边形-程序员宅基地
文章浏览阅读470次。《用inlscape临摹太极图logo》_inkscape 画平行四边形